How to Make a Movie Poster in Photoshop

Final product imageFinal product imageFinal product image
What You’ll Be Creating

Today I’ll show you how to make a movie poster in Adobe Photoshop, paired with Placeit’s poster maker and photos from Envato Elements!

We will focus on creating a gritty post-apocalyptic color grade using adjustment layers, and you’ll also learn how to apply quick and easy typography with Placeit. Let’s get started! 

Follow along with us over on our Envato Tuts+ YouTube channel:

What You’ll Learn in This Photoshop Tutorial

  • How to create a red and black silhouetted character
  • How to plan out and place an effective composition
  • How to create a gritty post-apocalyptic photo effect
  • How to composite multiple subjects together
  • How to draw highlights and blend characters quickly
  • How to add typography using Placeit’s poster maker

What You’ll Need

You’ll need the following resources to complete this project:

1. How to Create a Red and Black Silhouetted Character

To start everything off, we will be creating our base and the main focus of our poster. In a real movie poster, this is where the hero would be located!

Step 1

Create a 4349 x 5907 px canvas with a Resolution of 300

Step 2

Create a Color Fill Layer and fill it with black. 

Using the Gradient or Brush Tool, create a red #ef0000 to transparent gradient coming from the bottom of the canvas. 

gradientgradientgradient

Step 3

Using a massive, soft, round Brush Tool, paint a black shadow gradient coming in from the left and right sides of the canvas. 

gradientgradientgradient

Step 4

Use the Rectangle Tool to create a long red #ff0000 vertical rectangle going from the top of the canvas to the bottom. 

stripestripestripe

Step 5

Drop in the Post-apocalypse female character and clip her into the red rectangle.  

Set the female image to Multiply.

Group all of your background layers into a group named “Base.”

subjectsubjectsubject

2. How to Plan Out and Place an Effective Composition

Next, we want to place our secondary characters—in this case, our hero’s enemies.

Step 1

Take Nuclear survivor 1 and Nuclear survivor 2  and place them side by side, but facing away from each other. This will help frame the main female character.

place other subjectsplace other subjectsplace other subjects

Step 2

Next, place Nuclear survivor 3 between the previous survivors. 

To help place him and get his positioning just right, loosely extract him from his background using the Lasso Tool—just enough so that you can see behind the character. 

place other subjectplace other subjectplace other subject

Step 3

Finally, drag and drop Nuclear survivor 4 onto your canvas, setting the layer to Lighten.

He will represent our main bad guy, so let’s not only make him bigger but also place him looming over all the other characters.

Placing all your characters before extracting them is helpful when you have multiple poses or people to choose from. It will keep you from wasting time removing the background of people or objects you end up not using. 

place final subjectplace final subjectplace final subject

3.  How to Create a Gritty Post-Apocalyptic Photo Effect

Before we go any further, we are going to add a gritty color grade. Most of the time I save this step for last, but given the intensity of this effect in particular, it’s best to do it earlier on so you have a better vision of the outcome.

These are layered from bottom to top and should be placed above all future layers from here on out. 

Step 1

Create a Color Lookup adjustment layer. 

Color Lookup Settings

  • 3DLUT: Bleach Bypass 
  • Opacity: 50%
color lookup resultcolor lookup resultcolor lookup result

Step 2

Create a Color Lookup adjustment layer. 

Color Lookup Settings

  • 3DLUT: Foggy Night
  • Opacity: 20%
color lookup resultcolor lookup resultcolor lookup result

Step 3

Create a Color Lookup adjustment layer. 

Color Lookup Settings

  • 3DLUT: Crisp Warm
  • Opacity: 40%
color lookup resultcolor lookup resultcolor lookup result

Step 4

Create a Color Lookup adjustment layer. 

Color Lookup Settings

  • 3DLUT: Edgey Amber
  • Opacity: 50%
color lookup resultcolor lookup resultcolor lookup result

Step 5

Create a Color Lookup adjustment layer. 

Color Lookup Settings

  • 3DLUT: Horror Blue
  • Opacity: 100%
  • Layer Mode: Darker Color
color lookup resultcolor lookup resultcolor lookup result

Step 6

Create a Selective Color adjustment layer. 

Selective Color Settings

Reds

  • Yellow: +100%

Blues

  • Cyan: +100%
  • Magenta: +3%
  • Yellow: -96%
selective color resultselective color resultselective color result

Step 7

Create a Color Lookup adjustment layer. 

Color Lookup Settings

  • 3DLUT: Teal Orange Plus Contrast 
  • Opacity: 62%
  • Layer Mode: Color

Group all of your adjustment layers together, naming the group “Color Grade.”

color lookup resultcolor lookup resultcolor lookup result

4. How to Composite Multiple Subjects Together  

Now that we have our colors fleshed out and our characters placed, we can finally composite them all together.

Step 1

Extract the left and right characters using your preferred method; mine is the Pen Tool. Check out my How to Create a Honey Bee Themed Photo Manipulation to see how I extract subjects!

Now is the time to get their exact positioning just right. 

exstract subjectsexstract subjectsexstract subjects

Step 2

Extract and place your third subject located in the front. I also went ahead and enlarged him slightly to give the characters more of a hierarchy. 

adjust subjectsadjust subjectsadjust subjects

Step 3

Extract the fourth, largest character using the Magic Wand Tool. We want this character to have mostly highlights and be roughly extracted with a lot of jagged and torn edges. 

Make sure the layer is still set to Lighten and place it behind all other characters. 

Group all of your characters into a group named “Subjects.”

final layersfinal layersfinal layers

5. How to Draw Highlights and Blend Characters Quickly

Given the darkness of the overall image, it’s important to make sure your characters pop against their background; adding some strong highlights is a great way to do that!

Step 1

Create a New Layer above the “Subjects” group. 

Paint a red, somewhat sloppy outline around your three lower subjects using a small, hard round Brush. 

If you don’t have a graphics tablet, bring up the Smoothing of the brush to 30-50% and use the Smudge Tool to taper out the ends of the lines.

add red highlightadd red highlightadd red highlight

Step 2

Create a New Layer above your red outline. 

Using a large, soft, round Brush, paint a black shadow below your three lower subjects. 

Make sure not to hide any crucial details such as the subject’s weapons, while also making sure the bottom edges of the subjects aren’t showing and it’s a smooth black transition. 

add shadowadd shadowadd shadow

6. How to Add Typography Using Placeit’s Poster Maker

Finally, we will be bringing our poster into Placeit’s poster maker to add our movie’s title and other relevant text!

Step 1

Save your poster design as either a JPG or PNG at a max of 12 MB in size. 

I’d suggest making your width at least 3600 px.

Step 2

See all of the poster templates available by going to Placeit.net  > Designs and searching “Poster”.

I will be using the first option, Horror Film Poster Template.

templatestemplatestemplates

Step 3

Scroll down to see some of the horror genre presets available.

I will be using “Ritual”. Although this is a horror preset and our film is more in the post-apocalyptic action genre, Placeit gives you tons of customization options! 

horror presetshorror presetshorror presets

Step 4

While Placeit has a library of images available to use, we, of course, will be using our own. 

Do this by selecting Custom Image on the right-hand side where the background images are located.

Select your saved poster PNG or JPG image.

Crop your image using Placeit’s simple slider crop feature if needed. 

crop imagecrop imagecrop image

Step 5

Add your own text by replacing the text found on the left-hand side of the screen. 

The changes happen live and in real time!

add textadd textadd text

Step 6

Once all your text is decided, you can start to change the color, font face, and font placement! 

I will be using a pale-yellow color #f4d150 for the title font to make it stand out. 

Use the Color Picker Tool in Photoshop to pick colors right off your poster.

color textcolor textcolor text

Step 7

Next, I will be changing the font to Ultra.

change placement of textchange placement of textchange placement of text

Step 8

Finally, to finish everything up, I am going to arrange our poster text.

To do this in Placeit, drag and place the text wherever you want it. Once again, it’s all live editing! 

It also has guides to help you align everything perfectly! 

We’ve Done It!

The only thing more important than the composition or color story of a movie poster is the text itself. It must be bold, readable, and something that draws the eye to it. As always, keep experimenting with different techniques, and see what you can create.

finalfinalfinal

Find more resources on Envato Elements! Or check out this roundup of the best ready-made movie poster templates:

Explore Awesome Movie Poster Templates From Envato Elements

Looking for the right template for your movie poster project? We’ve selected a few examples from Envato Elements: 

1. Double Exposure Movie Poster (AI, PSD)

Double Exposure Movie PosterDouble Exposure Movie PosterDouble Exposure Movie Poster

Learn how to blend photos for a poster in Photoshop with a template like this one. Finish your movie poster project with an easy-to-customize PSD or AI file with well-organized layers. You’ll get an 8.27 × 11.69 inch file size (with bleed) in print-ready format. 

2. Movie Poster (PSD)

Movie PosterMovie PosterMovie Poster

Learning how to make a poster in Photoshop? Get the right movie poster size with this template. The download features an A3 size file with free fonts in use. All the objects, colors, and text in this movie poster in Photoshop are editable. Customize this file and you’ll have a bunch of full-resolution movie posters ready to print.

3. Film Festival Poster (PSD)

Film Festival PosterFilm Festival PosterFilm Festival Poster

Are you thinking of a yellow movie poster for your film or festival? Check out this movie poster for Photoshop. It’s 100% customizable, and all the shapes are resizable, removable, and editable. 

4. Movie Festival Poster Design (AI, EPS, PSD)

Movie Festival - Flyers DesignMovie Festival - Flyers DesignMovie Festival - Flyers Design

Learn how to make a poster in Photoshop with a good template. This is an awesome choice that could work as an original movie poster in Photoshop. You’ll get a layered PSD file with Smart Objects for you to insert your own photos and text. It’s also print-ready, so you’ll get a bunch of full-resolution movie posters in no time.

5. Red Double Exposure Movie Poster (AI, PSD)

Double Exposure Movie PosterDouble Exposure Movie PosterDouble Exposure Movie Poster

This template will show you how to blend photos for a poster in Photoshop. It’s easy to customize, so you just need to replace elements with your text and images. Get the right movie poster resolution and size (8.27 × 11.69 inch) with this download. 

Discover More Resources

Looking to learn more? Why not check out the following excellent photo manipulation tutorials:


This content originally appeared on Envato Tuts+ Tutorials and was authored by Abbey Esparza

Final product imageFinal product imageFinal product image
What You'll Be Creating

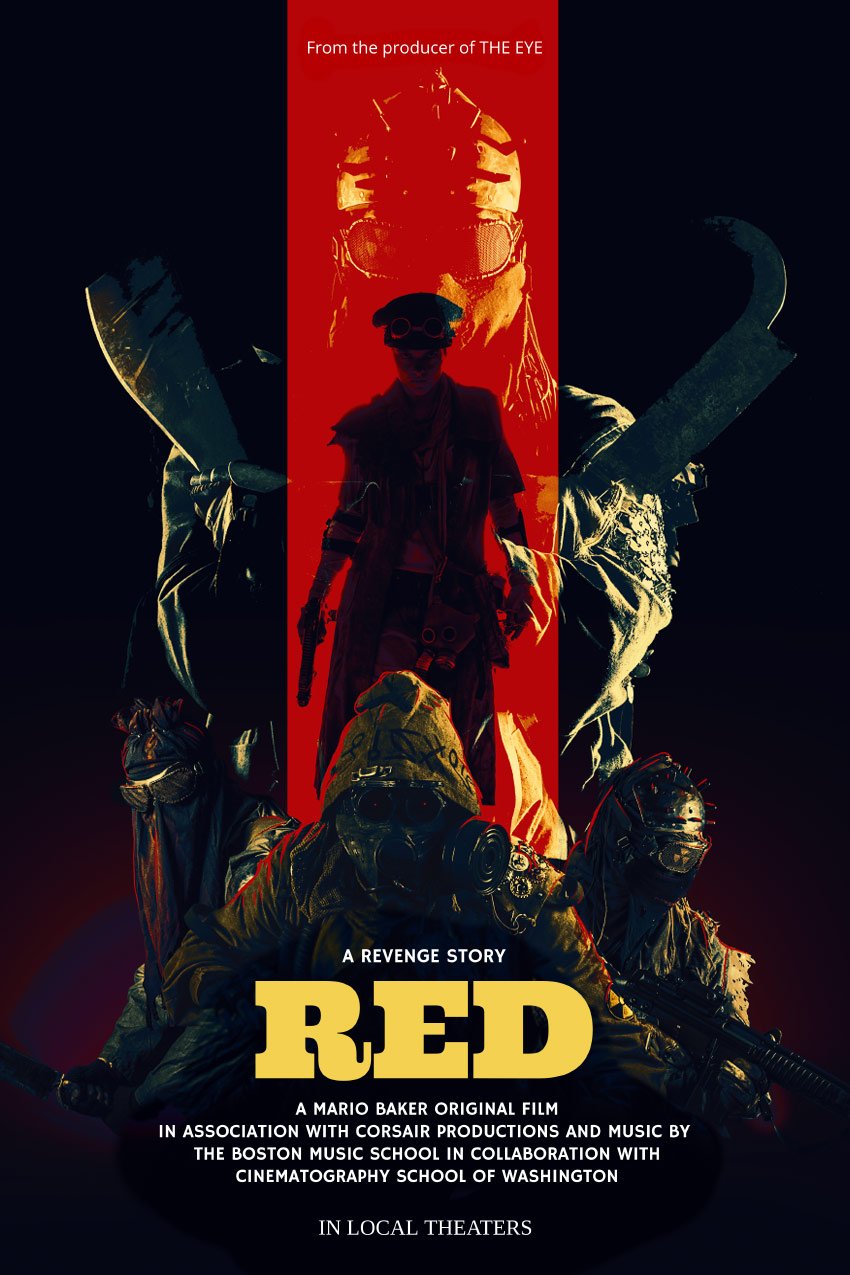
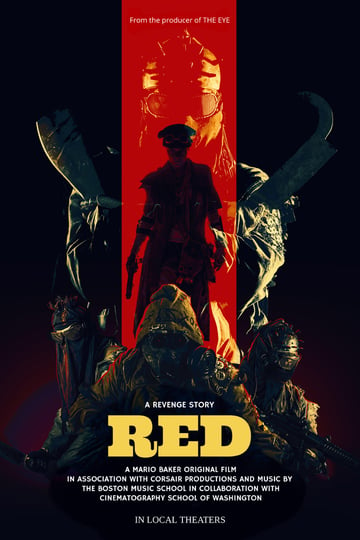
Today I'll show you how to make a movie poster in Adobe Photoshop, paired with Placeit's poster maker and photos from Envato Elements!

We will focus on creating a gritty post-apocalyptic color grade using adjustment layers, and you'll also learn how to apply quick and easy typography with Placeit. Let's get started! 

Follow along with us over on our Envato Tuts+ YouTube channel:

What You'll Learn in This Photoshop Tutorial

  • How to create a red and black silhouetted character
  • How to plan out and place an effective composition
  • How to create a gritty post-apocalyptic photo effect
  • How to composite multiple subjects together
  • How to draw highlights and blend characters quickly
  • How to add typography using Placeit's poster maker

What You'll Need

You'll need the following resources to complete this project:

1. How to Create a Red and Black Silhouetted Character

To start everything off, we will be creating our base and the main focus of our poster. In a real movie poster, this is where the hero would be located!

Step 1

Create a 4349 x 5907 px canvas with a Resolution of 300

Step 2

Create a Color Fill Layer and fill it with black. 

Using the Gradient or Brush Tool, create a red #ef0000 to transparent gradient coming from the bottom of the canvas. 

gradientgradientgradient

Step 3

Using a massive, soft, round Brush Tool, paint a black shadow gradient coming in from the left and right sides of the canvas. 

gradientgradientgradient

Step 4

Use the Rectangle Tool to create a long red #ff0000 vertical rectangle going from the top of the canvas to the bottom. 

stripestripestripe

Step 5

Drop in the Post-apocalypse female character and clip her into the red rectangle.  

Set the female image to Multiply.

Group all of your background layers into a group named "Base."

subjectsubjectsubject

2. How to Plan Out and Place an Effective Composition

Next, we want to place our secondary characters—in this case, our hero's enemies.

Step 1

Take Nuclear survivor 1 and Nuclear survivor 2  and place them side by side, but facing away from each other. This will help frame the main female character.

place other subjectsplace other subjectsplace other subjects

Step 2

Next, place Nuclear survivor 3 between the previous survivors. 

To help place him and get his positioning just right, loosely extract him from his background using the Lasso Tool—just enough so that you can see behind the character. 

place other subjectplace other subjectplace other subject

Step 3

Finally, drag and drop Nuclear survivor 4 onto your canvas, setting the layer to Lighten.

He will represent our main bad guy, so let's not only make him bigger but also place him looming over all the other characters.

Placing all your characters before extracting them is helpful when you have multiple poses or people to choose from. It will keep you from wasting time removing the background of people or objects you end up not using. 

place final subjectplace final subjectplace final subject

3.  How to Create a Gritty Post-Apocalyptic Photo Effect

Before we go any further, we are going to add a gritty color grade. Most of the time I save this step for last, but given the intensity of this effect in particular, it's best to do it earlier on so you have a better vision of the outcome.

These are layered from bottom to top and should be placed above all future layers from here on out. 

Step 1

Create a Color Lookup adjustment layer. 

Color Lookup Settings

  • 3DLUT: Bleach Bypass 
  • Opacity: 50%
color lookup resultcolor lookup resultcolor lookup result

Step 2

Create a Color Lookup adjustment layer. 

Color Lookup Settings

  • 3DLUT: Foggy Night
  • Opacity: 20%
color lookup resultcolor lookup resultcolor lookup result

Step 3

Create a Color Lookup adjustment layer. 

Color Lookup Settings

  • 3DLUT: Crisp Warm
  • Opacity: 40%
color lookup resultcolor lookup resultcolor lookup result

Step 4

Create a Color Lookup adjustment layer. 

Color Lookup Settings

  • 3DLUT: Edgey Amber
  • Opacity: 50%
color lookup resultcolor lookup resultcolor lookup result

Step 5

Create a Color Lookup adjustment layer. 

Color Lookup Settings

  • 3DLUT: Horror Blue
  • Opacity: 100%
  • Layer Mode: Darker Color
color lookup resultcolor lookup resultcolor lookup result

Step 6

Create a Selective Color adjustment layer. 

Selective Color Settings

Reds

  • Yellow: +100%

Blues

  • Cyan: +100%
  • Magenta: +3%
  • Yellow: -96%
selective color resultselective color resultselective color result

Step 7

Create a Color Lookup adjustment layer. 

Color Lookup Settings

  • 3DLUT: Teal Orange Plus Contrast 
  • Opacity: 62%
  • Layer Mode: Color

Group all of your adjustment layers together, naming the group "Color Grade."

color lookup resultcolor lookup resultcolor lookup result

4. How to Composite Multiple Subjects Together  

Now that we have our colors fleshed out and our characters placed, we can finally composite them all together.

Step 1

Extract the left and right characters using your preferred method; mine is the Pen Tool. Check out my How to Create a Honey Bee Themed Photo Manipulation to see how I extract subjects!

Now is the time to get their exact positioning just right. 

exstract subjectsexstract subjectsexstract subjects

Step 2

Extract and place your third subject located in the front. I also went ahead and enlarged him slightly to give the characters more of a hierarchy. 

adjust subjectsadjust subjectsadjust subjects

Step 3

Extract the fourth, largest character using the Magic Wand Tool. We want this character to have mostly highlights and be roughly extracted with a lot of jagged and torn edges. 

Make sure the layer is still set to Lighten and place it behind all other characters. 

Group all of your characters into a group named "Subjects."

final layersfinal layersfinal layers

5. How to Draw Highlights and Blend Characters Quickly

Given the darkness of the overall image, it's important to make sure your characters pop against their background; adding some strong highlights is a great way to do that!

Step 1

Create a New Layer above the "Subjects" group. 

Paint a red, somewhat sloppy outline around your three lower subjects using a small, hard round Brush. 

If you don't have a graphics tablet, bring up the Smoothing of the brush to 30-50% and use the Smudge Tool to taper out the ends of the lines.

add red highlightadd red highlightadd red highlight

Step 2

Create a New Layer above your red outline. 

Using a large, soft, round Brush, paint a black shadow below your three lower subjects. 

Make sure not to hide any crucial details such as the subject's weapons, while also making sure the bottom edges of the subjects aren't showing and it's a smooth black transition. 

add shadowadd shadowadd shadow

6. How to Add Typography Using Placeit's Poster Maker

Finally, we will be bringing our poster into Placeit's poster maker to add our movie's title and other relevant text!

Step 1

Save your poster design as either a JPG or PNG at a max of 12 MB in size. 

I'd suggest making your width at least 3600 px.

Step 2

See all of the poster templates available by going to Placeit.net  > Designs and searching "Poster".

I will be using the first option, Horror Film Poster Template.

templatestemplatestemplates

Step 3

Scroll down to see some of the horror genre presets available.

I will be using "Ritual". Although this is a horror preset and our film is more in the post-apocalyptic action genre, Placeit gives you tons of customization options! 

horror presetshorror presetshorror presets

Step 4

While Placeit has a library of images available to use, we, of course, will be using our own. 

Do this by selecting Custom Image on the right-hand side where the background images are located.

Select your saved poster PNG or JPG image.

Crop your image using Placeit's simple slider crop feature if needed. 

crop imagecrop imagecrop image

Step 5

Add your own text by replacing the text found on the left-hand side of the screen. 

The changes happen live and in real time!

add textadd textadd text

Step 6

Once all your text is decided, you can start to change the color, font face, and font placement! 

I will be using a pale-yellow color #f4d150 for the title font to make it stand out. 

Use the Color Picker Tool in Photoshop to pick colors right off your poster.

color textcolor textcolor text

Step 7

Next, I will be changing the font to Ultra.

change placement of textchange placement of textchange placement of text

Step 8

Finally, to finish everything up, I am going to arrange our poster text.

To do this in Placeit, drag and place the text wherever you want it. Once again, it's all live editing! 

It also has guides to help you align everything perfectly! 

We've Done It!

The only thing more important than the composition or color story of a movie poster is the text itself. It must be bold, readable, and something that draws the eye to it. As always, keep experimenting with different techniques, and see what you can create.

finalfinalfinal

Find more resources on Envato Elements! Or check out this roundup of the best ready-made movie poster templates:

Explore Awesome Movie Poster Templates From Envato Elements

Looking for the right template for your movie poster project? We've selected a few examples from Envato Elements: 

1. Double Exposure Movie Poster (AI, PSD)

Double Exposure Movie PosterDouble Exposure Movie PosterDouble Exposure Movie Poster

Learn how to blend photos for a poster in Photoshop with a template like this one. Finish your movie poster project with an easy-to-customize PSD or AI file with well-organized layers. You'll get an 8.27 × 11.69 inch file size (with bleed) in print-ready format. 

2. Movie Poster (PSD)

Movie PosterMovie PosterMovie Poster

Learning how to make a poster in Photoshop? Get the right movie poster size with this template. The download features an A3 size file with free fonts in use. All the objects, colors, and text in this movie poster in Photoshop are editable. Customize this file and you'll have a bunch of full-resolution movie posters ready to print.

3. Film Festival Poster (PSD)

Film Festival PosterFilm Festival PosterFilm Festival Poster

Are you thinking of a yellow movie poster for your film or festival? Check out this movie poster for Photoshop. It’s 100% customizable, and all the shapes are resizable, removable, and editable. 

4. Movie Festival Poster Design (AI, EPS, PSD)

Movie Festival - Flyers DesignMovie Festival - Flyers DesignMovie Festival - Flyers Design

Learn how to make a poster in Photoshop with a good template. This is an awesome choice that could work as an original movie poster in Photoshop. You'll get a layered PSD file with Smart Objects for you to insert your own photos and text. It's also print-ready, so you'll get a bunch of full-resolution movie posters in no time.

5. Red Double Exposure Movie Poster (AI, PSD)

Double Exposure Movie PosterDouble Exposure Movie PosterDouble Exposure Movie Poster

This template will show you how to blend photos for a poster in Photoshop. It's easy to customize, so you just need to replace elements with your text and images. Get the right movie poster resolution and size (8.27 × 11.69 inch) with this download. 

Discover More Resources

Looking to learn more? Why not check out the following excellent photo manipulation tutorials:


This content originally appeared on Envato Tuts+ Tutorials and was authored by Abbey Esparza


Print Share Comment Cite Upload Translate Updates
APA

Abbey Esparza | Sciencx (2018-11-01T05:32:31+00:00) How to Make a Movie Poster in Photoshop. Retrieved from https://www.scien.cx/2018/11/01/how-to-make-a-movie-poster-in-photoshop/

MLA
" » How to Make a Movie Poster in Photoshop." Abbey Esparza | Sciencx - Thursday November 1, 2018, https://www.scien.cx/2018/11/01/how-to-make-a-movie-poster-in-photoshop/
HARVARD
Abbey Esparza | Sciencx Thursday November 1, 2018 » How to Make a Movie Poster in Photoshop., viewed ,<https://www.scien.cx/2018/11/01/how-to-make-a-movie-poster-in-photoshop/>
VANCOUVER
Abbey Esparza | Sciencx - » How to Make a Movie Poster in Photoshop. [Internet]. [Accessed ]. Available from: https://www.scien.cx/2018/11/01/how-to-make-a-movie-poster-in-photoshop/
CHICAGO
" » How to Make a Movie Poster in Photoshop." Abbey Esparza | Sciencx - Accessed . https://www.scien.cx/2018/11/01/how-to-make-a-movie-poster-in-photoshop/
IEEE
" » How to Make a Movie Poster in Photoshop." Abbey Esparza | Sciencx [Online]. Available: https://www.scien.cx/2018/11/01/how-to-make-a-movie-poster-in-photoshop/. [Accessed: ]
rf:citation
» How to Make a Movie Poster in Photoshop | Abbey Esparza | Sciencx | https://www.scien.cx/2018/11/01/how-to-make-a-movie-poster-in-photoshop/ |

Please log in to upload a file.


There are no updates yet.
Click the Upload button above to add an update.

You must be logged in to translate posts. Please log in or register.