
This content originally appeared on Twilio Blog and was authored by Fikayo Adepoju
Introduction
In a previous article, we looked at the structure of an Electron.js application and how to get started building a simple desktop app with Electron.js. In this article, you will learn how to secure your Electron.js desktop applications using Twilio Verify. If you are not yet familiar with how to build Electron.js applications, I advise you to read An Introduction to Building Electron.js Apps first before continuing with this one.
At the end of this tutorial, you will have developed a desktop application that:
- Is built from the ground up with web technologies.
- Uses Twilio Verify for authentication
- Users can log in using an OTP sent to their phones
Prerequisites
These are the things you’ll need to begin building apps with Electron.js:
- Basic knowledge of HTML, CSS, and JavaScript
- Node.js installed on your system (version >= 11)
- Basic knowledge of Node.js
- Yarn installed
- A free Twilio account (if you sign up with this link, you’ll get $10 in Twilio credit when you upgrade your account)
Scaffold the Electron.js Application
Scaffold the application using create-electron-app
Having to create every Electron.js from scratch involves writing a lot of boilerplate code. A quick way to save time and set up an Electron.js application with all the basic parts is by using the create-electron-app utility.
To begin your project, create a new application by running the following command in your terminal/command line:
npx create-electron-app electron-twilio-verify
This will scaffold a new Electron.js application inside a folder called electron-twilio-verify with all application code contained in the src folder. The Main process logic is in the file index.js, while the index.html file is loaded by the Renderer process both contained in the src folder.
Install dependencies
The project scaffolding process of create-electron-app does not involve the installation of dependencies. To install the dependencies contained in the package.json file, run the following command at the root of the project folder:
yarn
Once this installation is complete, you can now run the application using the following command:
yarn start
This command will start up the application and load a screen similar to the one below:
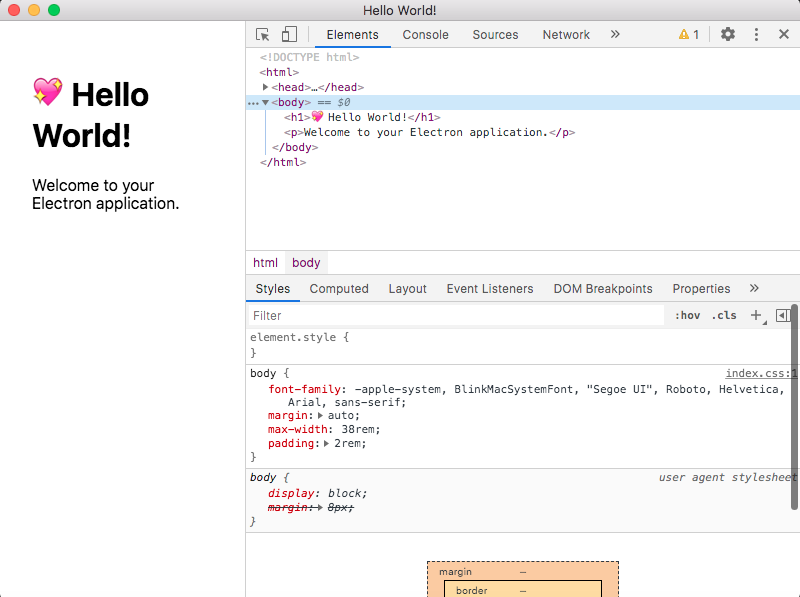
As seen in the above screen, some “Hello World” text is printed on the screen and the developer tools window is open.
You can stop the application with the Ctrl + C command in the same terminal window running the application.
In order to store sensitive Twilio credentials in environment variables and also use the Twilio Node.js SDK, you will need to install two more packages, dotenv and twilio, from npm. Use the following command to add them to the project:
yarn add dotenv twilio
Set up environment variables
As stated earlier, you need a secure way to store Twilio credentials for the project and the first step to doing that was installing the dotenv package. The next step is to create a .env file at the root of the project, this is the environment file that will hold the values for your credentials. Inside the file, add the following empty variables for Twilio SID, the Twilio Authentication Token, and the Verify Service ID (you’ll collect the values for these variables in the following steps):
TWILIO_SID=
TWILIO_TOKEN=
VERIFY_SERVICE_ID=
This file will be updated as you get the corresponding values of the variables.
To include these environment variables in your application, add the following line at the top of src/index.js:
require("dotenv").config();
const { app, BrowserWindow } = require('electron');
Configure the Renderer process
Before you begin work on the actual application, there are a few configurations you need to make for the Renderer Process.
First, change the pixel width of the rendered index.html file to 1000 inside the createWindow method.
Then comment out the developer tools and add the Node.js integration into the Renderer process. Your index.html file should look like this:
const createWindow = () => {
  // Create the browser window.
  const mainWindow = new BrowserWindow({
    width: 1000,
    height: 600,
    webPreferences  : {
      nodeIntegration : true
    }
  });

  // and load the index.html of the app.
  mainWindow.loadFile(path.join(__dirname, 'index.html'));

  // Open the DevTools.
  //mainWindow.webContents.openDevTools();
};
This will cause the screen to be wider, hide the developer tools shown when the app first started, and the Node.js integration will ensure that you can use the Node.js API methods and properties like require within the Renderer process.
Get Twilio Credentials for Verify
Understand How Verify Works
Verify is a passwordless user verification service offered by Twilio. The service uses phone numbers, emails, voice, or push notifications to verify users by communicating a One-Time Password (OTP) to the specified channel. Verify takes care of managing phone numbers and scaling while you focus on the main parts of your application.
Verify majorly uses two endpoints, one for initiating the verification process which sends an OTP to the user’s phone or email.
Once the user enters the OTP, the second endpoint is used to verify that the entered OTP is correct, in order to determine whether the user is to be authenticated or not.
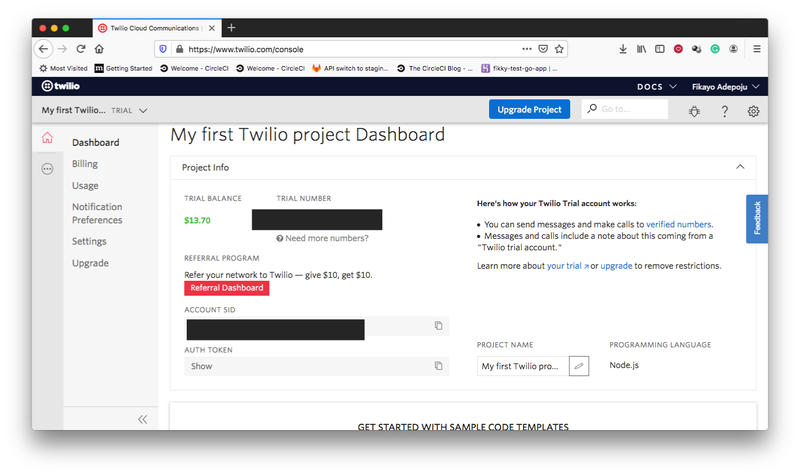
Get your Auth Token and Account SID
Collect your Account SID and Auth Token from the dashboard of your Twilio Console.
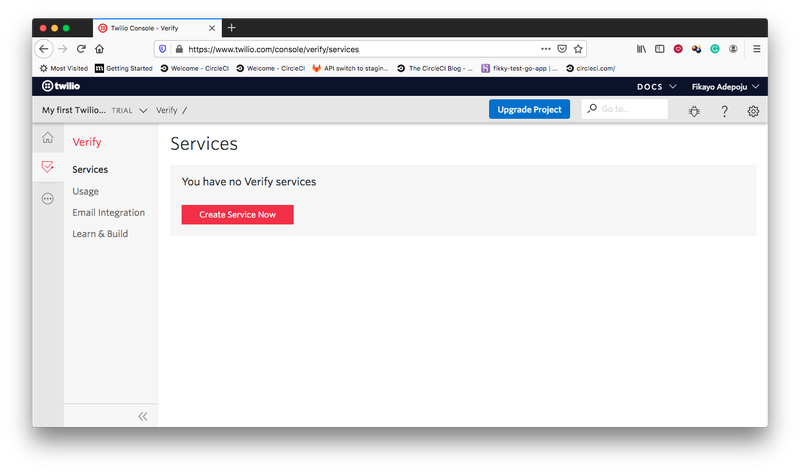
Create a Verify Service
To use Twilio Verify, you must first create a new Verify Service. Each service which will have a unique identifier to be used in your application. After navigating to the Verify section of the Console, you will see a screen like below if you have not ever created a Verify Service before.
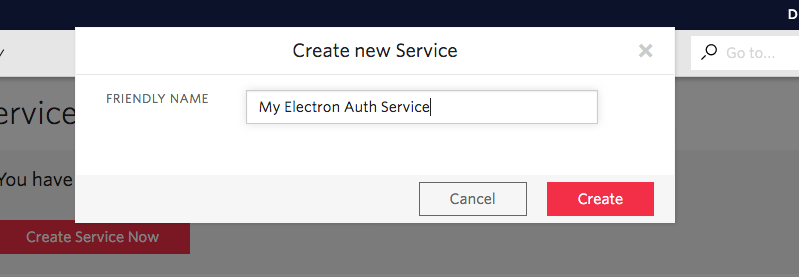
Click the Create Service Now button to create a new service and enter a friendly name for the service as shown below:
Once the service is created, you should see its General Settings page where you can set configurations like the length of the OTP.
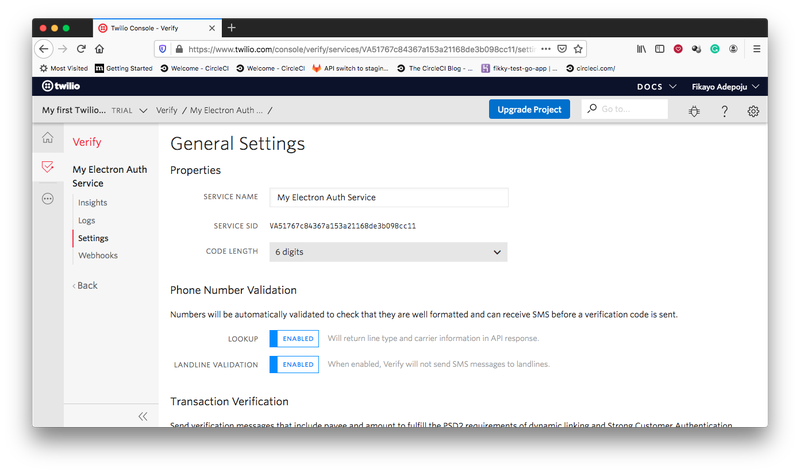
Once you have these three parameters (Twilio Account SID, Auth Token, and Verification Service ID), update your .env file with the values.
Create the Auth flow
The application in this tutorial is a simple starter application, thus the authentication step involving email/password is skipped to go directly to the verification flow, thus this is technically a verification flow.
Here is a breakdown of steps in the verification flow you will be building:
- The user loads the app and sees the login screen requesting a phone number
- The user enters a phone number and submits the form to receive an OTP
- The user receives OTP and enters it into the verification form loaded after submission of the phone number
- The user is verified and sees the home page, while the user data is persisted by the application so that when the user closes the app and reopens it, the session persists.
Handle user data in the Main process
Persisting data using the Local Storage API of the Renderer process does not work for persistent sessions in an Electron.js app because when the application is closed, the instance of the Renderer process with the data in place is destroyed.
One of the ways to persist data in an Electron.js app is by using flat files. Thus, when the user successfully logs in, the user data will be saved into a file and read to detect authentication status whenever the app loads.
The logic for saving and reading the data in the file will be placed in the Main process so that the Renderer process can communicate with the Main process for required operations.
First, import the ipcMain module from the electron package and the fs module at the top of the index.js file like below:
require("dotenv").config();
const { app, BrowserWindow, ipcMain } = require('electron');
const path = require('path');
const fs = require('fs');
Next, place the following code after the event handler of the activate event:
let userFilePath = path.join(__dirname, 'user.json');

ipcMain.handle('save-user-data', (event, ...args) => {
  fs.writeFileSync(userFilePath, args[0]);
})

ipcMain.on('get-user-data', (event, arg) => {
  fs.readFile(userFilePath, 'utf8', function(err, data){
    event.reply('user-data', data)
  });
})
In the code above, a path is first created to a user.json file which is the file that will eventually contain the user data code. The Main process then responds to a save-user-data event invoked by the Renderer process containing the user data by saving the user data into the user.json file. The file will be created if it doesn’t already exist.
Next, the Main process handles the get-user-data event by reading and passing the user data to the Renderer process when this event is called.
Create the application flow in the Renderer process
It’s now time to work on the user-facing side of the application, the index.html file that the Renderer process runs.
Locate the src/index.html file and replace its contents with the following code:
<!DOCTYPE html>
<html>
<head>
        <meta charset="UTF-8">
        <title>Hello World!</title>
        <link rel="stylesheet" href="https://cdn.jsdelivr.net/npm/bootstrap@4.5.3/dist/css/bootstrap.min.css" integrity="sha384-TX8t27EcRE3e/ihU7zmQxVncDAy5uIKz4rEkgIXeMed4M0jlfIDPvg6uqKI2xXr2" crossorigin="anonymous">
        <script src="https://cdn.jsdelivr.net/npm/vue@2"></script>
</head>

<body>
        <nav class="navbar navbar-expand-lg navbar-dark bg-dark">
                <a class="navbar-brand" href="/#">Welcome to Verify</a>
                <button
                        class="navbar-toggler"
                        type="button"
                        data-toggle="collapse"
                        data-target="#navbarText"
                        aria-controls="navbarText"
                        aria-expanded="false"
                        aria-label="Toggle navigation">
                        <span class="navbar-toggler-icon" />
                </button>
        </nav>

        <div id="app">
                <div class="container">
                        <div class="row" v-if="!authenticated">
                                        <div class="col-md-6 offset-md-3 mt-5">
                                                <div class="card">
                                                        <div class="card-header bg-primary text-white">
                                                                Login with Phone Number
                                                        </div>

                                                        <div class="card-body">
                                                                <form>
                                                                        <div v-if="!verification_started">
                                                                                <div class="form-group">
                                                                                        <label>Enter Phone Number</label>
                                                                                        <input type="phone" v-model="phonenumber" class="form-control">
                                                                                        <small class="form-text text-muted">We'll never share your phone number with anyone else.</small>
                                                                                </div>
                                                                                <button type="button" @click="getVerificationCode()" class="btn btn-primary" :disabled="fetching_code">
                                                                                        {{ fetching_code? "Processing" : "Get Verification Code"}}
                                                                                </button>
                                                                        </div>
                                                                        <div v-else>
                                                                                <div class="form-group">
                                                                                        <label>Enter Verification Code</label>
                                                                                        <input v-model="code" class="form-control">

                                                                                </div>
                                                                                <button type="button" @click="checkVerification()" class="btn btn-primary" :disabled="checking_code">
                                                                                        {{ checking_code? "Processing" : "Login"}}
                                                                                </button>
                                                                        </div>
                                                                </form>
                                                        </div>

                                                </div>


                                        </div>
                        </div>

                        <div class="row" v-else>
                                <div class="col-md-8 offset-md-2 mt-5">
                                        <div class="jumbotron">
                                                <h1 class="display-4">Hello, User!</h1>
                                                <p class="lead">You have successfully logged into your profile.</p>
                                                <hr class="my-4">
                                                <p>If you're ready to log out of your profile, you can use the button below.</p>
                                                <button class="btn btn-primary btn-lg" @click="logout()" type="button">Log Out</button>
                                        </div>
                                </div>
                        </div>
                </div>
        </div>
</body>
</html>
In the code above, the first highlighted line shows the variable authenticated used to conditionally control the visibility of both the authenticated and non-authenticated sections of the page.
When the Get Verification Code button on line 42 is clicked, a request is sent to the verify API to initiate the process by sending a code to the phone number entered in the form contained in the non-authenticated section.
The verification_started variable on line 36 is then set to true to hide the previous form which takes the user’s phone number and display another form which takes the verification code sent to the user’s phone.
One the code is entered, the Login button on line 52 is clicked to verify the entered code through the Verify service API. A successful verification will then set the authenticated variable to true to hide the non-authenticated section and reveal the authenticated section of the page.
This is the authenticated part of the application and it includes a button for signing out of the application.
Next, add a script tag below the body tag and start by importing some required packages and creating an instance of the Twilio client with the code below:
const twilio = require('twilio');
const { ipcRenderer } = require('electron');
twilio_client = twilio(process.env.TWILIO_SID, process.env.TWILIO_TOKEN);
Next, below the code above, create a new Vue.js app and set it’s el property to #app which references the div with the id of app in the DOM and initialize it with the required variables:
let app = new Vue({
  el: '#app',
  data : {
    authenticated: false,
    verification_started : false,
    phonenumber : null,
    fetching_code : false,
    code : null,
    checking_code : false
  },
});
The data variables declared here are responsible for the following:
authenticated: Holds the user’s authenticated stateverification_started: Is set totrueafter the user submits their phone number so as to load the OTP verification screenphonenumber: Holds the phone number submitted by the userfetching_code: Disables the submit button while the phone number is submittingcode: Holds the OTP submitted through the formchecking_code: Disables the OTP submission button when its being submitted
Below the data object, add a created lifecycle function that will run immediately when the app is loaded:
created(){
      ipcRenderer.on('user-data', (event, userData) => {
            if(userData && JSON.parse(userData).status == "approved"){
                    this.authenticated = true;
            }
      })

      ipcRenderer.send('get-user-data', ' ')
},
This function calls the Main process to read the user data. If user data is present and its status reads approved, the authenticated state is set to true. The status property is returned by the Verify service to indicate the authentication status of a user.
Below, the created lifecycle function, add the methods object which will contain the functions required by the verification flow on this page:
methods : {

},
Within the methods object, add a getVerificationCode() function as shown below:
methods : {
        async getVerificationCode(){

            if(this.phonenumber){

              this.fetching_code = true;
              try {

                let verification = await twilio_client.verify.services(process.env.VERIFY_SERVICE_ID)
                  .verifications
                  .create({to: this.phonenumber, channel: 'sms'})

                  console.log(verification);

                  if(verification.status == "pending"){
                    this.verification_started = true;
                  }

                  this.fetching_code = false;

              } catch (error) {
                this.fetching_code = false;
                alert("Could not request Verification")
              }

            }
          },
},
The getVerificationCode function takes the submitted phone number and calls the Verify service to send the user an OTP to the submitted number. Once this process is successful, verification_started is set to true causing the OTP section of the form to be displayed.
Below the getVerificationCode() function, still inside the methods object, add a checkVerification() function by like below:
methods: {
  ...

  async checkVerification() {
    if(this.code){
      this.checking_code = true;
      try {
        let check = await twilio_client.verify.services(process.env.VERIFY_SERVICE_ID)
        .verificationChecks
        .create({to: this.phonenumber, code: this.code})

        if(check.status == "approved"){
          this.authenticated = true;

          ipcRenderer.invoke('save-user-data', JSON.stringify(check))
        }

        this.checking_code = false;
      } catch (error) {
        this.checking_code = false;
        alert("Could not verify code")
      }
    }
  },
}
The checkVerification() function takes the submitted OTP and calls the Verify service to confirm a match between the submitted code and the user’s phone number. If the verification status is approved then the authenticated state is set to true.
Lastly, still in the methods object, add a logout() function just below the checkVerification() function with the following code
 logout () {
            ipcRenderer.invoke('save-user-data', JSON.stringify({}))
            this.authenticated = false;
            this.verification_started = false;
            this.phonenumber = null;
            this.code = null;
}
The logout() function invokes the save-user-data event passing it an empty object to empty the currently stored user data in user.json. It then resets the authentication state and other authentication flow variables.
You can find the complete code for the index.html file here.
Test the Authentication Flow
Now stop the application with Ctrl + C if it is currently running and then relaunch it using yarn start. You will see the screen displayed below:

Enter a phone number in E.164 format and submit. You will see the next screen and also get an OTP on the phone number entered.
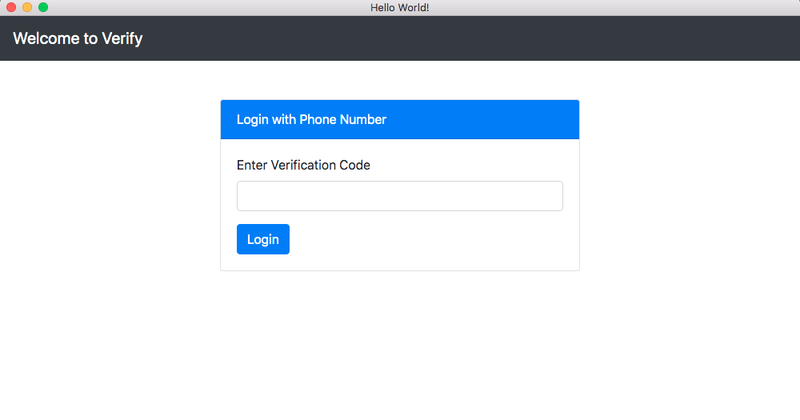
Now enter the OTP received on your phone and click the Login button. You will now be taken to the homepage of the application shown below
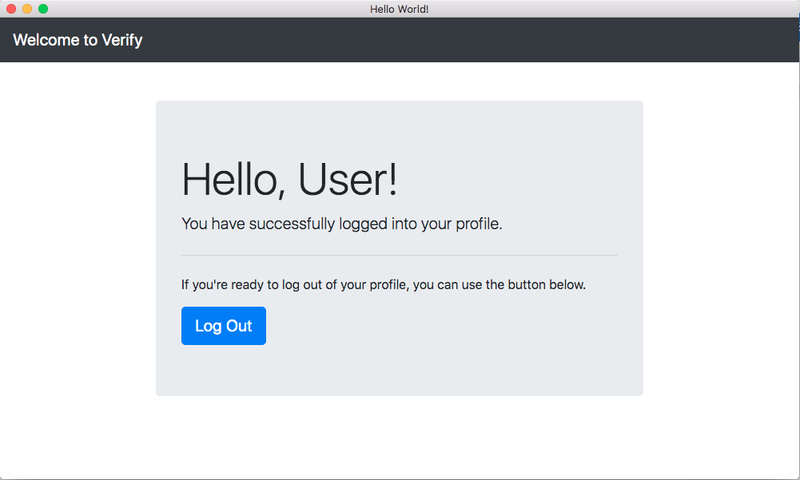
To confirm that the session persists, stop the app using and relaunch it, you will notice that the homepage will be loaded once the background authentication logic in the created lifecycle function completes.
Now click on the Log Out button, the app will log the user out and display the phone number form section once again. And if you stop and relaunch the application, the user will no longer be logged in.
Conclusion
Now that you have completed this tutorial, you know how to:
- Scaffold and Electron.js application with create-electron-app
- Use Twilio Verify to authenticate an Electron.js application
Almost every application today requires users to have authenticated access to their profiles/accounts. Having to build a new authentication flow from scratch for each app can quickly become laborious but with Verify, as you have seen through this tutorial, you have one less thing to worry about.
Happy coding :)
This content originally appeared on Twilio Blog and was authored by Fikayo Adepoju
Fikayo Adepoju | Sciencx (2021-03-12T18:30:50+00:00) Authenticate Electron.js Apps with Twilio Verify. Retrieved from https://www.scien.cx/2021/03/12/authenticate-electron-js-apps-with-twilio-verify/
Please log in to upload a file.
There are no updates yet.
Click the Upload button above to add an update.