
This content originally appeared on Level Up Coding - Medium and was authored by Dennisse Pagán Dávila
Life is locomotion; if you’re not moving, you’re not living — The Flash
Adding movement to your player is the first step to bring life into your game, and it’s a lot easier and simpler than you might think. Let’s take look!
What is a “player”, anyway?
In Unity, players are considered GameObjects . A GameObject can be anything from characters, items, and even elements in your scenery. They are, however, not very useful by themselves — the real magic starts with the Components which are contained within the object. Essentially, GameObjects are containers for Components.
Components can be viewed in the Inspector when the Object is selected.
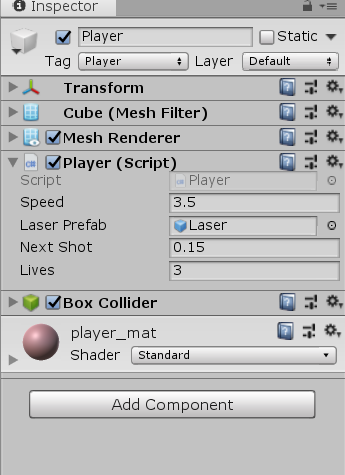
Let's take a look at the essential components for Player Movement.
Transform
Every object has a Transform by default. This is the component used to store and manipulate the position, rotation, and scale of the object.
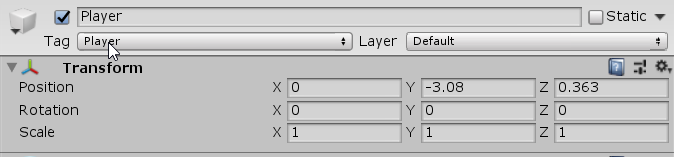
As you can see above, the positional coordinates are stored in a vector with their respective axes: X(horizontal), Y(vertical), and Z (front, back).
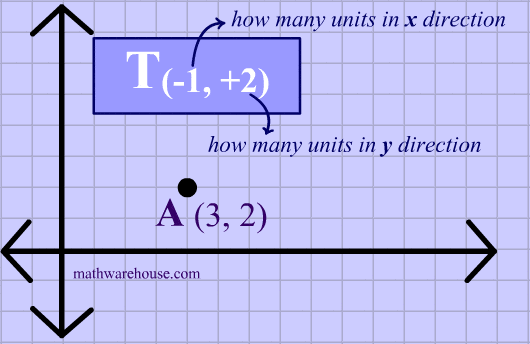
Translate
Translate is used to move the transform(our Object) in the direction of translation
Now that you know about the essential components, it’s time to learn about how the player can interact with our object.
User Input
Input is a UnityEngine Class which allows the program to detect standard user Inputs. In this tutorial, you will learn how to move the player using WASD, or the directional arrows on your keyboard.
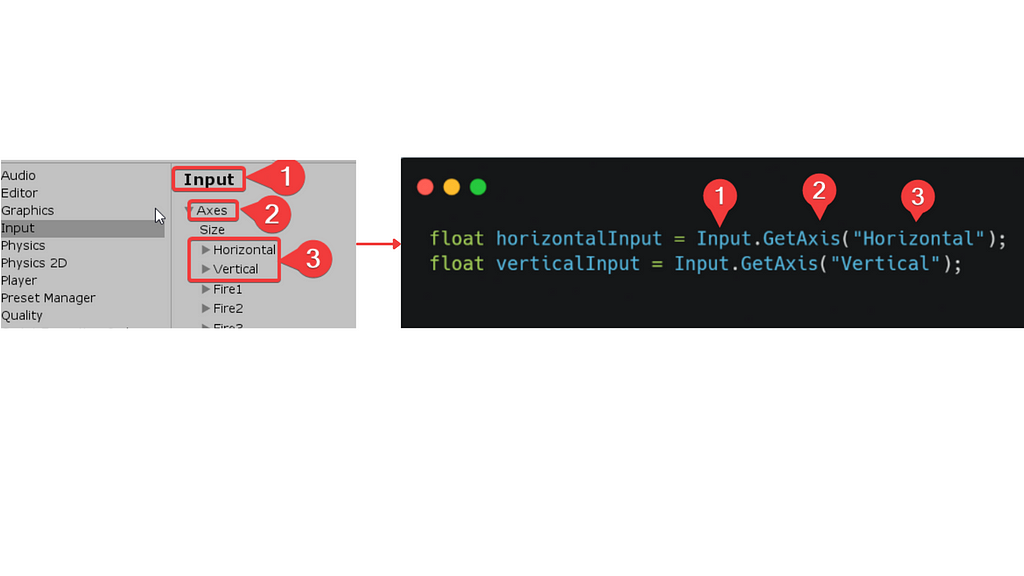
You can verify the in-engine standard inputs by doing the following.
- Go to your Edit →Project Settings →Input

Making the player move
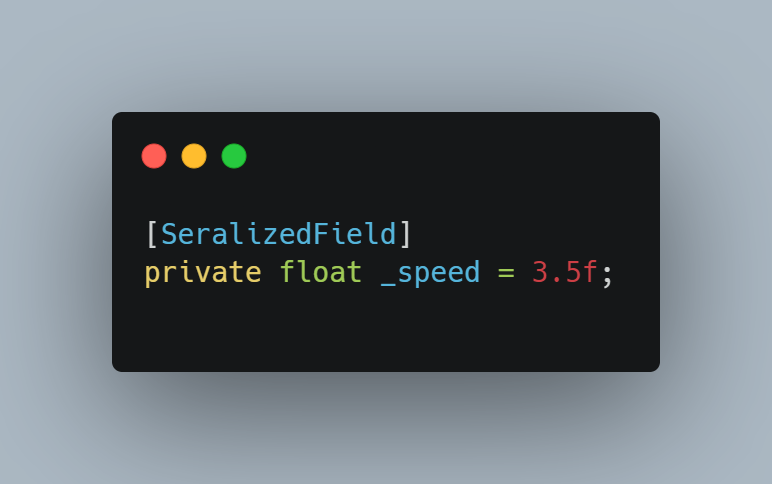
- Create a private global speed variable to control how fast the player will move. This variable will be a Serialized Field as you may need to access it in the Inspector for adjustments.
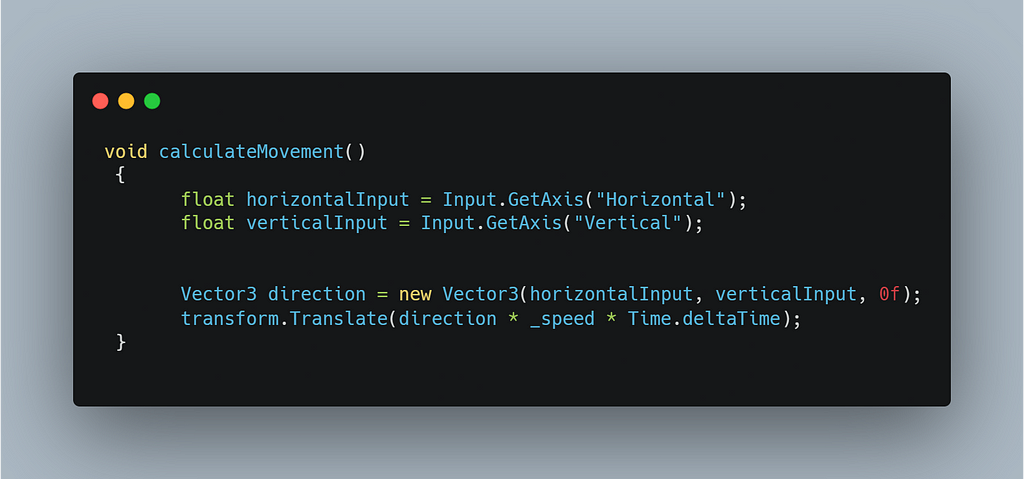
2. Create variables to store the directional values. Note, these variables must be local to the Update function. Update is called every frame, which is essential to get our player moving.
Notice how Unity operates with a very hierarchical approach: The way to implement the input matches the order in which we reached the Axes in the Project Settings.
3. You can use a vector to store the directional values and make them more readable when calculating in the next line.

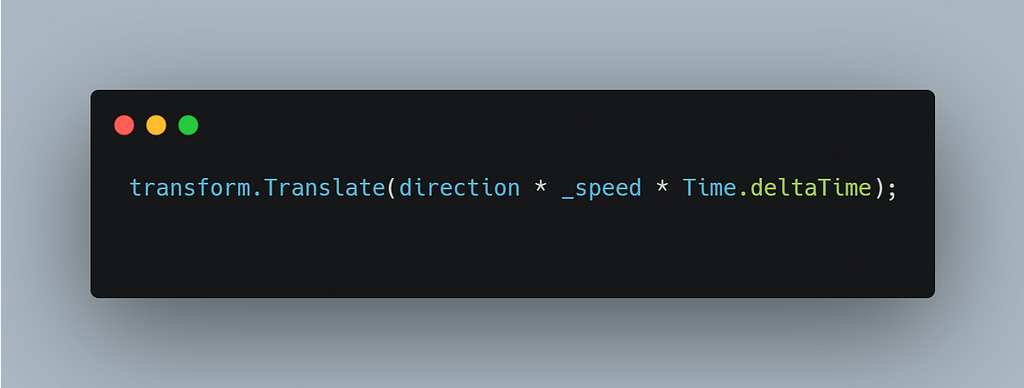
4. Now it’s time to really get moving. Use tranform.Translate to initiate the movement calculation.
Time.deltaTime is used so that the movement takes place in realtime rather than by frame.
5. Lastly, you can create a void method to further clean up your code, this method contains everything about the Player movement that was loose in the update, and must be called from within the Update.
In my next article, we’ll take a look at how to create a cooldown system in unity.
How to add simple Player movement in Unity was originally published in Level Up Coding on Medium, where people are continuing the conversation by highlighting and responding to this story.
This content originally appeared on Level Up Coding - Medium and was authored by Dennisse Pagán Dávila
Dennisse Pagán Dávila | Sciencx (2021-04-08T01:46:54+00:00) How to add simple Player movement in Unity. Retrieved from https://www.scien.cx/2021/04/08/how-to-add-simple-player-movement-in-unity/
Please log in to upload a file.
There are no updates yet.
Click the Upload button above to add an update.