
This content originally appeared on DEV Community and was authored by Mike Pearson
Should form state always be local? Some believe so, but methods like setValue() and disable() indicate that at least sometimes you need to manage form state from the outside. But these methods are imperative and reminiscent of jQuery, so usually it is better to have something more declarative and reactive like the rest of Angular.
Before we look at how to accomplish this, let's review some scenarios where reactive state management is especially helpful:
Saved Progress
This is any app where users spend a lot of time in a form and switch between multiple drafts, such as email clients with draft emails. This requires a lot of external state updates to the form.
Undo/Redo
Undo/Redo across multiple form elements can be convenient for users, and it requires completely swapping out form state multiple times.
Time and Realtime
Sometimes realtime data needs to be reflected in a form on an ongoing basis, like when a user is entering a bid for an item with frequent price updates, or scheduling something in the near future.
Server-Side Events
Any time something happens to a data model that the user is editing, you may need to update the state of the form. These events could be another user editing the same data, an item selling out, some status change, or anything that would cause a problem if the user tried to submit outdated data.
Complexity
Complex forms are hard to understand, but Redux Devtools can help a lot. You have to personally decide when a form is complex enough to justify the time to set up external state management.
How?
The Simple Way
Setting up external state management for forms might take a lot less time than you might think. I'm going to explain how to do it with both NgRx and StateAdapt because I just released StateAdapt and want you to know how cool it is ?
Skip to Steps 5-7 if you want to only see the stuff that is related to forms.
Step 1 (NgRx and StateAdapt)
Create the form state interface and initial state:
// form-state.interface.ts
export interface FormState { // Whatever it is
  name: string;
  age: number;
}

export const initialState: FormState = { name: '', age: 0 };
Step 2 (NgRx only)
Create this action:
// form.actions.ts
import { createAction, props } from '@ngrx/store';
import { FormState } from './form-state.interface';

export const formValueChange = createAction(
  '[Form] Value Change',
  props<FormState>()
);
Step 3 (NgRx only)
Create the reducer:
// form.reducer.ts
import { Action, createReducer, on } from "@ngrx/store";
import { FormState, initialState } from "./form-state.interface";
import { formValueChange } from "./form.actions";

const formReducer = createReducer(
  initialState,
  on(formValueChange, (state, { type, ...update }) => ({ ...state, ...update }))
);

export function reducer(state: FormState | undefined, action: Action) {
  return formReducer(state, action);
}
Step 4 (NgRx only)
Plug the reducer into the reducer/state tree, wherever you want it to show up (see NgRx Docs).
Step 5 (NgRx)
Add these imports to the file of the component containing the form:
import { using } from 'rxjs';
import { tap } from 'rxjs/operators';
import { formValueChange } from './form.actions';
Add this code inside the component class:
  // this.form is the formGroup you created for the form
  formValues$ = using(
    () =>
      this.form.valueChanges
        .pipe(tap(values => this.store.dispatch(formValueChange(values))))
        .subscribe(),
    () => this.store.select(state => state.form) // Wherever you put it in your state tree
  );
Step 5 (StateAdapt)
Add these imports to the file of the component containing the form:
import { mapToAction } from '@state-adapt/core';
import { initialState } from './form-state.interface';
Add this code inside the component class:
  // this.form is the formGroup you created for the form
  valueChanges$ = this.form.valueChanges.pipe(
    mapToAction('[Form] Value Change'),
  );
  formValues$ = this.adapt.updater('form', initialState, this.valueChanges$);
Step 6 (NgRx and StateAdapt)
Drop this directive into your module:
// patch-form-group-values.directive.ts
import { Directive, Input } from "@angular/core";

@Directive({
  selector: "[patchFormGroupValues]"
})
export class PatchFormGroupValuesDirective {
  @Input() formGroup: any;
  @Input()
  set patchFormGroupValues(val: any) {
    if (!val) return;
    this.formGroup.patchValue(val, { emitEvent: false });
  }
}
Step 7 (NgRx and StateAdapt)
Use the new directive in your component template:
<form [formGroup]="form" [patchFormGroupValues]="formValues$ | async">
  <input type="text" formControlName="name" />
  <input type="number" formControlName="age" />
</form>
Simple Way Review
Here are working StackBlitz examples for NgRx and StateAdapt. Open up Redux Devtools and watch as you edit the form. Success!
Notice that StateAdapt didn't require Steps 2-4. Check out the diff between NgRx and StateAdapt:

What is StateAdapt missing that makes it so minimal? Nothing. It has every layer NgRx has; each layer is just thinner.
Here I used this.adapt.updater instead of the usual this.adapt.init method. It is syntactic sugar for calling init for a basic adapter with an update state change function. I do not think this is cheating, because a primary benefit of StateAdapt is encouragement to reuse state management patterns (an idea from NgRx/Entity). But even without the syntactic sugar it would only take 6 lines of code to define the updateAdapter:
import { createAdapter } from '@state-adapt/core';
import { FormState } from './form-state.interface';

export const updateAdapter = createAdapter<FormState>()({
  update: (state, update: Partial<FormState>) => ({...state, ...update}),
});
Read more about StateAdapt here if you are interested.
The Advanced Way
The simple method only puts one action type in Redux Devtools:
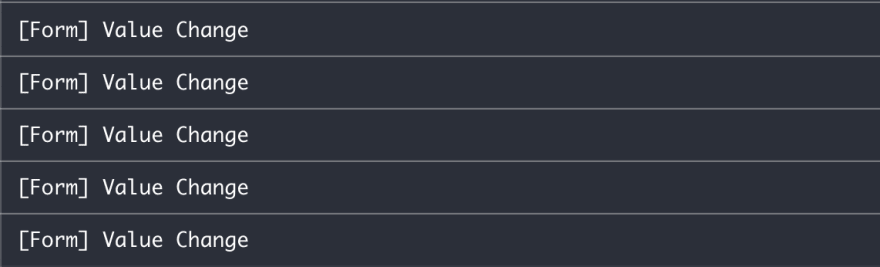
You will probably want something more descriptive if your form is large.
The basic pattern is established in the simple method above, so if you want to extend it, you will just need to create an action for each property of FormState and enhance the reducer to handle each action. If you have multiple form groups, you can use PatchFormGroupValues on each of them. If, however, you are defining an action for each form control, you need a new directive. Here is where you can use the SetValue directive:
// set-value.directive.ts
import { Directive, Input } from "@angular/core";
import { NgControl } from "@angular/forms";

@Directive({
  selector: "[setValue]"
})
export class SetValueDirective {
  @Input()
  set setValue(val: any) {
    this.ngControl.control.setValue(val, { emitEvent: false });
  }

  constructor(private ngControl: NgControl) {}
}
It is used as you would imagine:
<form>
  <input type="text" [formControl]="name" [setValue]="name$ | async" />
  <input type="number" [formControl]="age" [setValue]="age$ | async" />
</form>
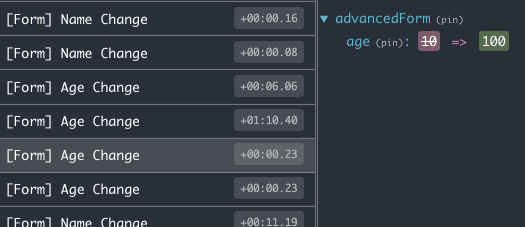
In the component you would listen to the valueChanges of each form control and have a using call for each if you are using NgRx. I won't paste all the code here, but I do have a working example in StackBlitz for StateAdapt. The result is a little more detail about what is happening:
Conclusion
When it is this easy to get Redux Devtools working for a form, I do not see many situations where you would not want to use it. Maybe NgRx is too much setup for a lot of forms, but if you add StateAdapt to your NgRx or NGXS project, you really only need to add 4 or so lines of code to enable Redux Devtools for a form. Plus, you have a much more reactive and declarative foundation for managing form state in the future!
You can control other attributes of form controls with directives, too, if you follow the same pattern. For example, I have a ControlDisabled directive in my last blog post you can use.
If you are interested in learning more about StateAdapt, please read my introduction post or visit the website.
This content originally appeared on DEV Community and was authored by Mike Pearson
Mike Pearson | Sciencx (2021-04-12T08:34:37+00:00) Why and how to manage state for Angular Reactive Forms. Retrieved from https://www.scien.cx/2021/04/12/why-and-how-to-manage-state-for-angular-reactive-forms/
Please log in to upload a file.
There are no updates yet.
Click the Upload button above to add an update.