
This content originally appeared on Level Up Coding - Medium and was authored by Jim O'Connor
Launch Blender for 3D Printing via Python
Writing tutorials is good — and I haven’t been doing it; repetitive clicky-draggy thing things are bad, and I’ve been doing it too much. Time to start changing both those conditions. Besides, writing this kind of boilerplate-useful code is 1000% the type of thing I tend to do, then forget how I did. I assume I’m not the only one, but even if that were the case, it would still be worth writing down these notes to help future-Jim.
Blender is great for 3D Printing, but configuring the environment each time is tedious — and clicking back and forth between Blender and YouTube trying to remember all of the settings to change wasn’t cutting it. Finally, turns out this is a pretty good way to start learning the Blender Python API.
For full access to the debugging output generated in the Python script, launch Blender from the command line. Because this will vary with OS, check Blender’s documentation for yours: Launching from the Command Line.
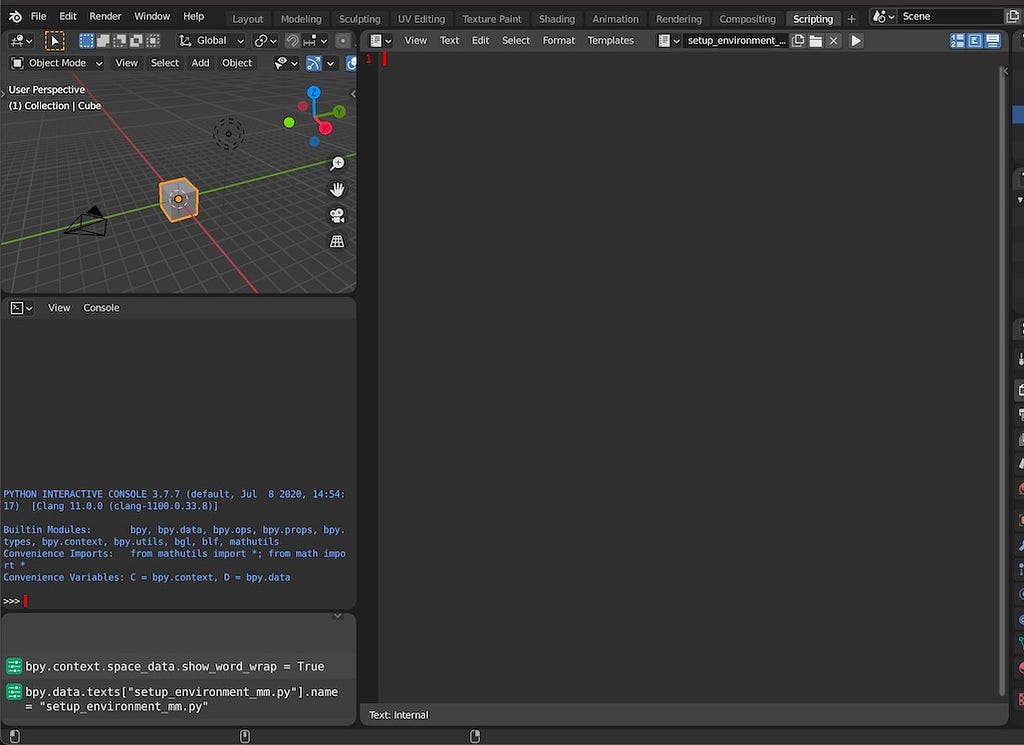
For convenience, all of the screenshots I’m including show the Blender Scripting environment — but any text editor works.
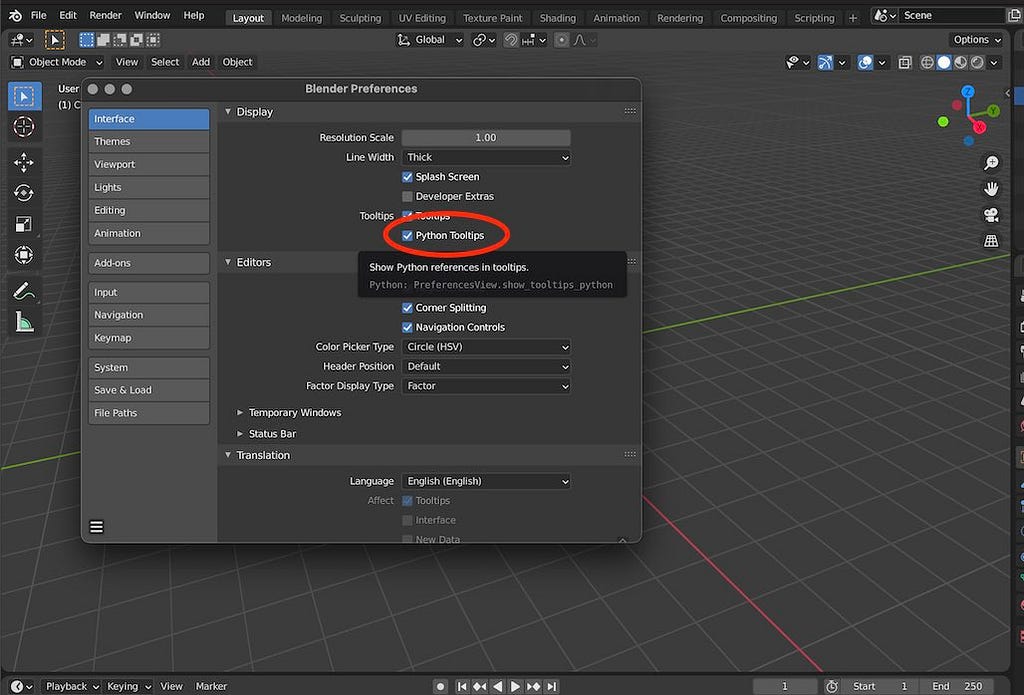
It’s also worth going into Edit > Preferences > Interface and enabling the Python Tooltips checkbox.
From here, everything can be done via the Scripting workspace, either creating a new .py file in the editor pane there or importing one via the file browser.
Now for the actual coding. There are 5 short steps:
- Define Imports & Constants
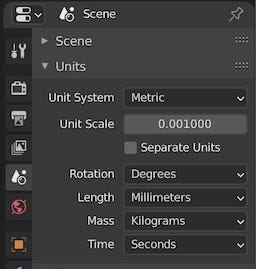
2. Change the Scene scale & units from Meters to Millimeters
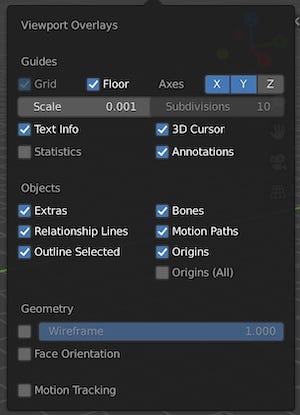
3. Configure the Viewports to display at the updated scale
4. Ensure that the official 3D Print Tools Add-on is enabled
5. Remove Default Scene objects
import bpy
from addon_utils import check, enable
C = bpy.context
D = bpy.data
SCALE_LENGTH = 0.001
LENGTH_UNIT = ‘MILLIMETERS’
MASS_UNIT = 'GRAMS'
CLIP_END = 100000
PRINT_UTIL = “object_print3d_utils”
“import bpy” loads Blender Python. The “addon_utils” functions will get used to enable the 3D Printing tools. “C” and “D” are Blender Python standards to alias “bpy.context” and “bpy.data”, objects which get used… frequently.
def config_units():
    C.scene.unit_settings.scale_length = SCALE_LENGTH
    C.scene.unit_settings.length_unit = LENGTH_UNIT
    C.scene.unit_settings.mass_unit = MASS_UNIT
Straightforward. Equivalent to updating ‘Unit Scale’, ‘Length’, and ‘Mass’ on the ‘Scene Properties’ panel. Mass is helpful to set if you’re modeling moving parts, gears, for example, and plan to use an animation to check their smooth operation.
def config_viewports():
    screens = D.screens
    viewareas = [
        area for screen in screens
        for area in screen.areas
        if area.type == ‘VIEW_3D’
       ]
    for area in viewareas:
        area.spaces.active.overlay.grid_scale = SCALE_LENGTH
        area.spaces.active.clip_end = CLIP_END
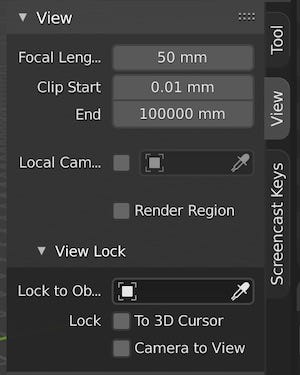
This step is a little more interesting: using a List Comprehension, the function iterates through each of the Workspaces, and filters to select only the 3D Viewport editors. From there, it’s just a case of setting new values for the Grid Scale and Clip End — equivalent to making adjustments in the “Overlays” dropdown and “View” sidebar.
def enable_print_util():
    is_enabled, is_loaded = check(PRINT_UTIL)
    if is_enabled and is_loaded:
        return
    try:
        bpy.ops.preferences.addon_enable(module=PRINT_UTIL)
    except:
        print(f"ERR: Error loading {PRINT_UTIL}")
    finally:
        return
Here’s where the imports from the “addon_utils” module get used. The function checks if the official Blender Mesh 3D-Print Toolbox add-on is already loaded and enabled. If it is, the function returns, otherwise, it enables the module. The bpy method is wrapped in a try-catch to be on the safe side when handling the dependency.
def remove_default_objects():
    bpy.ops.object.select_all(action=’SELECT’)
    if len(C.selected_objects) <= 3:
        bpy.ops.object.delete(use_global=True)
Long-suffering Default Cube gets it again. This helper function is optional, but works simply enough — selecting all objects in the scene (to include Default Light & Default Camera) and deleting them. As a safeguard, in case this script gets called on a file with more objects already created, the call to the delete method is wrapped behind a conditional and will not fire if there are more than 3 objected selected.
Finally, all that’s left is to call the functions:
config_units()
config_viewports()
enable_print_util()
remove_default_objects()
Now this script can be run within any project and it will set things up to model for export to 3D Printing. But that would still mean a good bit of clicking around to go into the Scripting workspace, load it up and execute. Fortunately, Blender makes it easy to execute a Python script at launch. Running from the CLI, simply pass in the ‘-P’ flag and the relative path to the script:
blender -P ./setup_environment_mm.py
This could be aliased behind a one word command to a shell script of its own, but this seems as good a place to prune as now. Here’s the gist of the script as a whole:
Configure Blender for 3D Printing via Python was originally published in Level Up Coding on Medium, where people are continuing the conversation by highlighting and responding to this story.
This content originally appeared on Level Up Coding - Medium and was authored by Jim O'Connor
Jim O'Connor | Sciencx (2021-04-20T02:41:10+00:00) Configure Blender for 3D Printing via Python. Retrieved from https://www.scien.cx/2021/04/20/configure-blender-for-3d-printing-via-python/
Please log in to upload a file.
There are no updates yet.
Click the Upload button above to add an update.