
This content originally appeared on DEV Community and was authored by lgf196
Project Address/Case Actual Combat
Project address👉vite-react-cil.
Case actual combat:
-ant-simple-pro is a middle-office solution that supports vue3, react, angular3 big frameworks, Version 3.0 has all been refactored with vite.
-JoL-player is a powerful react player, developed by typescript, and bate3.0 version is refactored with vite
Basic preparation
1.Create a new folder config,public,src
2.Generate package.json and execute the following command👇
$ npm init
3.Added index.html, tsconfig.json, vite.config.ts, .gitignore files
The project infrastructure is as follows:
├── config # Project scaffolding configuration file
├── public # static file
├── src # source code
├── index.html # root
├── .gitignore # git ignores files
├── vite.config.ts # Project global vite configuration file
├── tsconfig.json # Project global ts configuration file
└── package.json # package.json
Start
Installation must depend on
Development
$ npm install vite typescript @vitejs/plugin-react-refresh -D
Production
$ npm install react react-dom -S
Write configuration
Create a new main.tsx, App.tsx, app.css under the src folder
1.Write the following code in the src/App.tsx file
import React, {FC, useEffect} from'react';
import'./app.css';
const App: FC = () => {
  useEffect(() => {
      console.log(`vite-react-cil`);
  }, []);

  return (
    <div>
      <h2>Welcome to vite-react-cil</h2>
    </div>
  );
};

export default App;
2.Write the following code in the src/app.css file
* {
  padding: 0;
  margin: 0;
}
.App{
  width:200px;
}
3.Write the following code in the src/main.tsx file
import React from'react';
import ReactDOM from'react-dom';
import App from'./App';
ReactDOM.render(
  <React.StrictMode>
    <App />
  </React.StrictMode>,
  document.getElementById('root'),
);
4.Write the following code in the tsconfig.json file
{
  "compilerOptions": {
    "baseUrl": "./",
    "paths": {
      "@/*": ["src/*"]
    },
    "types": ["vite/client"],
    "target": "ESNext",
    "useDefineForClassFields": true,
    "lib": ["DOM", "DOM.Iterable", "ESNext"],
    "allowJs": false,
    "skipLibCheck": false,
    "esModuleInterop": true,
    "allowSyntheticDefaultImports": true,
    "strict": true,
    "forceConsistentCasingInFileNames": true,
    "module": "ESNext",
    "moduleResolution": "Node",
    "resolveJsonModule": true,
    "isolatedModules": true,
    "noEmit": true,
    "jsx": "react"
  },
  "include": ["./src"],
  "exclude": ["node_modules"]
}
5.Create a new plugins folder in the config folder. This file is specifically used to process the vite third-party plug-ins, and then create a new index.ts file in the config/plugins folder, and in Write the following code in the index.ts file:
import {Plugin} from'vite';
import reactRefresh from'@vitejs/plugin-react-refresh';
export default function createVitePlugins() {
  const vitePlugins: (Plugin | Plugin[])[] = [
    reactRefresh(),
  ];
  return vitePlugins;
}
6.Write the following code in the vite.config.ts file
import {defineConfig} from'vite';
import createVitePlugins from'./config/plugins';
export default defineConfig((configEnv) => {
  return {
    plugins: createVitePlugins(),
  };
});
7.Store a favicon.ico image file in the public folder.
8.Write the following code in the index.html file
<!DOCTYPE html>
<html lang="en">
  <head>
    <meta charset="UTF-8" />
    <link rel="icon" type="image/svg+xml" href="/favicon.ico" />
    <meta name="viewport" content="width=device-width, initial-scale=1.0" />
    <title>vite-react-cil</title>
  </head>
  <body>
    <div id="root"></div>
    <script type="module" src="/src/main.tsx"></script>
  </body>
</html>
9.Write the following configuration in the .gitignore file
node_modules
.DS_Store
dist
coverage
dist-ssr
*.local
10.Add the following code to the package.json file
{
  "scripts": {
    "dev": "vite"
  },
}
Run the project
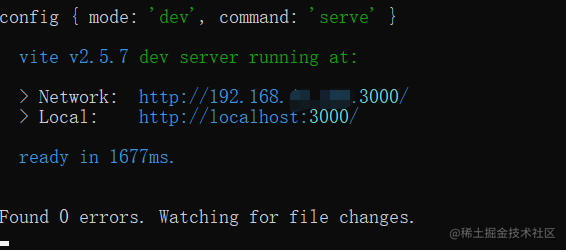
We can run the project with the following command:
$ npm run dev
The above picture shows that the project started successfully. So
far, a simple version of the scaffolding has been completed.
Extension
css-module/less/scss
vite supports module by default, just add a module to the file name, such as: xx.module.css, it becomes a module, more create-react- app.
For scss/less support, installation dependencies are as follows:
$ npm install less sass -D
The module mode of css/less is the same as css, such as: xx.module.scss,xx.module.less
Add the global less/scss variable as follows 👇:
1.Add the assets folder under the src folder, add the scss folder, add the varible.scss file in the scss folder, and add it in the src/assets/ Write the following code in scss/varible.scss:
$bg: #f0f0f0;
@mixin flexContainer($jc) {
  display: flex;
  flex-direction: row;
  flex-wrap: wrap;
  justify-content: $jc;
}
@mixin style($size, $color, $bold: normal) {
  font-size: $size;
  color: $color;
  font-weight: $bold;
}
2.Under the config folder, add the style folder, and add the index.ts under the style folder, write the following code in the config/style/index.ts:
import {CSSOptions} from'vite';
const cssOption: CSSOptions = {
  preprocessorOptions: {
    less: {
      javascriptEnabled: true,
    },
    scss: {
      additionalData:'@import "./src/assets/scss/varible.scss";',
    },
  },
};
export default cssOption;
Note:If you quote the format of
@importinadditionalData, you must add;at the end, otherwise an error will be reported
3.Find the vite.config.ts file and add the following code:
import {defineConfig} from'vite';
import createVitePlugins from'./config/plugins';
+ import cssOption from'./config/style';
export default defineConfig((configEnv) => {
  return {
    plugins: createVitePlugins(),
    + css: cssOption,
  };
});
4.Replace app.css in src/app.css with app.module.scss, such as: app.css->app.module.scss,
Change the code in the src/App.tsx file:
import React, {FC, useEffect} from'react';
 -import'./app.css';
 + import styles from'./app.module.scss';
const App: FC = () => {
  useEffect(() => {
      console.log(`vite-react-cil`);
  }, []);

  return (
    <div className={styles.App}>
      <h2>Welcome to vite-react-cil</h2>
    </div>
  );
};
Environment variables
In vue-cil,create-react-app,set environment variables, you can set custom environment variables through cross-env+.env file, and use process.env,get custom environment variables, but there is a difference in vite.
Set environment variables in vite
1.Add four files .env, .env.alpha, .env.preprod, .env.prod, and change the directory at the same level of src.
Write the following code in the .env file:
NODE_ENV=development
VITE_APP_ANT=dev
Write the following code in the .env.alpha file:
NODE_ENV=production
VITE_APP_ANT=alpha
Write the following code in the .env.preprod file:
NODE_ENV=production
VITE_APP_ANT=preprod
Write the following code in the .env.prod file:
NODE_ENV=production
VITE_APP_ANT=prod
They represent the four environment variables of development, test, pre-release, and production respectively. If you want to expand other variables, and so on.
Note:Customized environment variables must be variables prefixed with
VITEto be exposed tovite, such as: VITE_APP_SOME
2.Find the package.json file and add the following code:
{
  "scripts": {
   -"dev": "vite",
   + "dev": "vite --mode dev",
   + "build:alpha": "vite build --mode alpha",
   + "build:preprod": "vite build --mode preprod",
   + "build:prod": "vite build --mode prod"
  },
}
Hint:The reason for adding
--modeto the command inpackage.jsonis to override the default modeproduction,developmentused by the command
3.Declare custom environment variables in the typescript environment.
In the src folder, create a new vite-env.d.ts file, and write the following code in the src/vite-env.d.ts file:
/// <reference types="vite/client" />
interface ImportMetaEnv {
  VITE_APP_ANT:'dev' |'alpha' |'preprod' |'prod';
}
-Get environment variables in vite
Get environment variables in vite through: import.meta.env, not process.env, if you want to get it in the code, every time through import.meta.env, write It is really cumbersome, it is better to encapsulate a method.
In the src folder, create a new utils folder, and create a new index.ts in the utils folder. Write the following code in src/utils/index.ts:
export const environmentVariable = () => {
  const env = import.meta.env.VITE_APP_ANT;
  let parps = null;
  switch (env) {
    case'dev':
      parps ='dev';
      break;
    case'alpha':
      parps ='alpha';
      break;
    case'preprod':
      parps ='preprod';
      break;
    case'prod':
      parps ='prod';
      break;
    default:
      parps ='dev';
      break;
  }
  return parps;
};
In this way, no matter where we want to use environment variables, we only need to call the environmentVariable method.
base/server configuration
1.Create a new index.ts in the config folder, and write the following code in config/index.ts:
/**
 * @description Development port
 */
export const VITE_APP_PORT = 3000;
/**
 * @description public base path
 */
export const VITE_APP_BASE ='/';
/**
 * @description Whether to automatically open the application in the browser
 */
export const VITE_APP_OPEN = true;
Note:All files in
configcannot be passed,import.meta.envto get environment variables will report an error. If you want to use environment variables in theconfigfile, you can only pass in viavite-config-ts, Pass in to theconfigfile throughconfigEnv, then theconfigfile must be written in the form of a function
2 Create a new setupProxy.ts file in the config folder to use as a custom proxy. Write the following code in config/setupProxy.ts:
import {ProxyOptions} from'vite';
const proxy: Record<string, string | ProxyOptions> = {
  // String shorthand
  '/foo':'http://localhost:4567',
  // Option writing
  '/api': {
    target:'http://jsonplaceholder.typicode.com',
    changeOrigin: true,
    rewrite: (path) => path.replace(/^\/api/,''),
    // For more, please see: https://cn.vitejs.dev/config/#server-proxy
  },
};
export default proxy;
3.Find the vite.config.ts file and add the following code:
import {defineConfig} from'vite';
import createVitePlugins from'./config/plugins';
import cssOption from'./config/style';
+ import {VITE_APP_BASE, VITE_APP_PORT, VITE_APP_OPEN} from'./config';
+ import proxy from'./config/setupProxy';
export default defineConfig((configEnv) => {
  return {
    + base: VITE_APP_BASE,
    plugins: createVitePlugins(),
    css: cssOption,
    + server: {
      host: true,
      port: VITE_APP_PORT,
      open: VITE_APP_OPEN,
      proxy,
    },
  };
});
Alias configuration
Find the vite.config.ts file and add the following code:
Install path first.
$ npm install path -D
... omitted
+ import path from'path';
export default defineConfig((configEnv) => {
   return {
    ... omitted
      + resolve: {
       alias: {
         '@': path.resolve(__dirname,'src'),
       },
     },
   };
});
build configuration
1.Find the config/index.ts file and add the following code:
...Omitted
/**
 * @description Whether to open the packaged analysis visualization diagram in the packaging environment
 */
+ export const VITE_APP_VISUALIZER = false;
/**
 * @description is in the packaging environment, remove console.log
 */
+ export const VITE_APP_CONSOLE = true;
/**
 * @description delete debugger in packaging environment
 */
+ export const VITE_APP_DEBUGGER = true;
/**
 * @description Whether to generate a source map file in the packaging environment
 */
+ export const VITE_APP_SOURCEMAP = false;
2.In the config/plugins folder, create a new visualizer.ts file
Install rollup-plugin-visualizer
$ npm install rollup-plugin-visualizer -D
In the config/plugins/visualizer.ts file, write the following code:
import visualizer from'rollup-plugin-visualizer';
export default function configVisualizerConfig() {
  return visualizer({
   // Write the packaged dependency analysis visualization page to node_modules, so that it does not occupy a position
    filename:'./node_modules/.cache/visualizer/stats.html',
    open: true,
    gzipSize: true,
    brotliSize: true,
  });
}
3.Find the config/plugins/index.ts file and add the following code:
import {Plugin} from'vite';
import reactRefresh from'@vitejs/plugin-react-refresh';
+ import {VITE_APP_VISUALIZER} from'../index';
+ import configVisualizerConfig from'./visualizer';
export default function createVitePlugins() {
  const vitePlugins: (Plugin | Plugin[])[] = [
    reactRefresh(),
  ];
  + VITE_APP_VISUALIZER && vitePlugins.push(configVisualizerConfig());
  return vitePlugins;
}
4.In the config folder, create a new build.ts file and write the following code:
import {BuildOptions} from'vite';
import {VITE_APP_CONSOLE, VITE_APP_DEBUGGER, VITE_APP_SOURCEMAP} from'../config';
const build: BuildOptions = {
  terserOptions: {
    compress: {
      keep_infinity: true,
      drop_console: VITE_APP_CONSOLE,
      drop_debugger: VITE_APP_DEBUGGER,
    },
  },
  outDir:'dist', // Specify the output path directory
  assetsDir:'assets', // Specify the storage path directory for packaging and generating static resources
  sourcemap: VITE_APP_SOURCEMAP, // Whether to generate a source map file after construction
};
export default build;
5.Find the vite.config.ts file and add the following code:
... omitted
+ import build from'./config/build';
export default defineConfig((configEnv) => {
  return {
   ... omitted
    + build
  };
});
Advanced
eslint
1.Install the following dependencies first:
$ npm install @typescript-eslint/eslint-plugin eslint eslint-plugin-import eslint-plugin-jsx-a11y eslint-plugin-prettier @typescript-eslint/parser eslint-config-prettier eslint-plugin-react eslint-plugin-react -hooks eslint-plugin-simple-import-sort -D
Hint:As above, these dependencies are installed according to their own circumstances. I have installed them all here, including
@typescript-eslint/eslint-plugin,eslint-plugin-react, andeslint-plugin-react-hooksRelative to the others, each dependency is more important, and it is recommended to install it.
2.Create a new.eslintrc.js,.eslintignoretwo files, and change thesrcto the same level directory.
Write the following code in the.eslintrc.jsfile:
module.exports = {
  root: true,
  parser:'@typescript-eslint/parser',
  parserOptions: {
    ecmaVersion: 2020,
    sourceType:'module',
    ecmaFeatures: {
      jsx: true,
    },
  },
  settings: {
    react: {
      version:'detect',
    },
  },
  env: {
    browser: true,
    amd: true,
    node: true,
  },
  extends: [
    'eslint:recommended',
    'plugin:react/recommended',
    'plugin:react-hooks/recommended',
    'plugin:jsx-a11y/recommended',
    'plugin:prettier/recommended',
  ],
  plugins: ['simple-import-sort','prettier'],
  rules: {
    'prettier/prettier': ['error', {}, {usePrettierrc: true }],
    'react/react-in-jsx-scope':'off',
    'jsx-a11y/accessible-emoji':'off',
    'react/prop-types':'off',
    '@typescript-eslint/explicit-function-return-type':'off',
    'simple-import-sort/imports':'off',
    'simple-import-sort/exports':'error',
    'jsx-a11y/anchor-is-valid': [
      'error',
      {
        components: ['Link'],
        specialLink: ['hrefLeft','hrefRight'],
        aspects: ['invalidHref','preferButton'],
      },
    ],
    'no-debugger': 0,
    eqeqeq: 2,
    'default-case': 1,
    'no-empty-function': 1,
    'no-multi-spaces': 1,
    'spaced-comment': ['error','always'],
    'no-multiple-empty-lines': ['error', {max: 3 }],
  },
};
Hint:The above
eslintconfiguration, you don't need to change like mine, you can make the correspondingeslintconfiguration according to your own actual situation, please refer to eslint official website.
Write the following code in the.eslintignorefile:
node_modules
.DS_Store
dist
coverage
src/__tests__
__tests__
dist-ssr
*.local
node_modules/*
3.Find the package.json file and add the following code:
... omitted
+ "lint": "eslint ./src --ext .jsx,.js,.ts,.tsx",
+ "lint:fix": "eslint ./src --ext .jsx,.js,.ts,.tsx --fix",
The npm run lint command can detect all irregular codes in the src file.
The npm run lint:fix command can automatically fix all irregular codes in the src file.
😦, now we can indeed check the code specifications, but there is a problem, these detected codes must require me to type commands, and they are not auto detected in development mode. This behavior is very unfriendly, like us in webpack Can use eslint-loader to automatically detect in development mode, so does vite also have plug-ins similar to eslint-loader? Of course there is.
4.Install the following dependencies:
$ npm install vite-plugin-checker -D
5.Find the config/index.ts file and add the following code:
/**
 * @description Whether to start eslint in development mode
 */
+ export const VITE_APP_ESLINT = true;
6.Find the config/plugins folder, create a new eslint.ts file, and write the following code in the config/plugins/eslint.ts file:
import checker from'vite-plugin-checker';
export default function configEslint() {
  return [
    checker({
      typescript: true,
      eslint: {
        files: ['./src'],
        extensions: ['.ts','.tsx','.jsx'],
      },
    }),
  ];
}
Hint:I do not recommend you to use the
vite-plugin-eslintplug-in. This plug-in will prevent hot updates when it detects errors.
7.Find the config/plugins/index.ts file and add the following code:
import {Plugin} from'vite';
import reactRefresh from'@vitejs/plugin-react-refresh';
+ import {VITE_APP_VISUALIZER,VITE_APP_ESLINT} from'../index';
import configVisualizerConfig from'./visualizer';
+ import configEslint from'./eslint';
export default function createVitePlugins() {
      const vitePlugins: (Plugin | Plugin[])[] = [
        reactRefresh(),
      ];
      VITE_APP_VISUALIZER && vitePlugins.push(configVisualizerConfig());
      + VITE_APP_ESLINT && vitePlugins.push(...configEslint());
      return vitePlugins;
}
At this point, we have configured a configuration for automatic detection in a development environment.
jest
1.Install the following dependencies:
$ npm install @testing-library/jest-dom @types/jest jest ts-jest identity-obj-proxy -D
2.Add the file jest.config.js, the same level as src, and write the following code:
module.exports = {
  preset:'ts-jest',
  roots: ['<rootDir>/src'],
  moduleDirectories: ['node_modules','src'],
  transform: {
    '^.+\\.tsx$':'ts-jest',
    '^.+\\.ts$':'ts-jest',
  },
  testRegex:'(/__tests__/.*.(test|spec)).(jsx?|tsx?)$',
  moduleFileExtensions: ['ts','tsx','js','jsx','json','node'],
  collectCoverage: true,
  collectCoverageFrom: ['<rootDir>/src/**/*.{ts,tsx,js,jsx}'],
  coverageDirectory:'<rootDir>/coverage/',
  verbose: true,
  testTimeout: 30000,
  testEnvironment:'jsdom',
  coveragePathIgnorePatterns: ['<rootDir>/node_modules/','(.*).d.ts$'],
  moduleNameMapper: {
    '^.+\\.module\\.(css|styl|less|sass|scss|png|jpg|ttf|woff|woff2|svg)$':'identity-obj-proxy',
  },
};
Hint:The configuration of
jestis different for each company, so it may not follow my configuration. For the configuration ofjest, please refer to jest official website
3.Under thesrcfolder, add the__tests__folder, and add theApp.test.tsxfile in the__tests__folder, and write the following code:
import React from'react';
import {render, cleanup, getByTestId} from'@testing-library/react';
import'@testing-library/jest-dom';
import App from'../App';

afterEach(cleanup);

describe('<App />', () => {
  it('renders without errors', () => {
    const {container} = render(<App />);
    // The a tag contains data-testid='aNoDisabled', check
    expect(getByTestId(container,'aNoDisabled')).not.toBeDisabled();
  });
});
Hint:Everyone’s test style is different. You can test with your own test style. You can write different
testaccording to,component,module,method, etc., I will introduce a simple one here. of
4.Find the package.json file and add the following code:
... omitted
+ "test": "jest --colors --passWithNoTests",
+ "test:watch": "jest --watchAll"
Hint:If you think your own configuration of
jestis more complicated, you can recommend you to use vite-plugin-test
svg import by name
If we want to import multiple svg files, the usual approach is to import xx from'xx.svg, write multiple import, or import multiple require array lists in js , And other methods are to obtain all the svg in the folder directly through operation, and then traverse. Most of these schemes are too cumbersome.
In webpack, we can use the plug-in svg-sprite-loader to reduce our operations. Write the name of svg directly to import it directly, which is very convenient.
It can also be done in vite, through the vite-plugin-svg-icons plug-in, the specific implementation is as follows:
1.Installation dependencies
$ npm install vite-plugin-svg-icons -D
2.Under the src folder, create a new icons folder, and in the icons folder, add a logon.svg file.
- Under the
pluginsfolder, create a newsvgIcons.tsfile and write the following code:
 import viteSvgIcons from'vite-plugin-svg-icons';
import path from'path';
export default function configSvgIcons() {
  return viteSvgIcons({
    iconDirs: [path.resolve(process.cwd(),'src/icons')],
    symbolId:'icon-[dir]-[name]',
  });
}
4.In config/plugins/index.ts, add the following code:
 + import configSvgIcons from'./svgIcons';
import {Plugin} from'vite';
import reactRefresh from'@vitejs/plugin-react-refresh';
export default function createVitePlugins() {
  const vitePlugins: (Plugin | Plugin[])[] = [
    reactRefresh(),
    + configSvgIcons()
  ];
  ...Omitted
  return vitePlugins;
}
5.Under the src folder, create a new components folder, create a new folder svgIcon folder in the components folder, and finally create a new index.tsx under thesrc/components/svgIconfolder, and write the following code:
import React, {memo, useMemo} from'react';
export type svgProps = {
  iconClass: string;
  fill?: string;
  fontSize?: string;
  className?: string;
  style?: React.CSSProperties;
  onClick?: React.MouseEventHandler<SVGSVGElement>;
};
const SvgIcon: React.FC<svgProps> = memo(function SvgIcon({
  iconClass,
  fill,
  fontSize = '18px',
  className,
  onClick,
  style,
}) {
  const iconName = useMemo(() =>'#icon-' + iconClass, [iconClass]);
  return (
    <svg
      fontSize={fontSize!}
      style={{ ...svgStyle, fontSize, ...style }}
      aria-hidden="true"
      className={className!}
      onClick={onClick}
    >
      <use xlinkHref={iconName} fill={fill!} />
    </svg>
  );
});
const svgStyle = {
  width: '1em',
  height: '1em',
  verticalAlign:'-0.15em',
  overflow:'hidden',
  fill:'currentColor',
  fontSize: '1.1em',
};
export default SvgIcon;
6.In the src/main.tsx file, add the following code:
+ import'virtual:svg-icons-register';
... omitted
7.To use, add the following code in the src/App.tsx file:
...Omitted
+ import SvgComponent from'./components/svgIcon';
const App: FC = () => {
  return (
    <div className={styles.App}>
      <h2>Welcome to vite-react-cil</h2>
     + <SvgComponent iconClass="logon" fontSize="30px" />
    </div>
  );
};
export default App;
Third-party ui components, imported on demand
In the project, ui components such as antd and element may be used. We generally introduce them on demand, not all of them. This will cause the package to be very large when packaging. The specific operations of vite are as follows :
1.Installation dependencies
$ npm install vite-plugin-style-import -D
$ npm install antd -S
2.In the config/plugins folder, create a new styleImport.ts file and write the following code:
import styleImport from'vite-plugin-style-import';
export default function configStyleImport() {
  return styleImport({
    libs: [
      {
        libraryName:'antd',
        esModule: true,
        resolveStyle: (name) => {
          return `antd/es/${name}/style/index`;
        },
      },
    ],
  });
}
3.In config/plugins/index.ts, add the following code:
+ import configStyleImport from'./styleImport';
import {Plugin} from'vite';
import reactRefresh from'@vitejs/plugin-react-refresh';
export default function createVitePlugins() {
  const vitePlugins: (Plugin | Plugin[])[] = [
    reactRefresh(),
    ...Omitted
    + configStyleImport()
  ];
  ...Omitted
  return vitePlugins;
}
prettierrc format code
Install the following dependencies:
$ npm install prettier -D
The vscode editor installs the Prettier-Code formatter plug-in for use together.
1.Add the two files .prettierignore and .prettierrc, and change the directory at the same level as src
.prettierrc write the following code:
{
  "singleQuote": true,
  "trailingComma": "all",
  "prettier.tabWidth": 2,
  "editor.defaultFormatter": "esbenp.prettier-vscode",
  "[typescript]": {
    "editor.defaultFormatter": "esbenp.prettier-vscode"
  },
  "[javascript]": {
    "editor.defaultFormatter": "esbenp.prettier-vscode"
  },
  "[css]": {
    "editor.defaultFormatter": "esbenp.prettier-vscode"
  },
  "[scss]": {
    "editor.defaultFormatter": "esbenp.prettier-vscode"
  },
  "overrides": [
    {
      "files": ".prettierrc",
      "options": {"parser": "json"}
    }
  ]
}
Hint:The configuration file of
prettierrccan also be ajsfile. For the specific configuration and usage ofprettierrc, please refer to Official Website
.prettierignorewrite the following code:
**/*.md
**/*.svg
**/*.ejs
**/*.html
package.json
2.Add the following code in package.json:
{
  "scripts": {
    "format": "prettier --loglevel warn --write \"./**/*.{js,jsx,ts,tsx,css,md,json}\"",
  }
}
Enter npm run format to format the code
mock
I use less mock here. I basically write the serve interface by myself. I recommend you to use the vite-plugin-mock plug-in. For configuration, the plug-in configuration I introduced earlier is similar. Create a new configMock.ts in config/plugins, and create a new mock folder to store the simulated asynchronous interface. The mock folder is moreThe src directory is at the same level.
editorconfig
The team code style is configured uniformly. It is recommended that you use editorconfig.
1.Install the plug-in EditorConfig for VS Code for the vscode editor. Of course, other editors are also possible, but the corresponding editorconfig plug-in needs to be downloaded. I will use vscode as the main one here.
2.Create a new .editorconfig file, the same level directory as src, and write the following code:
  [*.{js,jsx,ts,tsx,vue}]
charset = utf-8
indent_style = space
indent_size = 2
end_of_line = lf
trim_trailing_whitespace = true
insert_final_newline = true
max_line_length = 100
Hint:The code style configuration of each team is inconsistent, this needs to be configured according to the actual situation of their own team
Deployment
The deployment of each company is different. Some use jenkins, gh-pages, docker, etc., so for the deployment, you can read other articles. I will not elaborate here.
Summarize
After the previous step-by-step construction, the overall structure of the final project is as follows:
├── config
│ ├── plugins
│ ├── style
│ ├── build.ts
│ ├── index.ts
│ ├── setupProxy.ts
├── public
├── mock
├── src
│ ├── __tests__
│ ├── assets
│ ├── components
│ ├── icons
│ ├── utils
│ ├── app.module.scss
│ ├── App.tsx
│ ├── main.tsx
│ ├── vite-env.d.ts
├── .editorconfig
├── .env
├── .env.alpha
├── .env.preprod
├── .env.prod
├── .eslintignore
├── .eslintrc.js
├── .gitignore
├── .prettierignore
├── .prettierrc
├── jest.config.js
├── index.html
├── tsconfig.json
├── vite.config.ts
└── package.json
in conclusion:
1.Although vite is a newcomer, its shortcomings are also obvious. The ecology has not yet been fully popularized. It is still the master of webpack and has advantages in construction.
2.vite is indeed better than webpack in terms of performance, and because of vite, many people now know rollup, no matter what, vite is worth learning and understanding.
3.We can't blindly follow the wind and see that other companies use vite, and we also want to restructure the company's projects into vite, which is more realistic.
Project Address/Case Actual Combat
Project address👉vite-react-cil.
Case actual combat:
-ant-simple-pro is a middle-office solution that supports vue3, react, angular3 big frameworks, Version 3.0 has all been refactored with vite.
-JoL-player is a powerful react player, developed by typescript, and bate3.0 version is refactored with vite
This content originally appeared on DEV Community and was authored by lgf196
lgf196 | Sciencx (2021-10-09T07:12:44+00:00) Must-see + collection, build a vite-react-cil enterprise scaffolding from scratch. Retrieved from https://www.scien.cx/2021/10/09/must-see-collection-build-a-vite-react-cil-enterprise-scaffolding-from-scratch/
Please log in to upload a file.
There are no updates yet.
Click the Upload button above to add an update.