
This content originally appeared on DEV Community and was authored by Neil James
This is a quick guide for engineers who doesn't have broad knowledge in setting up SSL together with nginx from scratch.
Things to be familiar with:
- Docker
- Nginx
- Node (Can be any web framework)
Disclaimer
I won't be tackling in depth topics about docker, nginx, etc.
What we're gonna build
A simple microservice that serves up a backend service which is served in nginx inside the swag container.
Let's dive into it!

Setting Up a Web Server
We're going to create a simple web server using Express JS or you can clone the repository here and https://github.com/nljms/linux-server-swag-demo/.
Once the server is up and running let's proceed to the next step 🙂

Dockerizing the services we need.
In order to build our microservices, we have to create their images first. If you have cloned the repository given above, you'll notice that there were two Dockerfiles (the Dockerfile which serves as the node application image, and the Dockerfile.swag which is a custom image of linuxserver.io/swag
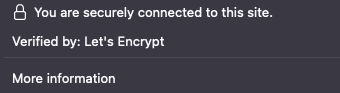
Note: I mentioned before that we're gonna be using nginx on this project. Since we're going to secure the server with letsencrypt, I found an easier way on how to do it in just a few steps with linuxserver/swag image.
You can read more about the documentation here on their documentation
![]()
Since the first image is only about the containerized node application. I'll only be discussing the custom swag image.
# Dockerfile.swag

FROM ghcr.io/linuxserver/swag

COPY ./default.conf /config/nginx/site-confs/default
What we only do here is that we replace the default configuration of the nginx inside the image since we're just going to reverse proxy our demo_api service which is here:
   location / {
        proxy_pass http://demo_api:3000;
    }
Note: I only modified the nginx configuration which I copied inside the
swagimage and put it insidenginx/default.conffile (you can name it whatever you want but just make sure to apply the changes the Dockerfile).Additional Note: If you notice that we're proxying
demo_apiinstead of a local address, indocker-composewe can have a default network or create a network for the services to communicate by theirhostnameidentical to theircontainer name.
You can check out the compose file here.
Linux Server SWAG image usage:
Inside our compose file, we have the swag service:
  swag:
    build:
      dockerfile: ./Dockerfile.swag
      context: .
    container_name: swag
    cap_add:
      - NET_ADMIN
    environment:
      PUID: 1000 # required
      PGID: 1000 # required
      TZ: Singapore # required
      URL: '${YOUR_DOMAIN}' # required
      VALIDATION: http # required
      DEFAULT_CONF: '${DEFAULT_CONF}' # required
    volumes:
      - swag:/config # I created a volume named swag to persist the config directory inside the container
    ports:
      - 443:443
      - 80:80 #optional
    restart: unless-stopped
    networks:
      - local-network
You only have to provide the URL environment variable which in your case was your domain name (Please make sure that your domain name is available), then run
docker-compose up --build -d
to build the dockerfiles and run it on detach mode. And that's it! Your server is now secured!
You can check the full documentation of linuxserver/swag here
Thank you so much for reading and I hope I helped you in such a little way. Have a great day!
This content originally appeared on DEV Community and was authored by Neil James
Neil James | Sciencx (2021-11-17T04:23:07+00:00) How to secure your server with SSL in less than 10 minutes. Retrieved from https://www.scien.cx/2021/11/17/how-to-secure-your-server-with-ssl-in-less-than-10-minutes/
Please log in to upload a file.
There are no updates yet.
Click the Upload button above to add an update.