
This content originally appeared on DEV Community and was authored by Carlo Gino Catapang
Preface
This post will be the first part of the series on how I will create the entire application. So I will start with a boring introduction about the motivation for this series.
Because I recently scored very low on my IELTS exam, I plan to create an application to help me to expand my English Vocabulary while learning Remix. With regards to why I have chosen Supabase to store my data, it is because it allows me to focus on the frontend part due to Supabase's easy-to-use API.
This part will focus on how to use Remix and Supabase for CRUD operations.
Prerequisites if you want to follow along
If you are not yet familiar with Remix, I suggest checking first my previous blog post about it.
Create a Supabase project
Refer to their official documentation on how to create a Supabase project.
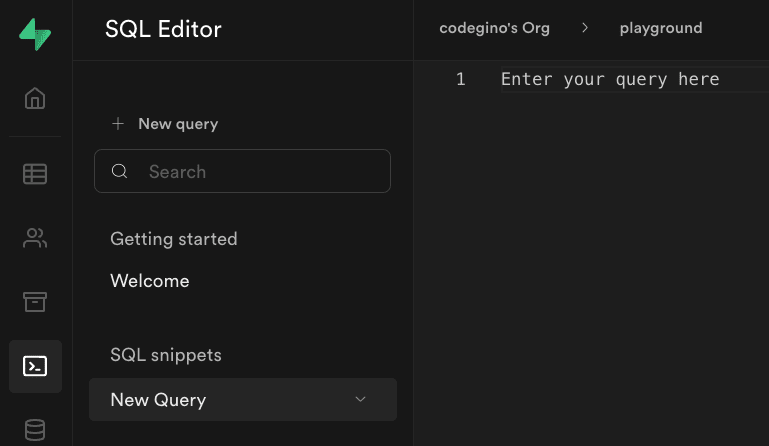
After creating your account, go to SQL Editor tab and execute the queries below:
Create words table
CREATE TABLE words (
  id bigint GENERATED BY DEFAULT AS IDENTITY PRIMARY KEY,
  name varchar NOT NULL,
  definitions varchar ARRAY NOT NULL,
  sentences varchar ARRAY NOT NULL,
  type varchar NOT NULL
);
Add a new word
INSERT INTO words
  (name, type, definitions, sentences)
VALUES
  ('hello', 'noun', ARRAY['used as a greeting'], ARRAY['Hello world.']);
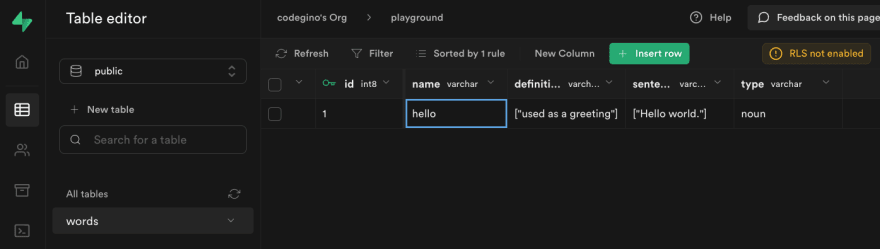
In the Table Editor tab, you should see the new entry.
Add anonymous access
ALTER TABLE words ENABLE ROW LEVEL SECURITY;

CREATE POLICY "anon_select" ON public.words FOR SELECT USING (
  auth.role() = 'anon'
);

CREATE POLICY "anon_insert" ON public.words FOR INSERT WITH CHECK (
  auth.role() = 'anon'
);

CREATE POLICY "anon_update" ON public.words FOR UPDATE USING (
  auth.role() = 'anon'
);

CREATE POLICY "anon_delete" ON public.words FOR DELETE USING (
  auth.role() = 'anon'
);
Lastly, in Authentication/Policies tab, should be seeing this.

Create a Remix project
Installation
npx create-remix@latest
cd [whatever you named the project]
Cleaning up
# Remove demo files
rm -rf app/routes/demos app/styles/demos

# We'll recreate this files later
rm app/routes/index.tsx app/root.tsx
Re-create file root.tsx file under app folder.
// app/root.tsx
import {Links,LiveReload,Meta,Outlet,Scripts,ScrollRestoration,useCatch} from "remix";

export default function App() {
  return (
    <Document>
      <Layout>
        <Outlet />
      </Layout>
    </Document>
  );
}

function Document({
  children,
  title,
}: {
  children: React.ReactNode;
  title?: string;
}) {
  return (
    <html lang="en">
      <head>
        <meta charSet="utf-8" />
        <meta name="viewport" content="width=device-width,initial-scale=1" />
        {title ? <title>{title}</title> : null}
        <Meta />
        <Links />
      </head>
      <body>
        {children}
        <ScrollRestoration />
        <Scripts />
        {process.env.NODE_ENV === "development" && <LiveReload />}
      </body>
    </html>
  );
}

function Layout({children}: React.PropsWithChildren<{}>) {
  return (
    <main>{children}</main>
  );
}

export function CatchBoundary() {
  let caught = useCatch();

  let message;
  switch (caught.status) {
    case 404:
      message = <p>This is a custom error message for 404 pages</p>
      break;
    // You can customize the behavior for other status codes
    default:
      throw new Error(caught.data || caught.statusText);
  }

  return (
    <Document title={`${caught.status} ${caught.statusText}`}>
      <Layout>
        <h1>
          {caught.status}: {caught.statusText}
        </h1>
        {message}
      </Layout>
    </Document>
  );
}
Re-create file index.tsx file under app/routes folder.
// app/routes/index.tsx
export default function Index() {
  return (
    <div>
      <h1>Hello world</h1>
    </div>
  );
}
The mandatory hello world page is now ready.

Expect the design will be terrible, I will create a separate blog for styling.
Integration Prerequisites
Install Supabase javascript library
npm install @supabase/supabase-js

OR

yarn add @supabase/supabase-js
Create a Supabase client utility
The next step will allow us to create a Supabase client utility that we can use across the whole application.
Create a .env file to hold your Supabase credentials.
SUPABASE_ANON_KEY=YOUR_SUPABASE_ANON_KEY
SUPABASE_URL=YOUR_SUPABASE_URL
Make sure to add
.envin the.gitignorefile.
Create a Supabase client utility for reusability
// libs/supabase-client.ts
import { createClient } from "@supabase/supabase-js";

const supabaseUrl = process.env.SUPABASE_URL as string;
const supabaseKey = process.env.SUPABASE_ANON_KEY as string;

export const supabase = createClient(supabaseUrl, supabaseKey);
Chores before integration
(OPTIONAL)Create type definition
If you prefer not to use TypeScript, remove the declarations and usages of types, and change the file extensions from
.tsxto.jsx.
// app/models/word.ts
export enum WordType {
  NOUN = "noun",
  VERB = "verb",
  ADJECTIVE = "adjective",
}

export type Word = {
  id: number;
  name: string;
  sentences: string[];
  definitions: string[];
  type: WordType;
};
(OPTIONAL) Redirect / to /words
As I plan to create multiple mini-apps in this project, I'll redirect / to /words, for now.
The code below will ensure we don't need to manually navigate to /words every time we open the root page.
// app/routes/index.tsx
import { redirect } from "remix";

export function loader() {
  return redirect("/words", 308);
}

Integrating Supabase with Remix
Create the words listing page
fetch data from Supabase using Remix's loader
// app/routes/words.tsx
import type { LoaderFunction } from "remix";
import { supabase } from "~/libs/supabase-client";
import { Word } from "~/models/word";

export const loader: LoaderFunction = async () => {
  const { data: words } = await supabase
    .from<Word>("words")
    .select("id,name,type");

  // We can pick and choose what we want to display
  // This can solve the issue of over-fetching or under-fetching
  return words;
};
Create a React component to display the list of words
// app/routes/words.tsx
import { useLoaderData, Link } from "remix";

// export const loader ...

export default function Index() {
  const words = useLoaderData<Word[]>();

  return (
    <div>
      <h1>English words I learned</h1>
      <ul>
        {words.map((word) => (
          <li key={word.id}>
            <div>
              <Link to={`/words/${word.id}`}>
                {word.name} | {word.type}
              </Link>
            </div>
          </li>
        ))}
      </ul>
    </div>
  );
}
The code above will fetch the data from Supabase and display it in a list.

Word details page
Create a file named $id.tsx under app/routes/words folder.
Create the loader function
// app/routes/words/$id.tsx
import type { LoaderFunction } from "remix";
import { supabase } from "~/libs/supabase-client";
import { Word } from "~/models/word";

export const loader: LoaderFunction = async ({ params }) => {
  const { data } = await supabase
    .from<Word>("words")
    .select("*")
    .eq("id", params.id as string)
    .single();

  return data;
};
Create the component
// app/routes/words/$id.tsx
// import ...
import { /*other imports*/, useLoaderData } from "remix";

// export const loader ...

export default function Word() {
  const word = useLoaderData<Word>();

  return (
    <div>
      <h3>
        {word.name} | {word.type}
      </h3>
      {word.definitions.map((definition, i) => (
        <p key={i}>
          <i>{definition}</i>
        </p>
      ))}
      {word.sentences.map((sentence, i) => (
        <p key={i}>{sentence}</p>
      ))}
    </div>
  );
}
The image below shows that it still won't show even after creating the /words/[id] route.

Adding a router Outlet
We need to add an Outlet inside our Words Index component to fix the above issue.
// app/routes/words.tsx
import {/*other imports*/, Outlet} from "remix";

// export const loader ...

export default function Index() {
  const words = useLoaderData<Word[]>();

  return (
    <div>
      <h1>English words I learned</h1>
      {/* To put the list and outlet side by side */}
      <div style={{ display: "flex", justifyContent: "space-between" }}>
        <ul>
          {words.map((word) => (
            <li key={word.id}>
              <Link to={`/words/${word.id}`}>
                {word.name} | {word.type}
              </Link>
            </li>
          ))}
        </ul>
        <Outlet /> {/* <-- this is where $id.tsx will render */}
      </div>
    </div>
  );
}
After clicking on a word, $id.tsx route will render on where we put the Outlet.
Delete a word entry
Since we're already on the /words/$id page, let's proceed with deletion first
Add a button to delete the word
// app/routes/words/$id.tsx
import {/*other imports*/, Form} from "remix";

// export const loader ...

export default function Index() {
  // ...

  return (
    <div>
      {/* previous content */}
      <Form method="post">
        <input type="hidden" name="_method" value="delete" />
        <button type="submit">Delete</button>
      </Form>
    </div>
  );
}
The image shows a message that we did not define any action to handle the submit event.

Delete the word in the database using Remix's action
// app/routes/words/$id.tsx
import { /*other imports*/, redirect} from "remix";
import type {/*other imports*/, ActionFunction} from "remix";

export const action: ActionFunction = async ({ request, params }) => {
  const formData = await request.formData();

  if (formData.get("_method") === "delete") {
    await supabase
      .from<Word>("words")
      .delete()
      .eq("id", params.id as string);

    return redirect("/words");
  }
};

// ...rest of the code
After we click on the delete button, the word hello will be deleted from the database, and the page will redirect to the /words page.

Explanation:
- We created a form with a hidden input field named
_methodwith valuedelete. - When the submit button is clicked, the
actionhandler will trigger in the server. - Inside the
actionhandler, we check if the_methodisdelete. - If it is, we delete the word from the database.
Why go through all this trouble?
It just happens that this approach does not need any JavaScript to run(try it on your browser).
This means our app is interactive even before we load the JavaScript from the server.
Add a new word
Now we don't have anything on the list; let's create the route to handle creation.
Create a button in the /words route that will navigate to /words/add
// app/routes/words.tsx
import { /*other imports*/ useNavigate } from "remix";

// export const loader ...

export default function Index() {
  // const words ...
  const navigate = useNavigate();

  return (
    <div>
      <h1>English words I learned</h1>
      <button type="button" onClick={() => navigate("/words/add")}>
        Add new word
      </button>
      {/* previous contents */}
    </div>
  );
}
Create the add new word route
To avoid a 404 page, let's create the /add route.
Create the component
// app/routes/words/add.tsx
import {Form} from "remix";
import { WordType } from "~/models/word";

export default function AddWord() {
  return (
    <Form method="post">
      <div>
        <label htmlFor="name">Word</label>
        <input id="name" name="name" type="text" placeholder="Word" required />
      </div>
      <div>
        <label htmlFor="type">Type</label>
        <select id="type" name="type" defaultValue={WordType.NOUN}>
          <option value={WordType.NOUN}>Noun</option>
          <option value={WordType.VERB}>Verb</option>
          <option value={WordType.ADJECTIVE}>Adjective</option>
        </select>
      </div>
      <div>
        <label htmlFor="sentence.1">Sentences</label>
        <textarea
          id="sentence.1"
          name="sentence"
          placeholder="Sentence"
          minLength={10}
        />
      </div>
      <div>
        <label htmlFor="definition.1">Definitions</label>
        <textarea
          id="definition.1"
          name="definition"
          placeholder="Definition"
          minLength={10}
        />
      </div>
      <button type="submit">Submit</button>
    </Form>
  );
}
The image below shows the form we created after clicking on the Add new word button.
Add an action
To avoid the missing action error after clicking on the Submit button, let's add an action on the words/add route.
// app/routes/words/add.tsx
import { /*other imports*/, redirect } from "remix";
import type { ActionFunction } from "remix";
import { supabase } from "~/libs/supabase-client";

export const action: ActionFunction = async ({ request }) => {
  const formData = await request.formData();

  const newWord = {
    name: formData.get("name"),
    type: formData.get("type"),
    sentences: formData.getAll("sentence"),
    definitions: formData.getAll("definition"),
  };

  const { data } = await supabase.from("words").insert([newWord]).single();

  return redirect(`/words/${data?.id}`);
};
After clicking on the Submit button, the word will be added to the database, and the page will redirect to the /words/$id page.

I'm not sure if you noticed, but we did not use any JavaScript code on the Frontend, yet it could complete the intended task. We only used an HTML form as it was initially used to handle validations and perform the submission. This is what I like about Remix; we can focus on the web fundamentals to become better Web developers.
Edit a word details
Now, to handle the missing operation in our CRUD app, let's add the ability to modify an existing entry.
Create a file named edit.$id.tsx under app/routes/words
When we add a . between words, it will transform to / in the URL.
The above example will result in words/edit/[id].
Create a form for editing the word
Refactoring
Since the edit form is very similar to the add form, we can reuse the same form with additional checks to determine if we are adding or editing.
// app/components/WordForm.tsx
import { Form } from "remix";
import { Word, WordType } from "~/models/word";

export default function WordForm({ word }: { word?: Word }) {
  return (
    <Form method="post">
      <div>
        <label htmlFor="name">Word</label>
        <input
          id="name"
          name="name"
          type="text"
          placeholder="Word"
          required
          defaultValue={word?.name ?? ""}
          disabled={Boolean(word?.name)}
        />
      </div>
      <div>
        <label htmlFor="type">Type</label>
        <select
          id="type"
          name="type"
          defaultValue={word?.type ?? WordType.NOUN}
        >
          <option value={WordType.NOUN}>Noun</option>
          <option value={WordType.VERB}>Verb</option>
          <option value={WordType.ADJECTIVE}>Adjective</option>
        </select>
      </div>
      <div>
        {word?.sentences.map((sentence, i) => (
          <SentenceField index={i + 1} sentence={sentence} key={i} />
        )) ?? <SentenceField index={1} sentence={""} />}
      </div>
      <div>
        {word?.definitions.map((definition, i) => (
          <DefinitionField index={i + 1} definition={definition} key={i} />
        )) ?? <DefinitionField index={1} definition={""} />}
      </div>
      <button type="submit">Submit</button>
    </Form>
  );
}

const SentenceField = ({ index, sentence }) => (
  <div>
    <label htmlFor={`sentence.${index}`}>Sentence #{index}</label>
    <textarea
      id={`sentence.${index}`}
      name="sentence"
      defaultValue={sentence}
      placeholder={`Sentence #${index}`}
      minLength={10}
    />
  </div>
);

const DefinitionField = ({ index, definition }) => (
  <div>
    <label htmlFor={`definition.${index}`}>Definition #{index}</label>
    <textarea
      id={`definition.${index}`}
      name="definition"
      defaultValue={definition}
      placeholder={`Definition #${index}`}
      minLength={10}
    />
  </div>
);
That's a lot of code; however, we can reap the benefits of simplifying the code in add.tsx and edit.$id.tsx.
Update routes/words/add.tsx
// app/routes/words/add.tsx
// other code...

export default function AddWord() {
  return <WordForm />;
}
Create routes/words/edit.$id.tsx
// app/routes/words/edit.$id.tsx
import { useLoaderData } from "remix";
import WordForm from "~/components/WordForm";
import { Word } from "~/models/word";

export default function EditWord() {
  const data = useLoaderData<Word>();

  return <WordForm word={data} />;
}
Now, we have a reusable form. If we have to make a style change, we can update the WordForm component, reflecting the change on both routes.
NOTE: I'm extracting everything to
WordForm.tsxsince it is applicable in my use case.
Create a loader for the word details
In order for the edit form to be populated with the existing data, we need to create a loader.
// app/routes/words/edit.$id.tsx
import { supabase } from "~/libs/supabase-client";
import type {LoaderFunction} from "remix";

export const loader: LoaderFunction = async ({ params }) => {
  const { data } = await supabase
    .from<Word>("words")
    .select("*")
    .eq("id", params.id as string)
    .single();

  return data;
};

// export const EditWord...
Create a button in the /words/$id page to edit a word
// app/routes/words/$id.tsx
import { /*other imports*/, useNavigate } from "remix";

// export const loader...

export default function Word() {
  // const word ...
  const navigate = useNavigate();

  return (
    <div>
      {/* other code... */}
      <button type="button" onClick={() => navigate(`/words/edit/${word.id}`)}>
        Edit
      </button>
    </div>
  );
}
The image below shows the pre-filled form depending on the content of id in the URL.
Add an action handler
To handle the form submission, we need to add an action handler.
// app/routes/words/edit$.id.tsx
import {/*other imports*/, redirect} from "remix";
import type {/*other imports*/, ActionFunction} from "remix";

export const action: ActionFunction = async ({ request, params }) => {
  const formData = await request.formData();
  const id = params.id as string;

  const updates = {
    type: formData.get("type"),
    sentences: formData.getAll("sentence"),
    definitions: formData.getAll("definition"),
  };

  await supabase.from("words").update(updates).eq("id", id);

  return redirect(`/words/${id}`);
};

// export const loader...

// export const EditWord...
After modifying some fields and clicking the submit button, the page will redirect to the /words/$id page with the updated data.

Add indicator for state transition
By utilizing the useTransition hook, we can add or change something on the screen depending on the route's state.
// Routes you want to use useTransition
import { useTransition } from "remix";


// Somewhere in the route's compnent
let transition = useTransition();

<div>... State: {transition.state}</div>
We can replace the text states below with global loading indicator, local component spinner, disabling elements, etc.

Putting all the codes together
Link to the source
Here's a demo
Conclusion
So far, I'm having a positive experience with the framework. Of course, I'm still learning, but I'm enjoying the process.
I'm starting to agree with the Remix team said that if we become better with Remix, we become better with the Web.
Working with Remix allows me to refresh my HTML skills that are almost diminishing due to too much dependency on JavaScript.
I'm looking forward to using more of their features in the next iteration of this app.
What's next?
- Error handling
- Styling
- Authentication
- Pagination
- Deeply nested routes
- SEO
Leave your thoughts in the comments section
This content originally appeared on DEV Community and was authored by Carlo Gino Catapang
Carlo Gino Catapang | Sciencx (2021-11-27T08:38:06+00:00) Remix and Supabase integration. Retrieved from https://www.scien.cx/2021/11/27/remix-and-supabase-integration/
Please log in to upload a file.
There are no updates yet.
Click the Upload button above to add an update.