
This content originally appeared on Envato Tuts+ Tutorials and was authored by Ashlee Harrell


Expand your flyer-making skills with this beach party flyer tutorial. In this summer beach party flyer tutorial, you will learn how to create a beach scene background in Adobe Photoshop, how to apply a wave image to text, and how to format and organize text in Adobe InDesign.
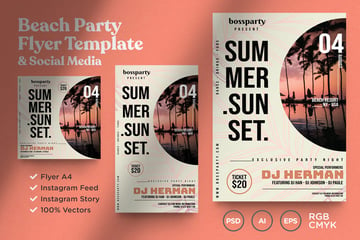
Before we jump in, Envato Elements has an awesome collection of summer party flyer ideas for you to choose from, like the one below. If you're running out of ideas on how to take your designs to the next level, this is for you!


What You'll Learn in This Beach Party Flyer Tutorial
- How to create a beach scene in Photoshop
- How to apply an image to text in InDesign
- How to format and organize text on a beach party flyer template
What You'll Need
1. How to Create a Beach Party Background in Photoshop
Step 1
Open Photoshop and create a new document, File > New. Use the dimensions 8.75 x 11.25 in, 300 Resolution, and CMYK Color.


Step 2
Unzip the sand texture file, and open TX 1506.jpg in Photoshop. Drag and drop this file into the new document we created. Duplicate (Command-J) this layer and place it underneath the original layer. Move it downward so that it covers the bottom half of the image.


Step 3
Apply a Brightness/Contrast layer by creating a new adjustment layer. Change the Brightness to -26 and keep the Contrast at 0. Save this file as a Tiff. Name your file BeachScene_BG.tif.


Step 4
Open the beach ball photo in Photoshop. Go to Image > Mode > CMYK Color to convert the image to CMYK. Use the Pen Tool (P) and create an outline around the ball. Right-click this outline and select Make Selection. Create a mask by selecting the add layer mask icon at the bottom of the Layers panel.


Step 5
Use the Pen tool (P) again and make the beach ball shadow path. Create a selection from this path by right-clicking > Make Selection. Fill this selection with #3e291c. Next, go to Filter > Blur > Gaussian Blur. Change the Blur Radius to 37 pixels. Change the Opacity to 21%. Save this file as a Tiff. When the Tiff Options dialog box appears, make sure the Save Transparency box is checked.


Step 6
Open the umbrella image in Photoshop. Convert this image to CMYK by going to Image > Mode > CMYK Color. Repeat the previous steps to mask out the umbrella image and create the umbrella shadow. Remember, save the umbrella file as a transparent Tiff.


Step 7
Open the beach waves photo in Photoshop, and convert it to CMYK by going to Image > Mode > CMYK Color. Next, go to Image > Image Size and change the Resolution to 300. Make sure Resample is unchecked. Save this file as a Tiff.


2. How to Apply an Image to Text in InDesign
Step 1
Create a new document in InDesign, File > New > Document. Use the dimensions 8.5 x 11 in, with 0.5 in Margins and 0.125 in Bleed on each side. Click Create.


Step 2
Place the sand texture background Tiff into the InDesign document by going to File > Place. Grab the Type Tool (T) and type "Beach Party". Use these settings:
- Beach Party: Davish - Black Font | 221 pt | All Caps


Step 3
Convert the type to outlines by highlighting the text and then selecting Type > Create Outlines. Your type should now be outlined and not editable. Select each word individually and copy (Command-C) and paste (Command-V) each one so that it's no longer within the text frame.


Step 4
Select both of the words and, in the Pathfinder panel, combine the words by selecting the add icon.


Step 5
With "Beach Party" still selected, go to File > Place and select the beach waves Tiff file. Apply an Inner Glow: Objects > Effects > Inner Glow. Use these settings:
- Mode: Screen
- Opacity: 86%
- Technique: Softer
- Source: Edge
- Size: 0.0972 in


3. How to Format and Organize Text for a Beach Party Flyer
Step 1
Select the hamburger icon (three horizontal lines) in the top-right corner of the Swatches panel and select New Color Swatch. Create the color yellow (C0 M18 Y100 K0). Add a blue color swatch using C100 M45 Y0 K33.
Select the Rectangle Tool (M) and make a horizontal yellow rectangle. Create two text boxes using the Type Tool (T) and use these settings:
- Summer Fun Presents: Groteska - Heavy font | 12pt | Blue Swatch | 240pt Tracking
- Give Me 6 Feet: Davish - Black font | 53pt | Paper Swatch
Apply a Drop Shadow effect, go to Object > Effects > Drop Shadow. Change the Mode to Multiply with an Opacity of 75%. The Distance should be 0 in and the Angle 180°. Change the Size to 0.1875 in.


Step 2
Using the Type Tool (T), type out the word "Summer" using the Paper swatch and make it vertical, like the image below. Change the Transparency to Overlay with an Opacity of 50% in the Effects panel: Object > Effects > Transparency. Move this text beneath the "Beach Party" text by right-clicking > Arrange > Send Backward.


Step 3
Use the Rectangle Tool (M) and create a yellow horizontal rectangle below the letter 'Y'. Use the Pen Tool (P) and create a triangle using the yellow swatch. Change the Tint to 50%.


Step 4
Using the Type Tool (T), add some information to the bottom of your beach flyer. Use the Rectangle Tool (M) and change the Fill to None and the 1 pt Stroke to yellow for the box outlines. Create yellow dividers using the Pen Tool (P). Use a 1 pt Stroke. Use these settings for the text:
- Tagline, Address and Subheaders: Groteska - Heavy font | 14pt | Paper swatch | 240pt Tracking
- Time, DJ, and Price: Davish - Black font | 45pt | Paper swatch
- Web address: Groteska - Heavy font | 12pt | Blue swatch


Step 5
Select the information at the bottom of your flyer and apply a drop shadow. Go to Objects > Effects > Drop Shadow. Change the Mode to Multiply with an Opacity of 75%. Change the Distance to 0 in, the Angle to 92°, and the Size to 0.125 in.


Step 6
Remember the beach ball and umbrella we saved as Tiff files? Add them to your flyer in the top right and bottom left corner using File > Place.


All Done! Now It's Time to Have Fun in the Sun!
If you successfully completed this tutorial, it should look like the image below. Throughout this tutorial, you learned how to create a beach scene in Photoshop, how to apply an image to text in InDesign, and how to format text and organize your summer beach party flyer like a pro.
Take your beach party flyer template to the next level by using this awesome Placeit mockup. Placeit has mockups of all kinds including flyers, shirts, magazines, and business cards, just to name a few. Placeit is your go-to resource for all ready-to-use templates!


5 Scorching Hot Summer Party Flyer Templates
Attention, party planners! Create the perfect summer-themed party with these professional beach flyer templates. With easy-to-use Photoshop and Illustrator files, it's never been easier to create the perfect summer beach party flyer. These templates give you everything you need to wow your guests, including hand-drawn fonts and melting vector popsicles that you can't find anywhere else.
1. Beach Party Flyer (PSD)


Summer's the time to party! Get ready for the most epic social beach party of the summer! This beach party poster PSD template is perfect for any summer event, especially if you're looking for a fun and easy way to promote your next big bash.
2. Tanti Beach Party Flyer (PSD, AI)


Get your friends together for a fun beach party with this template that includes a beach party flyer background. The beach party poster PSD file is easy to customize and edit, even if you're a beginner.
3. Tropical Beach Summer (PSD)


It's time to take a break from the mundane life and take a look at summer party flyer ideas. Blast the speakers at your next event with this summer party flyer template. This tropical beach summer party flyer features a flamingo pool float cruising along the cool, clear beach water.
4. Lifesaver Summer Party Flyer (PSD, AI)


There's still plenty of time left to enjoy some sand between your toes and think about how you're going to impress all your friends this summer. Don't forget to keep it light and unforgettable with this lifesaver beach party flyer template.
5. Popsicle Summer Party (PSD, AI)


Be spontaneous. Host a party. Here's the perfect template with a beach party flyer background: a vibrant red, yellow, and blue melting popsicle. This template is perfect for promoting a summer event, highlighting what you have planned, and giving important information.
Make a Splash This Summer With These Amazing Resources!
We know the struggle of looking for resources to become better designers. This great list of tutorials, tips and tricks I've put together will help you elevate your skills.

 FlyersHow to Create a Summer Club Flyer in Adobe InDesign
 Flyers25 Modern Flyer Template Design Ideas for New Business in 2022
 Marketing20 Best Free Club & Party Flyer Background Template Designs 2022
 Flyers20 Best Free Event and Party Flyer Templates (Design Ideas for 2022)
 Flat DesignHow to Create a Beach Guard Tower Illustration in Adobe Illustrator
 FlyersHow to Make a Flyer Online With a Flyer Creator (Without Photoshop!)
This content originally appeared on Envato Tuts+ Tutorials and was authored by Ashlee Harrell
Ashlee Harrell | Sciencx (2022-01-24T17:49:43+00:00) How to Design a Beach Party Flyer. Retrieved from https://www.scien.cx/2022/01/24/how-to-design-a-beach-party-flyer/
Please log in to upload a file.
There are no updates yet.
Click the Upload button above to add an update.