
This content originally appeared on DEV Community and was authored by Code Courses
Table of Contents
| No. | Topics |
|---|---|
| 1 | About Code Courses |
| 2 | Live Demo |
| 3 | Takeaway Skills |
| 4 | Course Overview |
| 5 | Prerequisites |
| 5.1 | Softwares |
| 5.2 | Technical Skills |
| 6 | Creating the React Project |
| 6.1 | Create Upload and Preview Image App |
| 7 | Structuring the Project |
| 7.1 | Project Structure |
| 7.2 | Setting Up CSS |
| 7.3 | Build the Upload Component |
| 8 | Pushing the Project to Github |
| 9 | Creating a new Vercel Account |
| 10 | Deploying the Project to Vercel |
| 11 | Conclusion |
1. About Code Courses
Code Courses is a website where people learn about coding and different technologies/frameworks/libraries. For the purpose of helping people learn, all of the courses are FREE and DETAIL. For this reason, Code Courses believe that you do not need to buy any courses out there. Hopefully, after following the content on Code Courses, you will find your dream jobs, and build any applications that you want.
2. Live Demo
After we finish this course, the final output will be like this:
If you want to find the full source code, you can refer to this Github link.
3. Takeaway Skills
We can build the upload and preview image application and understand how to apply React to create a real-life project. We can include this project in our profiles. It would help us a lot in finding a software engineer job. Aside from that, we can build other related applications with the skills we will get from this course.
4. Course Overview


As we see from the above image, we will have the upload section. If the users click on that section, the users can select an image from their devices. After selecting an image, the selected image will be shown. Therefore, the users can preview the selected image. On the other hand, to change the selected image, the users just need to click on the selected image and they can choose another image from their devices.
After finishing this course, we can understand how to apply React to build a real-life project.
5. Prerequisites
5.1. Softwares
- Install NodeJS.
- An IDE or a text editor (VSCode, Intellij, Webstorm, etc).
5.2 Technical Skills
- Basic programming skills.
- Basic HTML, CSS, JS, React skills.
6. Creating the React Project
In fact, we have several ways to create a new React project such as importing the React library from CDN links or using existing boilerplates/templates out there. In this case, we will create our React project by using the Create React App
Create React App is a comfortable environment for learning React and is the best way to start building a new single-page application in React. It sets up your development environment so that you can use the latest JavaScript features, provides a nice developer experience, and optimizes your app for production.
6.1. Create Upload and Preview Image App
In this situation, to create our upload and preview image app project, we need to follow the below steps:
Step 1: We'll need to have Node >= 14.0.0 and npm >= 5.6 on our machine. In case, If we have not installed Node.js, please click on the above link and follow its documentation.
Step 2: In order to make sure that we have installed Node.js on our computer. Hence, please open your terminal/cmd/power shell and run the following statement.
node -v
The result should be like this v16.10.0.
16.10.0 is the Node.js version on my computer. Nevertheless, it may be different on your computer, depending on which version you have installed.
- Step 3: After we have installed Node.js on our computer. On our terminal, we need to use the below statements.
npm install -g create-react-app
create-react-app your-app-name
In addition, we need to replace
your-app-namewith the real name of our application. In this case, we want to build an upload and preview image app. For this reason, we will replaceyour-app-namewithupload-preview-image-react. In conclusion, now our final statement should look like this:
create-react-app upload-preview-image-react
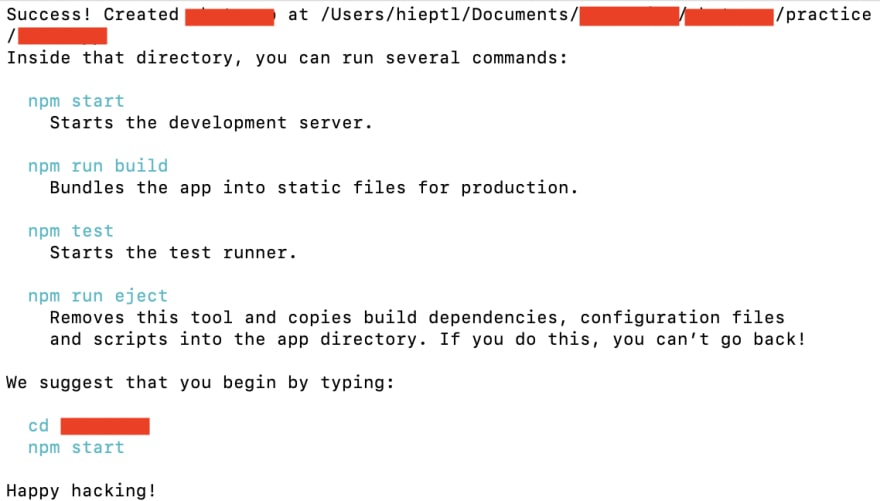
- Step 4: Otherwise, we need to wait until the process is finished. After that, our result should look like this:
- Step 5: Now we can try to run our application. On the same terminal, please
cdto your project folder.
cd upload-preview-image-react
- Step 6: Following that, please run the below statement to start our React project.
npm run start
Our result should look like this

7. Structuring the Project
In general, we will talk about how we structure our project. In some other tutorials, we may see that those tutorials will tell you to store every component in the src folder or develop everything in those files without caring about some best practices and principles. For example, we don't want to violate the DRY principle, DRY stands for don't repeat yourself. For the most part, It means that we should avoid duplication in the business logic. Hence, to avoid that, we create some common files and folders. Therefore, we can reuse them in different places. With this purpose in mind, doing that helps us increase the readability, maintainability, and scalability of our code.
7.1. Project Structure
In this section, we talk about how to structure our project.
- Step 1: Firstly, please create a folder which is called
componentsinside thesrcfolder.
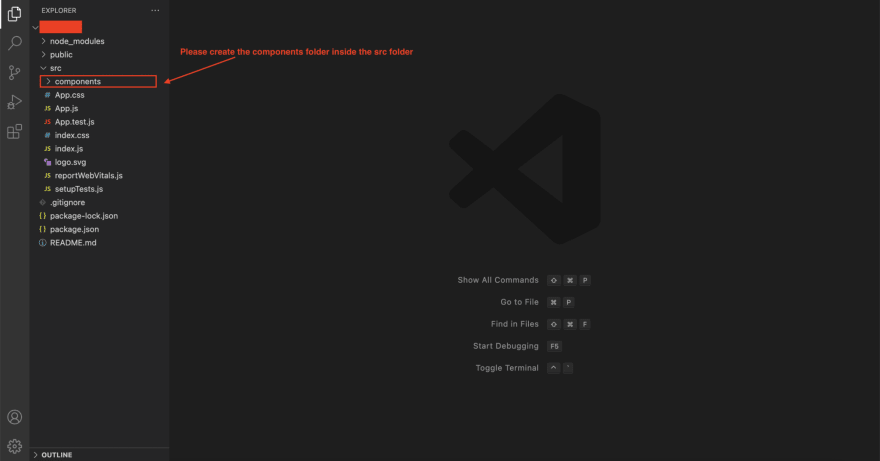
The
componentsfolder will contain all of the components in our application. For example, the login component, the register component, the home component, and so on.
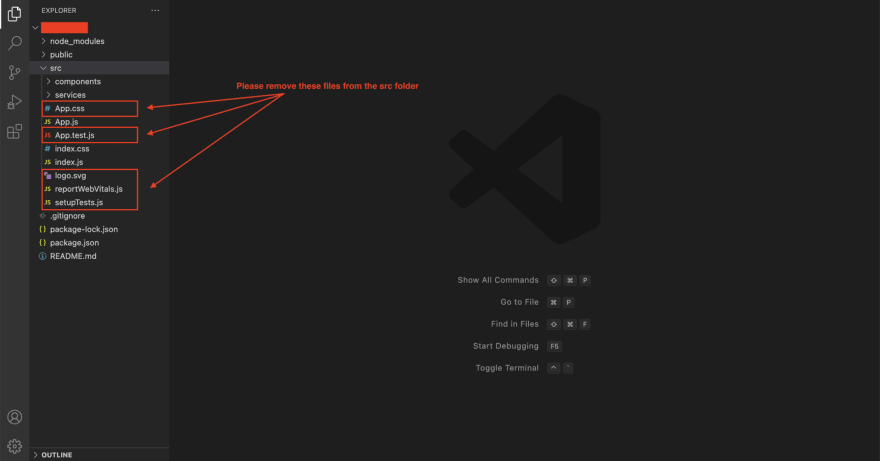
- Step 2: Moreover, we need to remove some unused files in this course. They are the
App.css,App.test.js,logo.svg,reportWebVitals.js,setupTests.js.
- Step 4: In this situation, we are importing the
logo.svgfile in theApp.js. For that reason, we need to remove it from theApp.jsfile.
import React from "react";

const App = () => {
  return <React.Fragment>Hello, Upload and Preview Image App</React.Fragment>;
};

export default App;
In the
App.jsfile, we removed all of the dependencies and the current JSX elements. After that, we returned a React fragment. Inside that fragment, we showedHello, Counter App.
- Step 5: In fact, We are importing
reportWebVitalsin theindex.jsfile. However, we removedreportWebVitalsin step 3. Therefore, we need to remove it from theindex.jsfile.
import React from "react";
import ReactDOM from "react-dom/client";
import "./index.css";
import App from "./App";

const root = ReactDOM.createRoot(document.getElementById("root"));
root.render(<App />);
Now we can get back to our browser and the UI should be like this.

The full source code of the index.js file will be like this:
import React from "react";
import ReactDOM from "react-dom/client";
import "./index.css";
import App from "./App";

const root = ReactDOM.createRoot(document.getElementById("root"));
root.render(<App />);
The full source code of the App.js file will be like this:
import React from "react";

const App = () => {
  return <React.Fragment>Hello, Upload and Preview Image App</React.Fragment>;
};

export default App;
7.2. Setting Up CSS
In fact, we need to make our UI attractive. Therefore, in this section, we will set up CSS for our application. Hence, we do not need to care about styling because CSS was pre-prepared.

In the index.js file, we are importing the index.css file. This file contains all CSS for the application. We have different ways to set up styling for a React application, we can use the styled-components library, or we can use the TailwindCSS library, and so on.
Therefore, we will write all CSS in the index.css file.
Please replace the current content of the index.css file with the following content:
body {
  margin: 0;
  font-family: -apple-system, BlinkMacSystemFont, "Segoe UI", "Roboto", "Oxygen",
    "Ubuntu", "Cantarell", "Fira Sans", "Droid Sans", "Helvetica Neue",
    sans-serif;
  -webkit-font-smoothing: antialiased;
  -moz-osx-font-smoothing: grayscale;
  /* background-color: #112b3c; */
}

code {
  font-family: source-code-pro, Menlo, Monaco, Consolas, "Courier New",
    monospace;
}

* {
  padding: 0;
  margin: 0;
  box-sizing: border-box;
}

input {
  outline: none;
  border: none;
}

::-webkit-scrollbar {
  display: none;
}

.upload__wrapper {
  align-items: center;
  display: flex;
  justify-content: center;
  min-height: 100vh;
  min-width: 100vw;
}

.upload__container {
  display: flex;
  flex-direction: column;
}

.upload__placeholder {
  align-items: center;
  border-radius: 0.25rem;
  border: 1px dashed #fff;
  color: #fff;
  display: flex;
  font-size: 1.25rem;
  font-weight: 600;
  justify-content: center;
  margin-bottom: 1rem;
  max-height: 15rem;
  max-width: 15rem;
  min-height: 15rem;
  min-width: 15rem;
  padding: 5rem;
}

.upload__placeholder:hover {
  cursor: pointer;
  opacity: 0.8;
}

.upload__content {
  border-radius: 0.25rem;
  height: 15rem;
  margin-bottom: 1rem;
  object-fit: cover;
  width: 15rem;
}

.upload__content:hover {
  cursor: pointer;
  opacity: 0.8;
}
7.3. Build the Upload Component

As mentioned above, we will have the upload section. If the users click on that section, the users can select an image from their devices. After selecting an image, the selected image will be shown. Therefore, the users can preview the selected image. On the other hand, to change the selected image, the users just need to click on the selected image and they can choose another image from their devices.
To develop the upload component, please follow the below steps:
- Step 1: Please create the
Upload.jsfile inside thecomponentsfolder.

The users can click on the upload section to choose the image that they want to upload. On the other hand, after uploading an image, if the users want to change the selected image, they can click on that image and they can choose another image. For each action, the component needs to be rendered based on the selected image. For this reason, we need to store the selected in a state.
- Step 2: In the
Upload.jsfile, we importuseStatefromreact.
import { useState } from 'react';
- Step 3: In the
Upload.jsfile, we define a functional component which is calledUploadand that component will render an empty React fragment temporarily.
import { useState } from 'react';

const Upload = () => {
    return <></>;
};

export default Upload;
- Step 4: To store the selected image as a state, we define a state which is called
avatar.
...
const Upload = () => {
    const [avatar, setAvatar] = useState(null);
};
...
By default, the users have not selected any image, yet. Hence, the default value of the
avatarstate will benull.
- Step 5: In the
Upload.jsfile, please update thereturnstatement as follows:
import { useState } from "react";

const Upload = () => {
  const [avatar, setAvatar] = useState(null);

  return (
    <div className="upload__wrapper">
      <div className="upload__container">
        {!avatar && (
          <div
            className="upload__placeholder"
          >
            <span>Upload</span>
          </div>
        )}
        {avatar && (
          <img
            className="upload__content"
            src={avatar}
            alt="img"
          />
        )}
        <input hidden type="file" />
      </div>
    </div>
  );
};

export default Upload;
If we run the code, the UI will be like this:

In this case, we used
conditional renderingin React. It means that if theavatarstate is null, we will show the upload section as we can see from the above image. On the other hand, if theavatarstate is not null, we will display the selected image.There is a special thing that we should notice here. We wrote
<input hidden type="file" />
To select an image from our devices, we need to have the
inputelement and its type isfile. In this case, we do not want to display the input element on the screen. Hence, we used thehiddenproperty for that input element. However, the question is that if we do not want to display that input element, how can we let the users choose an image from their devices. The idea is that if the users click on the upload section, we want to trigger the functionality of the input element.To achieve that, we need to use React ref (for example, the ref name can be
filepickerRef). We will define a ref and then associate that ref with the input element. After that, we will handle theonClickevent for the upload section (thedivelement that itsclassNameisupload_placeholder). Whenever we click on the upload section, we will call:
filepickerRef.current.click();
On the other hand, according to the business requirements, after the users have selected an image, they can change the selected image by selecting another image. Therefore, we also need to handle the
onClickevent for thedivid that itsclassNameisupload__contentby calling the same thing as above:
filepickerRef.current.click();
- Step 6: As mentioned above, we need to define a ref which is called
filepickerRef, before doing that, in theUpload.jsfile, we need to importuseReffrom 'react'. However, in the above step, we also importeduseStatefrom 'react'. Therefore, we can combine them into a single statement as follows:
import { useState, useRef } from 'react';
- Step 7: In the
Upload.jsfile, we need to define thefilepickerRef.
import { useRef, useState } from "react";

const Upload = () => {
  const [avatar, setAvatar] = useState(null);

  const filepickerRef = useRef();
  ...
};

export default Upload;
- Step 8: In the
Upload.jsfile, we need to associate thefilepickerRefwith the input element.
...
const Upload = () => {
    ...
    return (
        ...
        <input hidden ref={filepickerRef} type="file" />
        ...
    );
    ...
};
...
- Step 9: In the
Upload.jsfile, we need to handle theonClickevent for two div elements (the div element that itsclassNameisupload__placeholderand the div element that itsclassNameisupload__content). Please update thereturnstatement as follows:
...
const Upload = () => {
    return (
    <div className="upload__wrapper">
      <div className="upload__container">
        {!avatar && (
          <div
            className="upload__placeholder"
            onClick={() => filepickerRef.current.click()}
          >
            <span>Upload</span>
          </div>
        )}
        {avatar && (
          <img
            className="upload__content"
            src={avatar}
            alt="img"
            onClick={() => filepickerRef.current.click()}
          />
        )}
        <input hidden ref={filepickerRef} type="file" />
      </div>
    </div>
  );
};
...
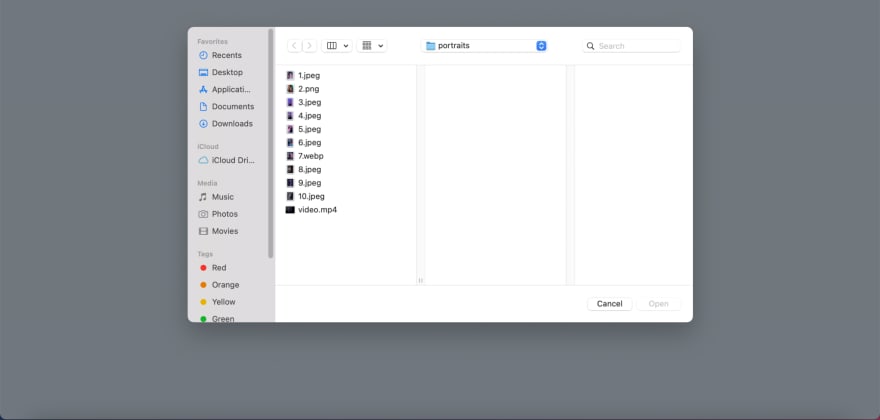
Now if we run the code and then we click on the upload section, a popup will be displayed, and we can select an image from our devices. Please refer to the below image for more information.
However, after we have selected an image, the upload section will not be hidden, and the selected image will be displayed. The reason behind this is that we have not set the
avatarstate after we have selected an image from our devices.To do that, we need to handle the
onChangefor the input element.
- Step 10: In the
Upload.jsfile, we handle theonChangeevent for the input element.
...
const Upload = () => {
    ...
    return (
        ...
        <input hidden onChange={uploadAvatar} ref={filepickerRef} type="file" />
        ...
    );
    ...
};
...
According to the above code snippet, after we have selected an image from our devices, the
uploadAvatarfunction will be executed. We have not defined that function, yet. We will do that in the below step.
- Step 11: In the
Upload.jsfile, we define theuploadAvatarfunction.
...
const Upload = () => {
    const uploadAvatar = (e) => {
        const reader = new FileReader();
        if (e.target.files[0]) {
            reader.readAsDataURL(e.target.files[0]);
        }
        reader.onload = (readerEvent) => {
            setAvatar(readerEvent.target.result);
        };
    };
    ...
};
...
The
uploadAvatarfunction will accept React synthetic event as its parameter. We used theFileReaderobject to read the file content.If the selected file exists, we will call
reader.readAsDataURL(e.target.files[0]);We also defined the
read.onloadfunction to get the file content and update theavatarstate.
8. Pushing the Project to Github
In this part, we will push our project to Github. GitHub is where over 73 million developers shape the future of software, together. Contribute to the open-source community, manage your Git repositories, and so on.
To push our project to Github, we need to follow the below steps:
- Step 1: Create the
.gitignorefile in your root directory with the following content.
node_modules
.env
We do not want to push the
node_modulesand.envfolder to Github.
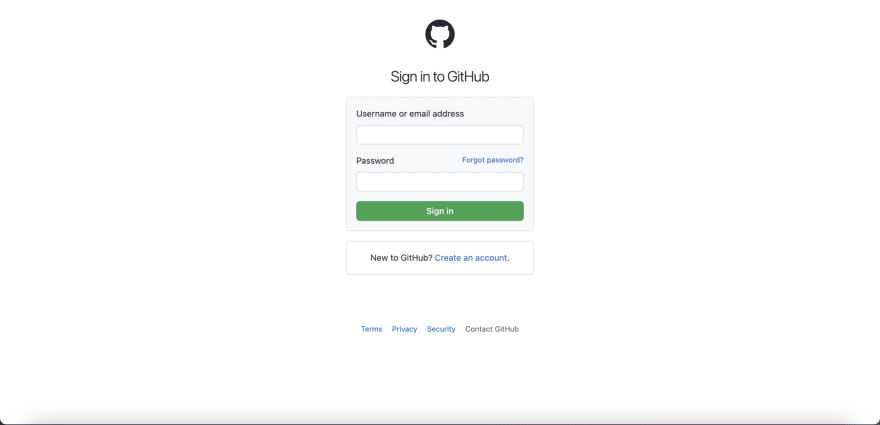
- Step 2: Go to this link, and then log in to Github with your created account.
Step 3: After we've logged in to Github, please go to this Link to create a new repository.
Step 4: We need to input the repository name and then click on the `Create Repository button.

- Step 5: We need to open the terminal,
cdto the project folder, and follow the guidelines on Github
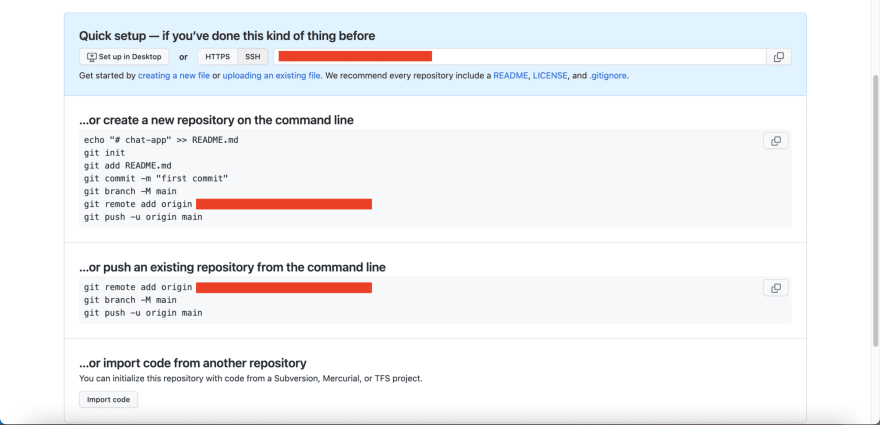
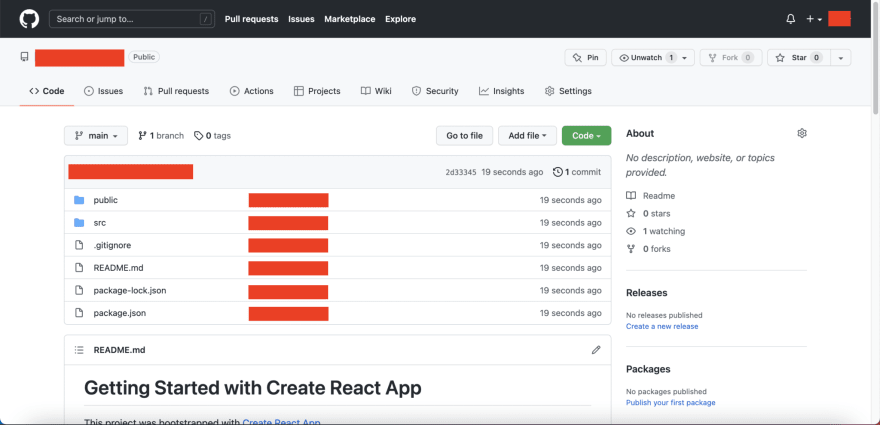
If everything is fine, you should see the below UI
9. Creating a New Vercel Account
In this section, we will create a new Vercel Account because we want to deploy our application on Vercel.
Vercel combines the best developer experience with an obsessive focus on end-user performance.
The platform enables frontend teams to do their best work. Vercel is the best place to deploy any frontend app. Start by deploying with zero configuration to our global edge network. Scale dynamically to millions of pages without breaking a sweat.
To create a new Vercel account, please follow the below steps:
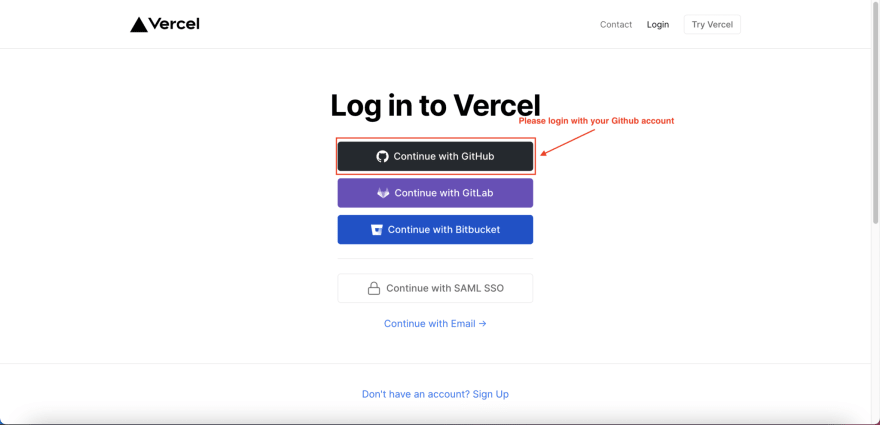
- Step 1: Please go to this Link and click on the
Loginbutton.

- Step 2: Please log in with your Github account.
- Step 3: After logging in to the Vercel platform successfully, we will be on this page
10. Deploying the Project to Vercel
In this part, we will deploy our project to the Vercel platform.
As mentioned above, Vercel combines the best developer experience with an obsessive focus on end-user performance.
The platform enables frontend teams to do their best work. Vercel is the best place to deploy any frontend app. Start by deploying with zero configuration to our global edge network. Scale dynamically to millions of pages without breaking a sweat.
To deploy the project to Vercel, please follow the below steps:
Please make sure that we've logged in to the Vercel platform.
- Step 1: Please go to this link and click on the
Create Projectbutton.

- Step 2: Please click on the
Importbutton to import our repository to Vercel.
Please note that the attached image is the screenshot at the time of writing this course. Your UI may be different. However, the purpose is the same, we want to import our repository to the Vercel platform.

- Step 3: Please input the environment variables, we just need to input all of the environment variables in our
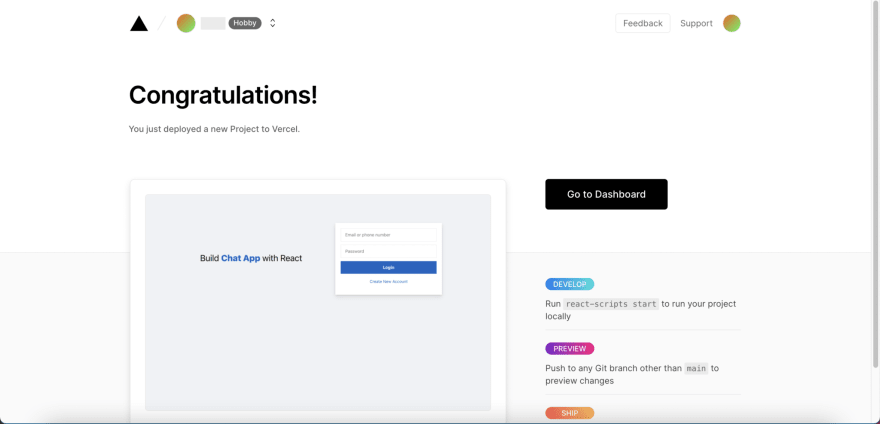
.envfile. However, we do not have any environment variable in this project. Therefore, we can ignore that. After that, we need to click on theDeploybutton.

If everything is fine, we should see the below UI
11. Conclusion
Congratulation! We have finished the upload and preview image application by using React. In conclusion, we have known about the purposes of this course, and created and structured the project. Following that, we also developed the Upload component and deployed the application to Vercel. Thank you so much for joining this course, you can find many courses on Code Courses.
This content originally appeared on DEV Community and was authored by Code Courses
Code Courses | Sciencx (2022-05-10T12:17:36+00:00) How to Upload and Preview Image in React [DETAIL COURSE]. Retrieved from https://www.scien.cx/2022/05/10/how-to-upload-and-preview-image-in-react-detail-course/
Please log in to upload a file.
There are no updates yet.
Click the Upload button above to add an update.