
Vue.JS is a very popular open-source framework. It works on Model–view–ViewModel JavaScript-based techniques to create interfaces and Single-Page Applications.
With the help of Vue.JS, there has been immense growth in the world of web app development. It is a JavaScript progressive framework that comes with a variety of tools that are used by software developers to create user interfaces.
Besides, the use of the Vue.JS framework is not just limited to web interfaces, but this framework is also utilized for both desktop and mobile app development with the help of the Electron framework.
This makes it more popular amongst the programmers and this increases the demand to use Vue.js coding best practices that the developers can refer to when in trouble or about to start a new Vue based project.
So, here, we are going to understand Vue.JS and its cheat sheets that can be used for quick reference.
What is Vue.JS?
Vue.JS is a top JavaScript-based framework that is utilized for creating the user interface layer. It is very easy to use, so any developer can work on it. Vue.JS is compatible with various extensions and libraries.
This makes creating a single-page application a very easy task with Vue.JS. In the field of app development, developers face millions of issues that cannot be solved by using only one library, and in this case, using Vue.JS is the best decision.
Besides this, Vue.JS is a technology that is supported by many popular browsers like Firefox, Chrome, Safari, IE, and more.
If you want to import install or import Vue, here are the three different ways to do it:
- Install through the NPM.
- By Vue CLI
- Directly included CDN File.
The Vue.JS Cheat Sheet
1. Events
Vue is a framework that enables the developers to manage a JavaScript custom event like input event, change event, click event, and more. And for this, the developer needs to use the v-on: directive that is followed by the name of the custom events.
- v-on:click
This is the event that enables the developers to execute code with one click of an element.
<button v-on:click=”name = ‘Mike’”>Display a message</button>
// or shortened syntax
<button @click=”name = ‘Mike’”>Display a message</button>
- v-on:keydown
It is a directive that enables the execution of the code as soon as the user presses a key. For instance, an enter key.
<button v-on:keydown.enter=”name = ‘Mike’”>Display a message</button>
// or shortened syntax
<button @click=”name = ‘Mike’”>Display a message</button>
Some of the other possible values with v-on: are keypress and keyup.
- v-on:submit
It is an event that enables the developers to run the code when it’s time to submit the form.
<form v-on:submit.prevent=”name = ‘Mike’”>
<input v-model=”name” type=”text” />
<button type=”submit”>Save</button>
</form>
2. Directives
Vue.JS is a framework that comes with directives that are HTML attributes. They can be easily inserted into a web page when you want to modify the rendering of the Vue app. Vue also comes with a global directive for the developer’s use.
Some of the directives of Vue.JS are –
- v-bind
It is a directive that enables the Vue expert to assign an expression to the HTML attribute. In this case, Vue replaces the expression with its value.
<img v-bind:src=”image_url” />
// or shortened syntax
<img :src=”image_url” />
- v-once
With the help of the v-once directive, the developers are able to interpolate the expression only once. This means that once the browser is refreshed, this expression will be ignored.
<div v-once>
{{ title }}
</div>
- v-html
It enables one to display an expression with the help of HTML tags. For instance, title: “<h1>Hello World</h1>”
<div v-html=”title”>
</div>
- v-model
With the use of v-model directive, we can implement two-way data binding in Vue. When the form input value is changed, v-model listens to event changes or updated UI elements and updates the value of the data property with the new value. UI element is also updated if the data property value is changed.
<input v-model=”name” type=”text” />
<div>
Name : {{ name }}
</div>
- v-if, v-else-if, and v-else
These are the directives that make an element visible or invisible as per the value of the expression which can be either true or false. When this is not visible, rendering of the element is not done in the HTML.
<div v-if=”amount > 100">
Free Shipping!
<div>
<div v-else-if=”montant > 50">
Shipping: 9.95$
</div>
<div v-else>
Shipping: 19.95$
</div>
- v-show
The v-show directive has the capability to make an element visible or invisible as per the expression’s value which can be true or false. When the element is not visible it is rendered with a CSS attribute known as display: none;
<div v-show=”isError”>
{{ errorMessage }}
</div>
- v-for
It is a directive that enables the developer to display a list of items in an HTML file.
<ul>
<li v-for=”item in items” :key=”item.id”>
{{ item.name }}
</li>
</ul>
- Ref
It enables the Vue app to identify an HTML element and work on it.
<input type=”text” ref=”name”>
To manipulate the Vue code, the experts can use the special Vue object: this.$refs
methods: {
handleClick() {
console.log(this.$refs.name)
this.$refs.name.classList.add(‘active’)
this.$refs.name.focus()
}
}
- <template> tag
It allows one to use the Vue directives without the need to create an HTML element.
<template v-show=”quantity === 0">
Quantity must be greater than zero
</template>
3. Global Configuration
In Vue, the Vue.config object comes with various properties that can be modified by the developers at the time of creating a Vue instance or Vue instance components. And these properties are –
- silent: It is by default false, but if it is true, it suppresses warnings and logs.
- devtools: It is default as true in development and when it comes to production, the value turns to false. And here, you can override the values.
- optionMergeStrategies: It is a property that enables the developers to define a customized merging plan for more options.
- ignoredElements: It is used by the developers when they want to let Vue ignore custom elements that are defined outside of the Vue, like Web Components.
- errorHandler: It enables the developers to set an error handler function. It is useful to catch services like Sentry and more.
- warnHandler: It allows one to set a function known as a warning handler. And this function is similar to errorHandler, but is for warning and not for errors.
- keyCodes: It is a property that enables the developer to define the custom key.
- performance: The value of performance is by default false. If the value is set to true, you can trace the performance of Vue components that are present in the Browser DevTools.
- productionTip: The value of this property is by default set to true. And if it is set to false, it will be to disable the warning that says that “you are in development mode”. This happens when the development is in console mode.
4. Lifecycle Hook Methods
Each Vue instance has to pass through a set of initialization steps while it is getting developed.
For example, when an instance is created it needs to be set up with data observation, a compilation of the template is done, it has to be mounted on the DOM, and at last, the DOM needs to be updated.
All these things happen when the data changes. For this, even the Vue instance filters are used.
While the process of initialization is on, it will also invoke lifecycle hooks. This enables one to carry out custom logic at each step of the life cycle.
For example, after the instance is developed, the “created” hook is called.
created() {
console.log(‘Component instance created’)
}
5. Computed Properties
These types of properties are cached. And they are only re-computed when the reactive dependency changes. When some of the dependencies are not reactive or out of the instance’s scope, the computed property won’t be updated.
For instance, take a computed property as a simple method in the data() which has the capability to always return a value. The method used here will be called and its property will be changed.
6. Filters
Filters in Vue are used to change a value and return it. They are used in both v-bind and mustached directives. If you want to define a filter in a component, this is the code for you:
<script>
export default {
filters: {
capitalize: function(value) {
if (!value) return ‘’;
value = value.toString();
return value.charAt(0).toUpperCase() + value.slice(1);
}
}
};
</script>
After this, the capitalize filter can be utilized in the following manner –
<span>{{ msg | capitalize }}</span>
Or you can use a v-bind directive as shown below:
<a v-bind:href=”url | capitalize”>My capitalized link!</a>
7. Instance Properties
Some of the major properties of a Vue instance are:
- vm.$data — It is a property that is clearly associated with the data object with the instance.
- vm.$el — It shows the DOM element that is bound with the instance.
- vm.$props- The props are what the instance has received back.
- vm.$options- It is the object that is utilized to instantiate the Vue instance.
- vm.$parent — This property is for the parent instance.
- vm.$root- It is the root instance property.
- vm.$scopedSlots- This property is an array of the associated scoped slots.
- vm.$children- It is an array of children instances.
- vm.$slots- It is an array that contains associated slots in the template.
- vm.$isServer- This property’s value is true if the instance is used in server-side rendering.
- vm.$listeners- It is simply an object of v-on event listeners. It is assigned to the child component or a parent component.
- vm.$refs- It has the property for each element that is pointed by a ref attribute.
- vm.$attrs- It is an object of attributes that are offered to the Vue component but not as props.
8. Built-in Components
There are top 5 built-in components in Vue. And they are:
- <component>
- <transition-group>
- <transition>
- <slot>
- <keep-alive>
9. Event Bus
Event bus enables communication between child components. And here the parent component doesn’t need to consider using Vuex.
// main.js
// create new event bus
export const bus = new Vue();
// Header.vue
import {bus} from “../main”;
// Footer.vue
import {bus} from “../main”;
// listen to bus event in first component
// usually in .created() function
bus.$on(“eventName”, (data) => {
// callback
// use data
})
// fire bus event in second component
bus.$emit(“eventName”, data);
Conclusion
As seen in this blog, Vue is a very important framework in the market and this is why every developer wants to have at least the basic knowledge of it. For this, we have listed some of the main Vue.JS cheat sheets that can be used by software engineers to create an amazing app for users.
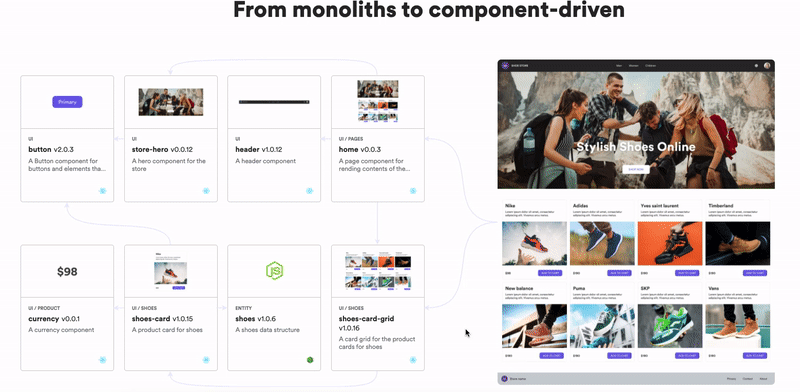
Build composable web applications
Don’t build web monoliths. Use Bit to create and compose decoupled software components — in your favourite frameworks like React or Node. Build scalable and modular applications with a powerful and enjoyable dev experience.
Bring your team to Bit Cloud to host and collaborate on components together, and speed up, scale, and standardize development as a team. Try composable frontends with a Design System or Micro Frontends, or explore the composable backend with serverside components.
Learn more
- How We Build Micro Frontends
- How we Build a Component Design System
- The Composable Enterprise: A Guide
- How to build a composable blog
- Meet Component-Driven Content: Applicable, Composable
- Building a Composable UI Component Library
Vue.JS Cheat Sheet was originally published in Bits and Pieces on Medium, where people are continuing the conversation by highlighting and responding to this story.
Rencybeth | Sciencx (2022-05-21T08:03:30+00:00) Vue.JS Cheat Sheet. Retrieved from https://www.scien.cx/2022/05/21/vue-js-cheat-sheet/
Please log in to upload a file.
There are no updates yet.
Click the Upload button above to add an update.