
This content originally appeared on Level Up Coding - Medium and was authored by Max Kalik
Surprisingly for myself, I realized that I have never implemented address autocompletion using only Apple technologies. Before, I had experience only with Google Places SDK and even with the not-so-well-known European GeoDataHub. I found it curious — to know how we can limit ourselves to using only SwiftUI and MapKit to solve a similar problem.
TL;DR
GitHub - maxkalik/address-autocomplete-swiftui: SwiftUI solution of Address autocomplete
MapKit
Before starting let’s briefly describe MapKit — a powerful framework invented by Apple. See documentation:
Display map or satellite imagery within your app, call out points of interest, and determine placemark information for map coordinates.
The framework includes a bunch of useful things. I will list only what we are going to use: the Map itself (MapView for SwiftUI); MKCoordinateRegion — this model will allow showing a particular region on the map; MKAnnotation — another model with coordinates and other data for showing MapMarker on the map, and MKLocalSearch engine which we are going to use to get a list of completions from searchable address. To implement this we need to useMKLocalSearchCompleterDelegate and MKLocalSearchCompleter where we can get results — possible addresses.
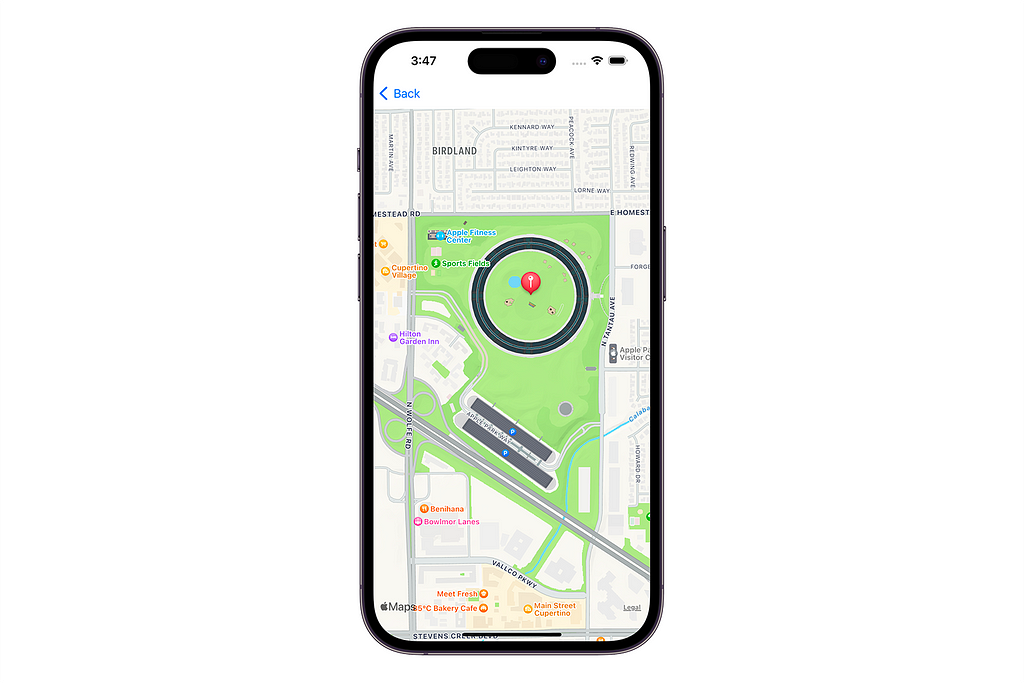
Project Overview
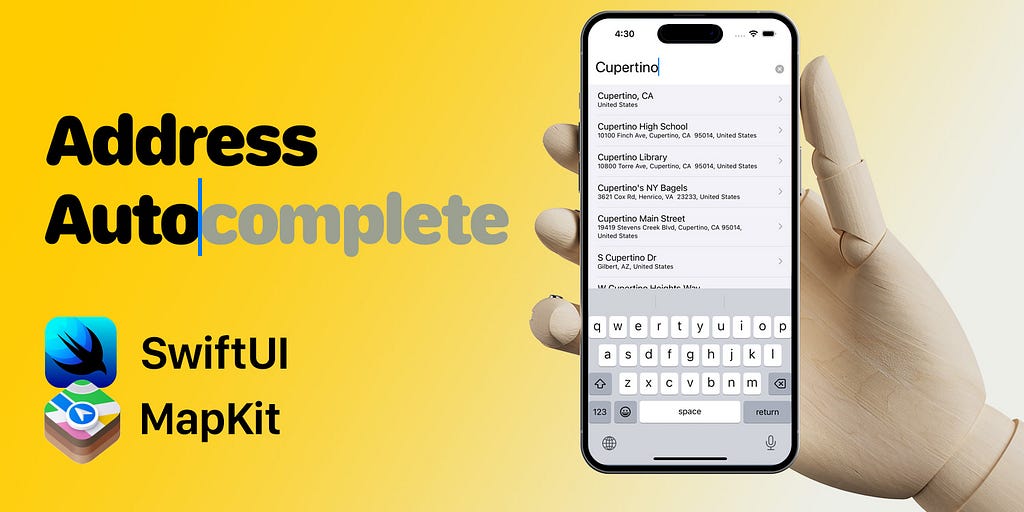
The completed task should look like this:
We are not going to ask a user to get the current location of a device hence we will not touch plist configuration at all, I tried to simplify the project as much as possible. Let’s start with a couple of models. The goal is to see how many things we need to implement for this simple application.
So the structure is the following, MVVM with two screens: Content and Map.
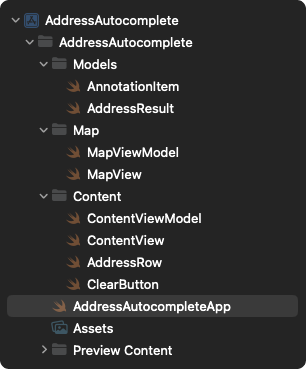
Models
Let’s start with a couple of models: AddressResult and Annotation. Both should be conformed to Identifiable protocol because we are going to use them in the collections.
struct AddressResult: Identifiable {
    let id = UUID()
    let title: String
    let subtitle: String
}
struct AnnotationItem: Identifiable {
let id = UUID()
let latitude: Double
let longitude: Double
var coordinate: CLLocationCoordinate2D {
CLLocationCoordinate2D(latitude: latitude, longitude: longitude)
}
}AddressResult model will be used in the list of results. AnnotationItem collection we will set right in the Map component. But before dive in into this, let's set up our view models first.
Content View Model
Our iOS application is starting from ContentView because we are using SwiftUI, therefore, we need to prepare our first view model: ContentViewModel. The ContentViewModel will be observable because two things need to be published — the value from textfield (searchable text) and results array of AddressResult model.
class ContentViewModel: NSObject, ObservableObject {

    @Published private(set) var results: Array<AddressResult> = []
    @Published var searchableText = ""

    private lazy var localSearchCompleter: MKLocalSearchCompleter = {
        let completer = MKLocalSearchCompleter()
        completer.delegate = self
        return completer
    }()

    func searchAddress(_ searchableText: String) {
        guard searchableText.isEmpty == false else { return }
        localSearchCompleter.queryFragment = searchableText
    }
}
Some of you can notice searchableText is not marked as private(set). This is because this value is going to be bound. Also, as you can see, here is an initializedMKLocalSearchCompleter. This completer will help to get results using queryFragment. For that, we need to conform to the MKLocalSearchCompleterDelegate:
extension ContentViewModel: MKLocalSearchCompleterDelegate {
    func completerDidUpdateResults(_ completer: MKLocalSearchCompleter) {
        Task { @MainActor in
            results = completer.results.map {
                AddressResult(title: $0.title, subtitle: $0.subtitle)
            }
        }
    }

    func completer(_ completer: MKLocalSearchCompleter, didFailWithError error: Error) {
        print(error)
    }
}
We are not going to handle errors at this time, so let me skip this part, we can just print a message. The methodcompleterDidUpdateResults where results are set from the completer’s results. Since our results are published, so we need to the main thread to avoid this warning:
[SwiftUI] Publishing changes from within view updates is not allowed, this will cause undefined behavior
Map View Model
The view models in this project are independent. We are going to observe them using @StateObject. The MapViewModel is pretty simple: two published variables and one method:
class MapViewModel: ObservableObject {

    @Published var region = MKCoordinateRegion()
    @Published private(set) var annotationItems: [AnnotationItem] = []

    func getPlace(from address: AddressResult) {
        let request = MKLocalSearch.Request()
        let title = address.title
        let subTitle = address.subtitle

        request.naturalLanguageQuery = subTitle.contains(title)
        ? subTitle : title + ", " + subTitle

        Task {
            let response = try await MKLocalSearch(request: request).start()
            await MainActor.run {
                self.annotationItems = response.mapItems.map {
                    AnnotationItem(
                        latitude: $0.placemark.coordinate.latitude,
                        longitude: $0.placemark.coordinate.longitude
                    )
                }

                self.region = response.boundingRegion
            }
        }
    }
}
Region value as MKCoordinateRegion will be bound with a view and AnnotationItem collection will be used by the Map view itself.
The most interesting part is this getPlace method with the argument as AddressResult. Briefly, this method converts our row address data into the coordinates using MKLocalSearch request!
Our address consists of a title and subtitle. In some cases, subtitle can contain the title, so we need to check first this part to prepare naturalLanguageQuery. Next, it is going to be a task with MKLocalSearch utility. From the response we need two things: MapItem collection and MKCoordinateRegion. From the first one, we will prepare AnnotationItem collection. The second one will be a map region that encloses the returned search results.
Content View
I really enjoy SwiftUI because you don’t need to spend so much time building user interfaces. It means you will spend really about 10 mins just to implement everything — 2 screens including a map.
Our task is simple, we need to prepare just a NavigationView with TextField for query and a List of results. Let’s take a look:
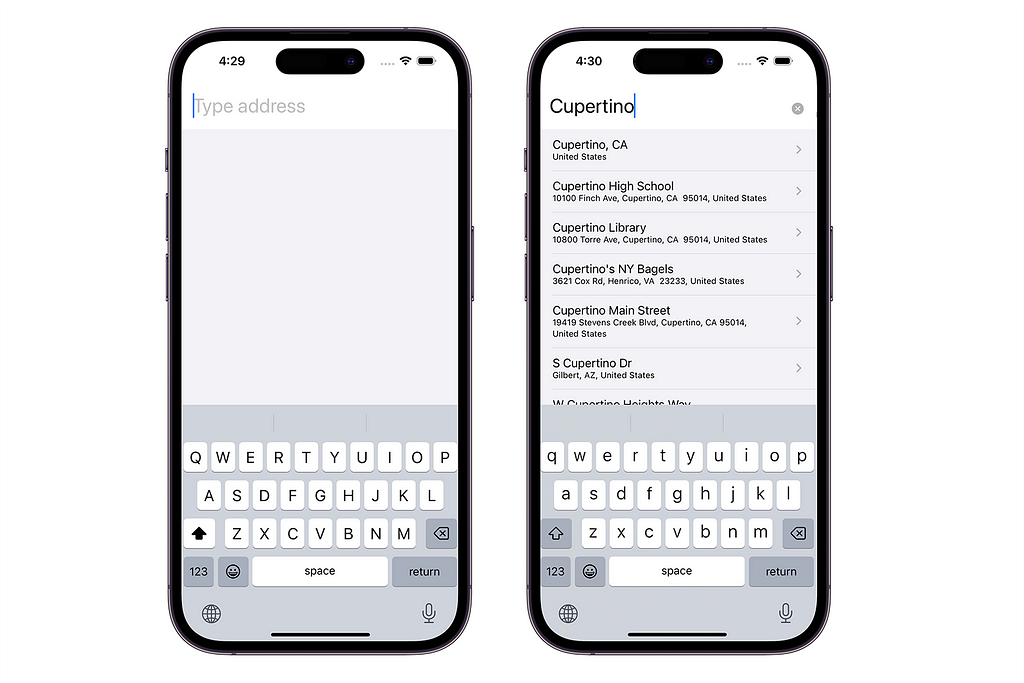
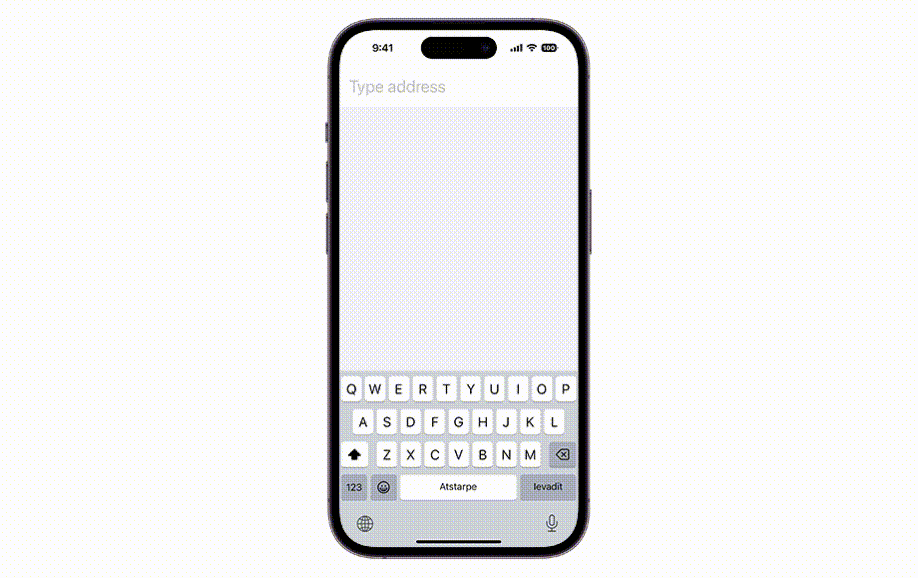
The first screen is when the app is just launched and the textfield is immediately focused on appearing. Also, I couldn’t resist myself to add a clear button to the TextField. So, let’s implement all these views.
struct ContentView: View {

    @StateObject var viewModel: ContentViewModel
    @FocusState private var isFocusedTextField: Bool

    var body: some View {
        NavigationView {
            VStack(alignment: .leading, spacing: 0) {

                TextField("Type address", text: $viewModel.searchableText)
                    .padding()
                    .autocorrectionDisabled()
                    .focused($isFocusedTextField)
                    .font(.title)
                    .onReceive(
                        viewModel.$searchableText.debounce(
                            for: .seconds(1),
                            scheduler: DispatchQueue.main
                        )
                    ) {
                        viewModel.searchAddress($0)
                    }
                    .background(Color.init(uiColor: .systemBackground))
                    .overlay {
                        ClearButton(text: $viewModel.searchableText)
                            .padding(.trailing)
                            .padding(.top, 8)
                    }
                    .onAppear {
                        isFocusedTextField = true
                    }

                List(self.viewModel.results) { address in
                    AddressRow(address: address)
                        .listRowBackground(backgroundColor)
                }
                .listStyle(.plain)
                .scrollContentBackground(.hidden)
            }
            .background(backgroundColor)
            .edgesIgnoringSafeArea(.bottom)
        }
    }

    var backgroundColor: Color = Color.init(uiColor: .systemGray6)
}
I will not go through line by line because, in my opinion, this code is pretty simple. I just wanted to grab your attention on some parts.
- FocusState is used for focusing TextView on appear.
- On receiving value in TextView, it’s needed to wait at least 1 second to get a searchable text except by querying each letter.
- List view. I tested .scrollContentBackground(.hidden) which works only in iOS16 — it helps to hide a content background.
- Using overlay in TextField we can add our ClearButton with bound searchable text (1. for checking if this text is not empty then the clear button will be rendered; 2. for clearing text from the ClearButton component).
struct ClearButton: View {

    @Binding var text: String

    var body: some View {
        if text.isEmpty == false {
            HStack {
                Spacer()
                Button {
                    text = ""
                } label: {
                    Image(systemName: "multiply.circle.fill")
                        .foregroundColor(Color(red: 0.7, green: 0.7, blue: 0.7))
                }
                .foregroundColor(.secondary)
            }
        } else {
            EmptyView()
        }
    }
}
The Address row is wrapped by NavigationLink with a destination in MapView.
struct AddressRow: View {

    let address: AddressResult

    var body: some View {
        NavigationLink {
            MapView(address: address)
        } label: {
            VStack(alignment: .leading) {
                Text(address.title)
                Text(address.subtitle)
                    .font(.caption)
            }
        }
        .padding(.bottom, 2)
    }
}
Map View
The second screen is a map itself and this view should show the correct location from the search result.
It’s going to be only one view: Map View. As you remember getPlace method converts addresses into coordinates, so when the view appears we need to update the coordinates: region and annotation items. Eventually, in annotation content, we can prepare the MapMarker. Map view configured with coordinateRegion, annotationItems, and annotationContent arguments. When all data is ready in the view model, the Map view will be updated. As you can see coordinateRegion argument applies a binding value. annotationItems can be just identifiable with coordinate variable inside (latitude and longitude) — it’s used in annotationContent item in closure.
struct MapView: View {

    @StateObject private var viewModel = MapViewModel()

    private let address: AddressResult

    init(address: AddressResult) {
        self.address = address
    }

    var body: some View {
        Map(
            coordinateRegion: $viewModel.region,
            annotationItems: viewModel.annotationItems,
            annotationContent: { item in
                MapMarker(coordinate: item.coordinate)
            }
        )
        .onAppear {
            self.viewModel.getPlace(from: address)
        }
        .edgesIgnoringSafeArea(.bottom)
    }
}
Btw, when you build the project you might see some SwiftUI warnings: Publishing changes from within view updates is not allowed…— which means you probably updated coordinates during view rendering. If you think that you did absolutely right, your states are updated from onAppear, so it can be an issue in Map inside. You can check this article about this issue by Donney Wals.
Wrapping up
Countless applications use Maps. But still few of them use a combination of SwiftUI and MapKit. I was curious to see what we can build if using only Apple technologies. How many lines of code are needed to implement this useful feature. Each year in WWDC you can notice that Apple engineers update MapKit rigorously adding new features especially if it comes to SwiftUI. I used only SwiftUI building Address with an autocompletion feature with Map because I truly believe that this framework is our closest future and UIKit soon will be secondary technology.
Want to Connect?
Don’t hesitate to follow me on Twitter. I appreciate any suggestions or comments regarding my research and articles.
Implementing address autocomplete using SwiftUI and MapKit was originally published in Level Up Coding on Medium, where people are continuing the conversation by highlighting and responding to this story.
This content originally appeared on Level Up Coding - Medium and was authored by Max Kalik
Max Kalik | Sciencx (2022-12-02T17:49:44+00:00) Implementing address autocomplete using SwiftUI and MapKit. Retrieved from https://www.scien.cx/2022/12/02/implementing-address-autocomplete-using-swiftui-and-mapkit/
Please log in to upload a file.
There are no updates yet.
Click the Upload button above to add an update.