
This content originally appeared on Level Up Coding - Medium and was authored by Ivan Rezic
AWS Redshift is a powerful analytical database (OLAP) designed to handle large amounts of data. It is commonly used by multiple user groups and manages various concurrent tasks with varying levels of importance. In this blog post, we will explore how to prioritize important queries, assign higher priority to specific queries, and monitor the execution of these tasks on Redshift.

Workload management
Amazon Redshift Workload Management (WLM) provides users with a flexible way to adjust the priority of workloads. There are two types of workload management: auto and manual. In this blog, I will cover the former.
With auto WLM, Amazon Redshift manages query concurrency and memory allocation on its own. Automatic WLM determines the amount of resources that queries need and adjusts the concurrency based on the workload. When queries requiring large amounts of resources are in the system (for example, hash joins between large tables), the concurrency is lower. Conversely, when lighter queries (such as inserts, deletes, scans, or simple aggregations) are submitted, concurrency is higher.
How to configure workload management?
Each Redshift cluster is associated with one parameter group, which configures database settings for all the databases created in that cluster. Among the different parameter options, one that interests us is the wlm_json_configuration.
This parameter can be configured through Infrastructure as Code (IaC), but for the sake of simplicity, we will configure it through the web console.
To add new workload management, on the AWS Redshift navigation menu, choose Configurations, then choose Workload Management to display the Workload Management page. From there, click ‘Create’ to create a new parameter group.

Fortunately, automatic WLM is enabled by default, so we don’t have to change anything for Redshift to take care of its resources. However, this configuration doesn’t allow us to prioritize some queries over others.
User groups and query priorities
Production clusters can have various workloads, but they are often grouped according to their type. For example, we could have:
- Transformation queries: Batch jobs and scheduled transformations, cleansing and aggregation, often done by the DBT.
- Dashboard queries: SELECT statements used for BI tools to display the dashboards.
- Ad-hoc queries: All other queries.
These groups have different importance. To ensure the freshest data for dashboard users, ETL must be done first. Therefore, Transformation queries have a higher priority than Dashboard queries. Additionally, to avoid slow dashboards, Ad-hoc queries have the lowest priority.
To accommodate priority requirements, we must create a user group in the production database for each defined workload type and add the users running those workload queries to the matching group.
For example, all of our transformations might be done by users user1 and user2, so we should create a user group called “wlm_transformations” and add those 2 users to it.
CREATE GROUP wlm_transformations;

ALTER GROUP wlm_transformations ADD USER user1;
ALTER GROUP wlm_transformations ADD USER user2;
Following the same pattern, we should create two other groups: “wlm_dashboards” and “wlm_ad_hoc.”
If we leave the created parameter group as is, it will have only one
Default queue with First-In-First-Out processing, which means all queries with different priorities will be processed based on start time and not by their priority.
Therefore, we must create three additional queues, one for each workload type. We can do that by clicking “Edit workload queues” and then clicking “Add queue” three times in the upper right corner.

Following previously defined workloads we can name our queues “Transformations“, “Dashboards“ and “Ad_hoc“ or we can choose any other name as long as it is unique per workload configuration. We can select different query priorities for each defined queue, for example:
- Transformations — HIGHEST
- Dashboards — HIGH
- Ad_hoc — NORMAL
We can also define which queries will run in each queue by adding the corresponding User groups to each queue.

After defining all the queues and clicking the “Save” button in the bottom right corner, we will see the following result in the Configuration preview:

As we can see, besides the newly added queues, the “Default queue” persists because Redshift must have a default queue for all queries that are not part of the previously defined workloads.
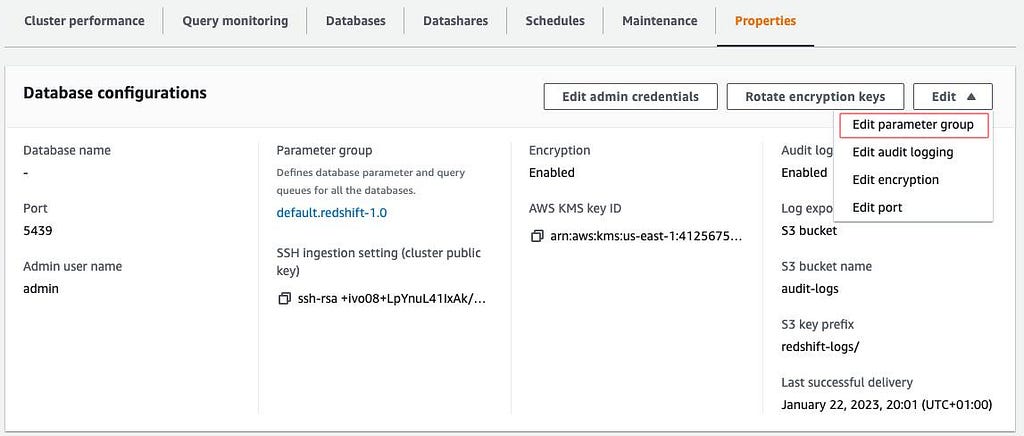
Finally, to apply this parameter group and WLM configuration, we must access the cluster properties tab (Amazon Redshift Clusters > Clusters > [cluster name]) and choose “Edit parameter group” and then select the newly created group.
Checking for automatic WLM
To check whether automatic WLM is enabled, run the following query. If the query returns at least one row, then automatic WLM is enabled.
SELECT *
FROM stv_wlm_service_class_config
WHERE service_class >= 100;
The following query shows the number of queries that went through each query queue (service class). It also shows the average execution time, the number of queries with wait time at the 90th percentile, and the average wait time. Automatic WLM queries use service classes 100 to 107.
SELECT
  final_state,
  service_class,
  COUNT(*),
  avg(total_exec_time),
  percentile_cont(0.9) WITHIN GROUP (ORDER BY total_queue_time),
  avg(total_queue_time)
FROM stl_wlm_query
WHERE userid >= 100
GROUP BY 1,2
ORDER BY 2,1;
Example of query duration per WLM queue graph, available under Amazon Redshift Clusters > Clusters > [cluster name] > Cluster performance.

Summary
We discussed Amazon Redshift Workload Management (WLM) and how to prioritize workloads within a Redshift cluster. We covered the use of auto WLM, explained how to configure WLM, set priorities for different workload types and create additional queues for each workload type.
In the upcoming blog post, we will delve into more advanced topics, including short query acceleration (SQA), concurrency scaling, and assignment rules, among others. Please make sure to follow me to stay updated.
Level Up Coding
Thanks for being a part of our community! Before you go:
- 👏 Clap for the story and follow the author 👉
- 📰 View more content in the Level Up Coding publication
- 🔔 Follow us: Twitter | LinkedIn | Newsletter
🚀👉 Join the Level Up talent collective and find an amazing job
Prioritizing Queries on AWS Redshift was originally published in Level Up Coding on Medium, where people are continuing the conversation by highlighting and responding to this story.
This content originally appeared on Level Up Coding - Medium and was authored by Ivan Rezic
Ivan Rezic | Sciencx (2023-01-29T11:46:40+00:00) Prioritizing Queries on AWS Redshift. Retrieved from https://www.scien.cx/2023/01/29/prioritizing-queries-on-aws-redshift/
Please log in to upload a file.
There are no updates yet.
Click the Upload button above to add an update.