
This content originally appeared on Level Up Coding - Medium and was authored by Shubham Matta

As fellow developers, we need to save time and make things efficient. One of the common ways to do that is to automate things. Learning is a continuous process and in this article, I will teach you how to automate very simple tasks.
Let me share a story, some time ago during the time of COVID peak, I had to travel abroad and the vaccine I was administered was not approved by WHO so by rules I would not be allowed to travel. But there was news that any day WHO might approve it. And I, being a curious soul would sit all day on Twitter and check for tweets from WHO. Every few minutes, open Twitter and click refresh just to see when the vaccine would be approved. Wasn’t very productive to be honest!
Then I got the idea that I should automate this. Most things that you do regularly can be automated. So for me, the idea was to query Twitter tweets containing the vaccine name let’s say “X” and “WHO” and get the results. Now, what to do with the results? Well, I can't open my laptop every time to see the output of my program. How about we send notifications on my phone in some way?
Telegram if you don't know, is a super-fast and free messaging app. You can use Telegram on all your devices at the same time — your messages sync seamlessly across any number of your phones, tablets, or computers. So what if we use this messenger to notify me? Good Idea!!
Let me share my thought process and overall execution. The tool had to be small, easy to build, and easy to run. There are many scripting languages out there. I had prior experience in Python so I chose it. If you want to learn Python, there are a lot of online resources. I won’t recommend any paid courses, Since there are some amazing teachers on youtube.
So, there are 4 components to this bot:
- Setting up Cloud Machine (AWS EC2/ Digital Ocean Droplet) to run the script.
- Twitter API and querying
- Telegram bot and sending messages.
- Running the bot on the cloud machine.
It will be a great exercise if you can follow the steps with me to set up your very own bot.
1. Setting up Cloud Machine
I think Digital Ocean has decent rates for their droplets. Since it is a simple BOT even the smallest config droplet will be enough. It costs about 4$/month. But if you are creating a new account, You can use this referral link to get $200 for 60 days to get started. Although AWS is free for 1 year, You can try that as well.
DigitalOcean | The Cloud for Builders
Don’t forget to terminate the instance after 60 days otherwise you will get charged.
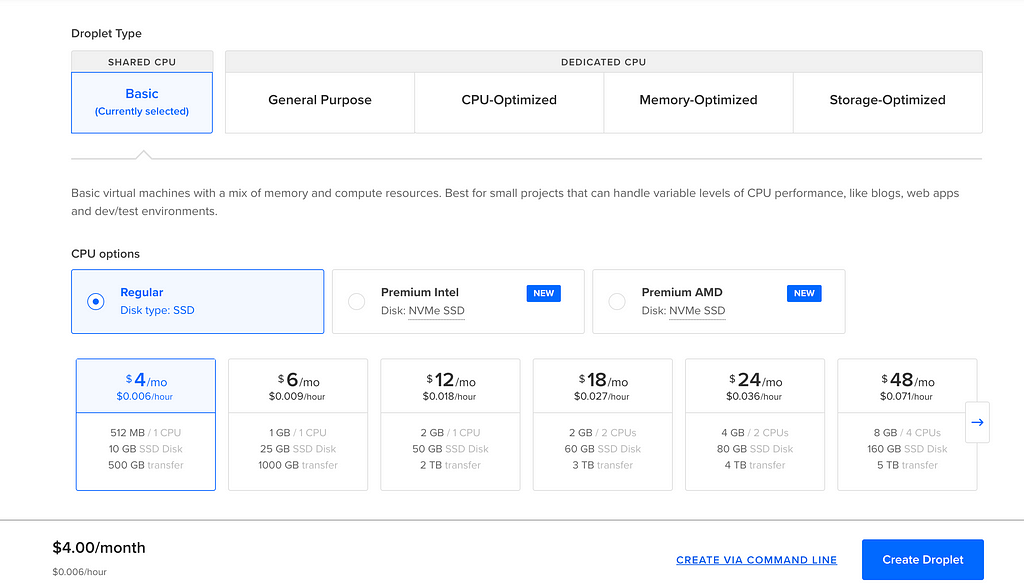
You can choose the server closest to your location. But it doesn’t matter much, other than to just reduce the connection time by a fraction. Once the droplet is setup, connect to it and install the following tools:
- Python3
- Pip3
- pip3 package named “requests”
- Screen (Run tasks in the background)
Do comment if you face issues with this setup, and I will create a more comprehensive guide to set up a droplet on DigitalOcean!
2. Twitter API and querying
Use Cases, Tutorials, & Documentation
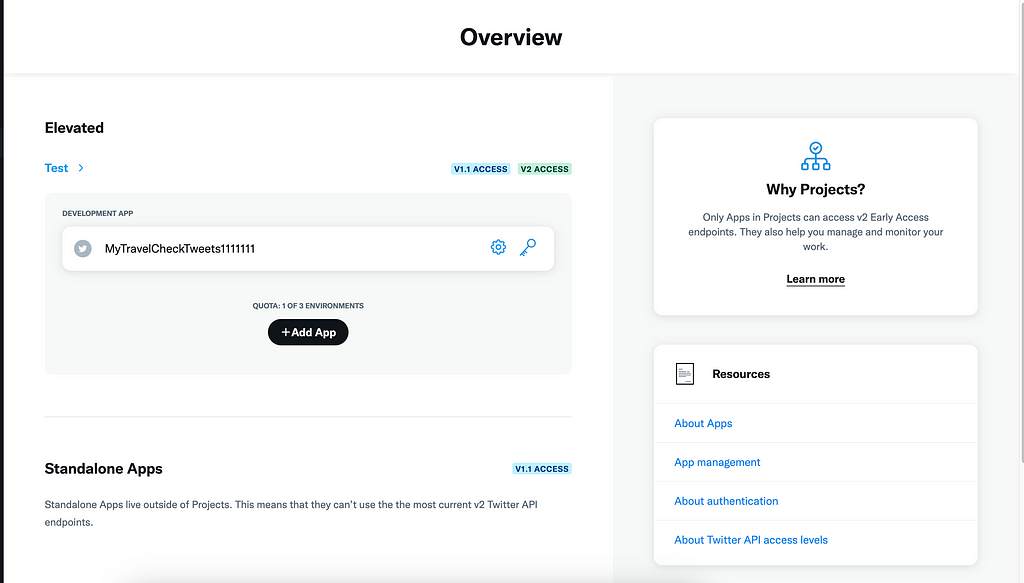
Visit the above page and log in to your Twitter Account. Then create a new project.
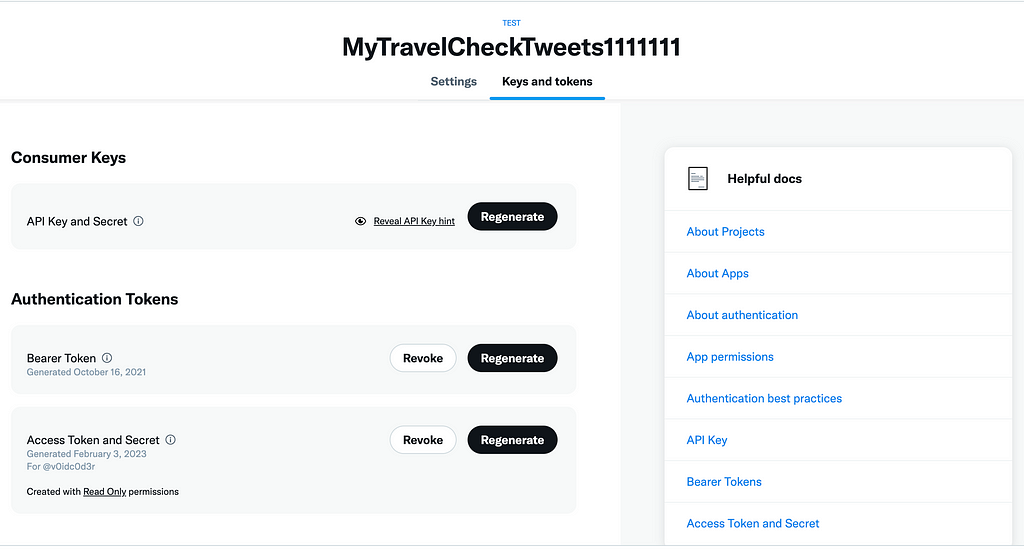
Then go to that particular app and get the ‘Bearer Token”.
Generally, most social media platforms provide API and you need to enable a developer account.
Keep these keys safe as they are your developer keys. Do not share sensitive content on the internet. You can use LastPass to save your keys for the future. I use LastPass as my password manager and store important notes/passwords.
#1 Password Manager & Vault App with Single-Sign On & MFA Solutions | LastPass
Now comes the part of calling the API using the Bearer Token. You can check my python code below and comment if you do not understand something.
We will be calling /2/tweets/search/recent API of twitter. [Documentation Link]
import requests
import time
import datetime
import json
# Define constants from Twitter developer console.
API_KEY="XXXXXXX"
API_SECRET="YYYYYYY"
BEARER_TOKEN="Bearer ZZZZZZZZZZ"


while(1):
 # Initiliaze an empty dictionary
 newTweets={}
 # Create a time for 5 min ago
 _5minAgo=(datetime.datetime.utcnow() - datetime.timedelta(minutes=5)).strftime('%Y-%m-%dT%H:%M:%SZ')
 # The endpoint we will hit /2/tweets/search/recent
 url = "https://api.twitter.com/2/tweets/search/recent"\
 "?query=elonmusk%20-is:retweet&max_results=100&"\
 "tweet.fields=author_id&start_time=" + _5minAgo
 print(_5minAgo + " " + url)
 # Make a GET Request
 r=requests.get(url, headers={"Authorization": BEARER_TOKEN})
 print(r.text)
 # load data into a json
 tweets=json.loads(r.text)
 if 'data' not in tweets: continue
 for tweet in tweets['data']:
  if tweet['id'] in data.keys(): continue
  newTweets[tweet['id']] = [tweet['text'], tweet['author_id']]
  data[tweet['id']] =  [tweet['text'], tweet['author_id']]

 print(newTweets)
 ## Add code to send telegram notification from here.
 time.sleep(280) ## Sleep timer just below 5 min because we call for tweets
 ## every 5 min
If you are not aware of Python, the code above creates a URL that is of Twitter API for getting recent tweets and then parsing the data of each tweet and printing it. Let’s look at the above URL:
# Base URL: https://api.twitter.com/2/tweets/search/recent
# Query params: "?query=elonmusk%20-is:retweet&max_results=100&"\
 "tweet.fields=author_id&start_time=" + _5minAgo
Query params help filter out the data. The above URL will fetch all the tweets mentioning “elonmusk”.
API Documentation is very helpful to understand the structure of the data that will be received from the API. I have mentioned the documentation link above.
3. Telegram bot and sending messages.
Moving on, We are left with the last part to connect telegram notifications and we are all set.
To create a new bot open your telegram app and start a chat with user “BotFather”. Make sure you select the one with a blue tick.
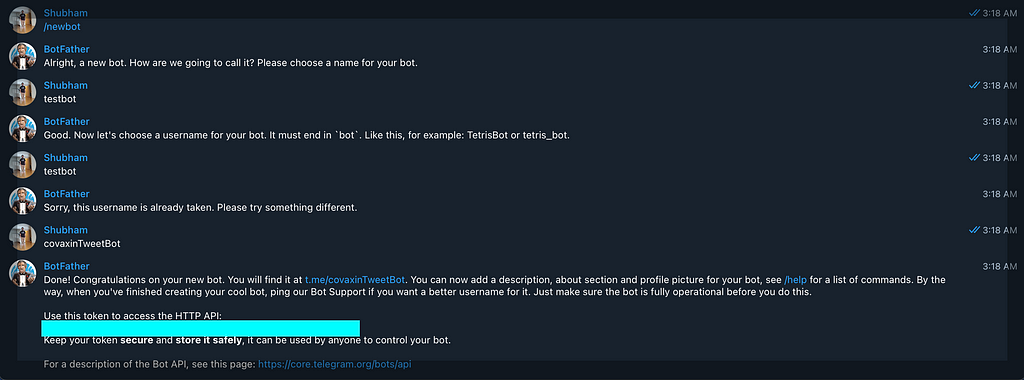
- “/newbot”, then you need to add a name to the bot.
From this, you get your bot-id which will help send messages to telegram through this bot. Now we are all set to send messages, however, I would like to provide one more tip regarding this. In case you are not the only one who wants to get the notifications from the bot, you can create a group with all the interested people along with the bot you just created. That way everyone can get the notifications. Once you are done, use this stack overflow thread to get the chat_id.
Telegram Bot - how to get a group chat id?
Using this group chat Id, you can send messages to the group chat on behalf of the bot. Let me show you how to do that.
import requests
import time
import datetime
import json


BOT_TOKEN = "XXXXXXXXX"
bot_chatID = "YYYYYYYYY"
is_prod_telegram_message = True

def send_mess_telegram(text):
    print("Telegram message: ", text)
    send_text_url = 'https://api.telegram.org/bot' + BOT_TOKEN \
    + '/sendMessage?chat_id=' + bot_chatID \
    + '&parse_mode=Markdown&text=' + text

    response = requests.get(send_text_url)
    # print(response.text)
    return response
What the above code is doing is calling the telegram API endpoint which publishes messages on behalf of the bot. The URL requires a bot token to send a message and a query param to know which group you would like to message. Again I would suggest going through telegram API documentation to understand what each parameter is doing. It helps to understand and extend the functionality.
This brings us to our final code. I am attaching the python script for your reference.
## twitterBot.py
import requests
import time
import datetime
import json
API_KEY="XXXXXX"
API_SECRET="YYYYYYY"
BEARER_TOKEN="ZZZZZZZZZ"
data={}
BOT_TOKEN="AAAAAAAAAAAA"
bot_chatID="-BBBBBB"

def send_mess_telegram(text):
    send_text_url = 'https://api.telegram.org/bot' \
    + BOT_TOKEN + '/sendMessage?chat_id=' \
    + bot_chatID + '&parse_mode=Markdown&text='+ text
    response = requests.get(send_text_url)
    print(response.text)
    return response


# send_mess(result_you_want_to_send)

def create_message(id):
 return "New Tweet: https://twitter.com/abcd/status/"+id + " EOT"

while(1):
 # Initiliaze an empty dictionary
 newTweets={}
 # Create a time for 5 min ago
 _5minAgo=(datetime.datetime.utcnow() - datetime.timedelta(minutes=5)).strftime('%Y-%m-%dT%H:%M:%SZ')
 # The endpoint we will hit /2/tweets/search/recent
 url = "https://api.twitter.com/2/tweets/search/recent"\
 "?query=elonmusk%20-is:retweet&max_results=100&tweet.fields=author_id&start_time=" + _5minAgo
 print(_5minAgo + " " + url)
 # Make a GET Request
 r=requests.get(url, headers={"Authorization": BEARER_TOKEN})
 print(r.text)
 # load data into a json
 tweets=json.loads(r.text)
 if 'data' not in tweets: continue
 for tweet in tweets['data']:
  if tweet['id'] in data.keys(): continue
  newTweets[tweet['id']] = [tweet['text'], tweet['author_id']]
  data[tweet['id']] =  [tweet['text'], tweet['author_id']]

 print(newTweets)
 # Sending message to telegram
 for key in newTweets.keys():
  send_mess_telegram(create_message(key))
 time.sleep(280)

# Reference curl https://api.twitter.com/2/tweets/search/recent?query=from%3Atwitterdev%20new%20-is%3Aretweet&max_results=10 -H "Authorization: Bearer $BEARER_TOKEN"
4. Running the bot on the cloud machine
Now comes the part where we need to run this script on our droplet. Since we already have set up everything on the droplet, let’s ssh and run this.
We will use the “screen” tool to run our script in the background so that even if our ssh connection terminates, the script keeps on running on the server. This is an extremely useful tool, please read this command usage here and learn some important shortcuts:
How to Use Screen Command on Ubuntu
Once you create a screen session run the above python bot:
$ python3 twitterBot.py
After running the script, log out of the screen session and let it do its magic.
This script is a DIY bot written by me. There are proper SDKs available for both Telegram and Twitter for Python that can be consumed and used more conveniently. I will leave that to you however you want to execute it.
If you have made it so far, thank you so much for reading this! Hope you learned something new and I would love to hear your feedback in the comments.
You can follow me for more technical content. Each follower is a huge encouragement to put in the time and provide more quality content.
Level Up Coding
Thanks for being a part of our community! Before you go:
- 👏 Clap for the story and follow the author 👉
- 📰 View more content in the Level Up Coding publication
- 💰 Free coding interview course ⇒ View Course
- 🔔 Follow us: Twitter | LinkedIn | Newsletter
🚀👉 Join the Level Up talent collective and find an amazing job
Step-by-step guide: Automate simple tasks with DIY bots. (<40 lines of code) was originally published in Level Up Coding on Medium, where people are continuing the conversation by highlighting and responding to this story.
This content originally appeared on Level Up Coding - Medium and was authored by Shubham Matta
Shubham Matta | Sciencx (2023-02-28T23:54:53+00:00) Step-by-step guide: Automate simple tasks with DIY bots. (<40 lines of code). Retrieved from https://www.scien.cx/2023/02/28/step-by-step-guide-automate-simple-tasks-with-diy-bots-40-lines-of-code/
Please log in to upload a file.
There are no updates yet.
Click the Upload button above to add an update.