
This content originally appeared on Level Up Coding - Medium and was authored by Itsuki
There are a lot of different approaches to control access to API Gateway.
In my previous articles, I have shared with you on how to achieve this by using
- Private API to only allow access from EC2 instances within a specific VPC
- Web Application Firewall to Control IP
Some of the other options will be using
In this article, let’s check out how we can use Cognito user pool to do this!
We will be first doing everything from the Console. I will then share with you the CDK stack (typescript) we can use to
- Create Cognito User Pool
- Add User Pool Domain (Managed Login)
- Add User Pool Client that uses managed login branding
- Create API Gateway Authorizer
- Add the Authorizer to a API Gateway Lambda proxy
- A little bonus: Customize Managed Login Branding (Login pages) with CDK
You can also find the demo code on my GitHub!
Let’s start!
Introduction to Cognito User POOL
Let’s start with a quick Introduction to Amazon Cognito!
Amazon Cognito is an identity platform for web and mobile apps.
By using the Cognito user Pool,
we can have our user sign in with
- persistent passwords
- persistent passwords and secure payload (Secure Remote Password (SRP) protocol)
- third-party IdPs (Apple, Login with Amazon, and OpenID Connect (OIDC) services. That’s Microsoft, Google, and etc.)
And more!
Check out Authentication flows Developer Guide for a complete sign in options provided!
When we want to sign up, sign in, and manage users in the user pool, we have two options.
- Managed login pages and the classic hosted UI include the managed login user-interactive endpoints and the federation endpoints that handle IdP and relying-party roles.
- Use Amazon Cognito user pools API to process the sign-in information we collect in our own custom front end.
With Managed login pages, all we have to provide in our front-end is a button to direct the user to the managed login page provided by AWS and a Callback URL for Amazon Cognito to notify us the authorization code we can use to exchange for tokens.
On that managed login page (no need for us to control), the user will be presented with the login form, option to sign up with email and password, or the social identity providers we have added to the pool. User will then do whatever they need to complete the sign up/login (Amazon Cognito will handle everything for us), and we will eventually get the authorization code in the Callback URL we specified. (If we are using an OIDC library as we will see shortly, we don’t even need to worry about exchanging the code!)
On the other hand, if we were to use APIs, we will have to create the login/sign up from by ourselves, send a SignUp API request to create a new user in the user pool after user filling in the information, prompt the user for an email confirmation code. Our users enters the code they received in an email message, we then send an InitiateAuth API request and stores an ID token, access token, and refresh token.
Also, We CANNOT sign in users who federate through an IdP with the API. We must authenticate these users through the user pool endpoints using the Managed login!
See! Just so many extra work if you were to use the API and write everything from scratch! That’s why I keep mentioning that we will be focusing on the managed login in this article!
Also, even though the UI for the managed login pages are pre-built by AWS (just like the name suggest), we can customize those to a certain extent such as adding logos, changing background and styles as we will be checking out at the end of this article as well!
Console
That’s a pretty long introduction but hope that it gives you (at least) some basic idea of what we will be doing in this article!
Let’s create our resources from the console here to get a better understanding of what we are actually doing!
Create User Pool
Let’s head to Cognito console and Select Create user pool from the User pools menu.

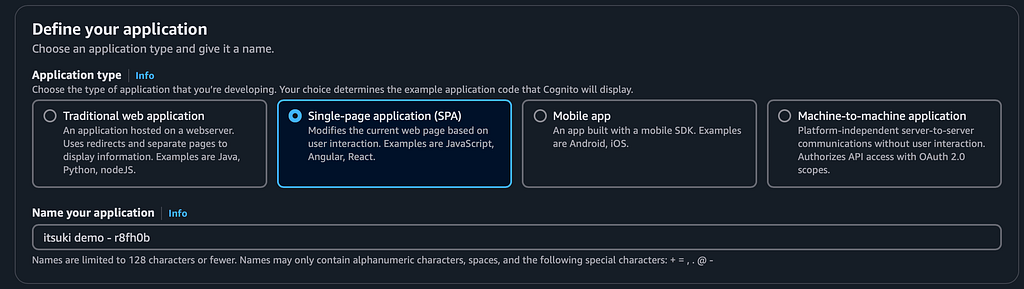
For Application type, choose something that best fits the application scenario that you want to create. Note that this will only affect the example code but has NO influence on the actual resource!
In Name your application, either enter a custom name or proceed with the default one.
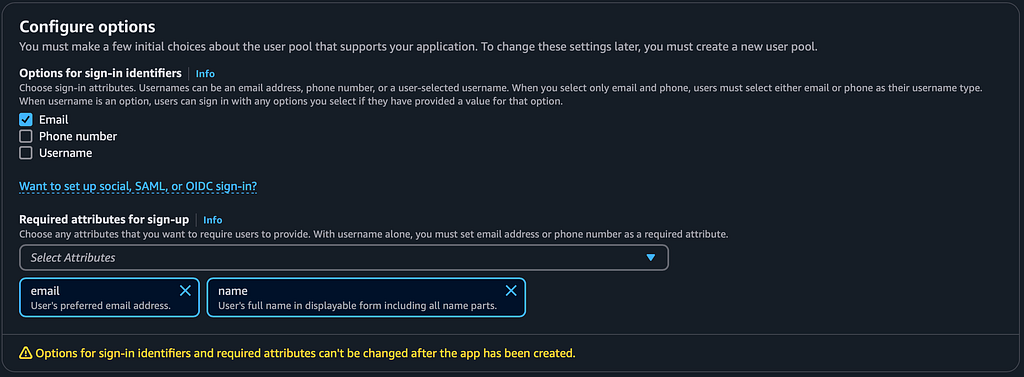
For Options for sign-in identifiers, choose the way that we want our user to be able to sign in with. It can be an email address, phone number, a user-selected username, or a combination of multiple.
When you select only email and phone, users must select either email or phone as their username type. When username is an option, users can sign in with any options you select if they have provided a value for that option
For Required attributes for sign-up, choose what user information we want (need) to collect when users register for a new account.
Note that if we have choose username in Options for sign-in identifiers, we have to have either email or phone attributes here so that users can receive a password-reset code in an email or SMS message. Email requires the email attribute, and Phone number requires the phone number attribute.
Add a return URL. This is the callback url in your app that Cognito will pass the authorization code to after users complete authentication. If we don’t enter anything here, the example code will use a default cloud front URL.
Note that this has to be HTTPS except for the only exception of http://localhost.

(Miss in my screenshot…http://localhost:3000/auth/callback)
Choose Create and Amazon will create a user pool and app client with some default settings. We can configure additional options like external identity providers and multi-factor authentication (MFA) after creation.
Test It Out!
After creation, we will be provided some sample code for us to test out! There are couple tiny problems with the sample code so let’s check it out together.

I am using Next.Js with App Router here so a little modifications.
// provider.tsx
'use client'
import { AuthProvider } from "react-oidc-context";


const cognitoAuthConfig = {
    authority: "https://cognito-idp.ap-northeast-1.amazonaws.com/<user_pool_id>",
    client_id: "<client_id>",
    redirect_uri: "http://localhost/auth/callback",
    response_type: "code",
    scope: "openid",
};


export function Providers({ children }: { children: React.ReactNode }) {
    return (
        <AuthProvider {...cognitoAuthConfig}>
            {children}
        </AuthProvider>
    );
}


// page.tsx
'use client'
import { useAuth } from "react-oidc-context";

export default function Home() {
    const auth = useAuth();

    const signOutRedirect = () => {
        const clientId = "<client_id>";
        const logoutUri = "http://localhost:3000"
        const cognitoDomain = "https://<domain_prefix>.auth.ap-northeast-1.amazoncognito.com";
        window.location.href = `${cognitoDomain}/logout?client_id=${clientId}&logout_uri=${encodeURIComponent(logoutUri)}`;
    };

    if (auth.isLoading) {
        return <div>Loading...</div>;
    }

    if (auth.error) {
        return <div>Encountering error... {auth.error.message}</div>;
    }

    if (auth.isAuthenticated) {
        return (
            <main>
                <p> Hello: {auth.user?.profile.email} </p>
                <p> Hello: {JSON.stringify(auth.user?.profile)} </p>
                <p> ID Token: {auth.user?.id_token} </p>
                <p> Access Token: {auth.user?.access_token} </p>
                <p> Refresh Token: {auth.user?.refresh_token} </p>

                <button onClick={() => {
                    auth.removeUser()
                    signOutRedirect()
                }}>Sign out</button>
            </main>
        );
    }

    return (

        <main>
            <button onClick={() => auth.signinRedirect()}>Sign in</button>
            <button onClick={() => signOutRedirect()}>Sign out</button>
        </main >
    );
}


// auth/callback/page.tsx
'use client'
import { useRouter } from "next/navigation";
import React from "react";

export default function Callback() {
    const router = useRouter()

    React.useEffect(() => {
        router.replace("/")
    }, [])

    return null
}
There is a auth.signoutRedirect method but it will not work in this case.
Also, we are basically doing NOTHING in our callback page because react-oidc-context handles all the code exchange for us.
Another thing here is when we sign our user out, in addition to calling auth.removeUser, we should also make sure to call signOutRedirect to actually remove the whatever saved in Cognito.
However, if we click on the Sign out button, either the before or after user login, we will get an invalid request error.
To have it work, we will need to have whatever we have defined for our const logoutUri as a Sign out URLs of our App client.
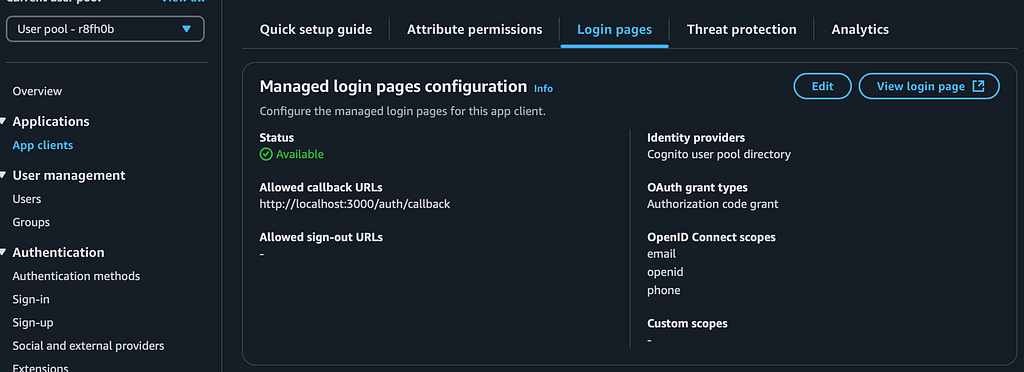
Choose App clients from the left panel and choose Login pages. Choose Edit and add the Allowed sign-out URLs. In my example above. This will be http://localhost:3000.

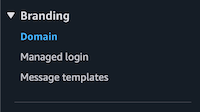
Also, you can find the domain needed for building the sign out url under Branding > Domain.
For the scope, I have openid here to retrieve all user attributes that my app client can read. You can also limit it by adding scopes like email, phone or any custom ones you have defined. Again, you can find this under App clients > Login Pages.
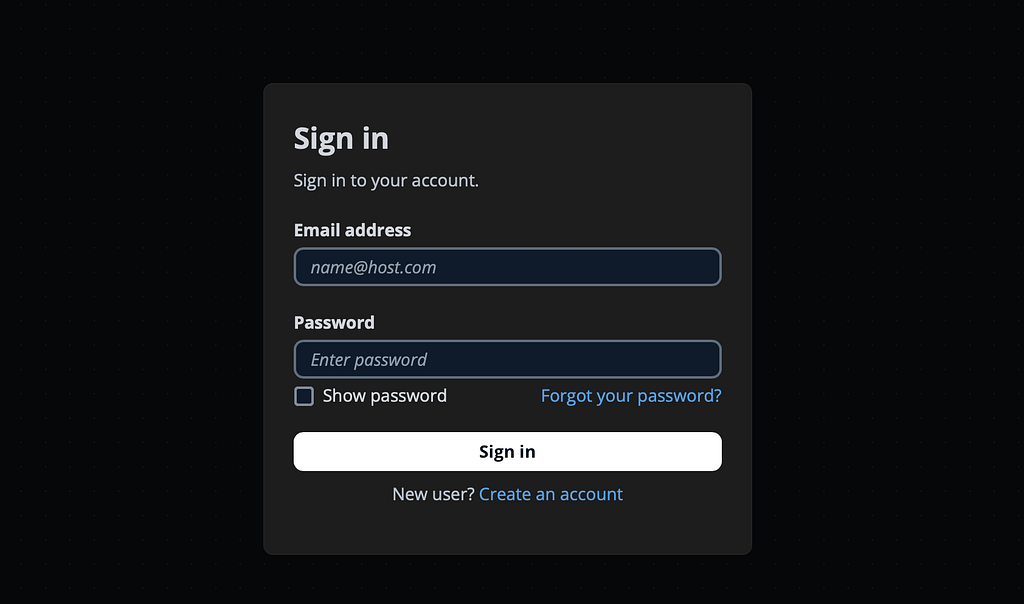
Click on the Sign in Button and you should see something like following.

And after you authenticate yourself successfully, you should see the tokens show up! We will be using those to test out our API Gateway.
API Gateway
I will not cover how to create a Lambda Proxy gateway and only focus on the important authorizer part.
Head to API Gateway Console and choose the API that you want to control the access for. Choose Authorizers from the left pane and choose Create authorizer.

Enter a name and choose the user pool we have created above. For Token source, enter Authorization. This will be the header name to pass the identity or access token from Amazon Cognito when a user signs in successfully.

Choose Create authorizer.
Since we are using a Lambda proxy, instead of attaching the authorizer to a specific method (which is not available), we will be attaching to the root. By that means, we CANNOT control which methods are public and which should be protected!

Choose Method request > Edit.
If you were to authenticate with ID tokens, keep Authorization Scopes empty. To use an Access tokens, enter one or more full names of a scope that has been configured when the Amazon Cognito user pool was created.
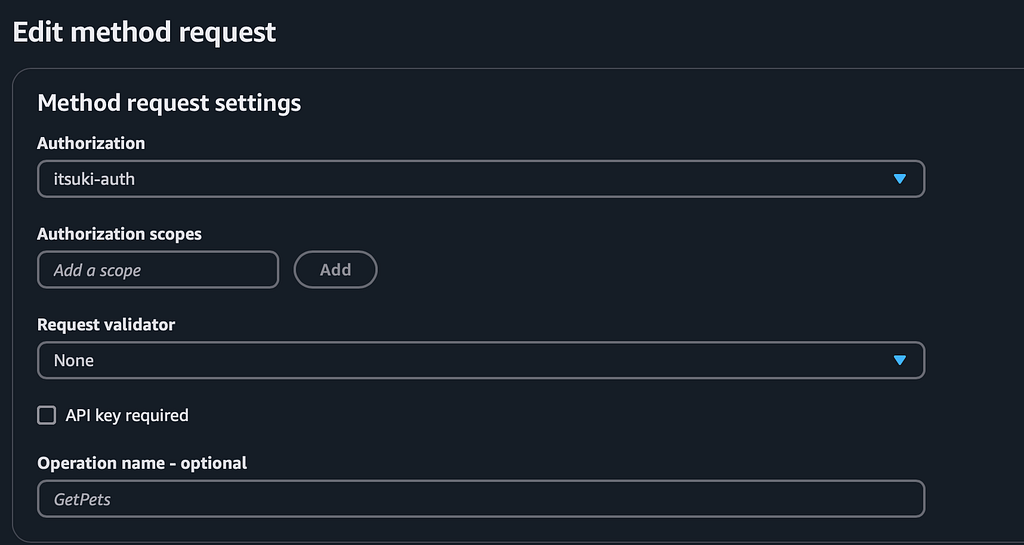
Keep all other fields as they are and choose save.
Deploy it to propagate the changes and use the token we got above to test it out!
Retrieve User Info with Proxy Lambda
This is actually a little off topic of what we are trying to make in this article, but let me just share it with you here!
If you have a non-proxy gateway, you can also add some mapping in the Integration request in the form of $context.authorizer.claims['property-name'] or$context.authorizer.claims.property-name so that you can get the authorizer properties in the Lambda Context.
For simple property names, such as sub or custom-sub, the two notations are identical. For complex property names, such as custom:role, we can't use the dot notation. For example, the following mapping expressions pass the claim's standard fields of sub and email to the backend.
{
   "context" : {
      "sub" : "$context.authorizer.claims.sub",
      "email" : "$context.authorizer.claims.email"
   }
}
Now, how can we retrieve those if we are using proxy?
Thankfully, both the ID Token and Access Token are JWT Tokens with the claims containing all the information about the user!
Which means we can just decode those by ourselves!
If you are using Rust, here is a little code snippet for that!
use axum::http::HeaderMap;
use jsonwebtoken::{decode, Algorithm, DecodingKey, Validation};

fn decode_auth(headers: HeaderMap) -> anyhow::Result<Value> {
    let auth_string = headers
        .get("Authorization")
        .context("Authorization header is not present.")?
        .to_str()
        .context("Authorization header is not valid UTF8.")?;

    let key = DecodingKey::from_secret(&[]);
    let mut validation = Validation::new(Algorithm::RS256);
    validation.insecure_disable_signature_validation();
    validation.validate_aud = false;
    validation.validate_exp = true;
    validation.validate_nbf = false;

    let token_data = decode::<Value>(&auth_string, &key, &validation)?;
    Ok(json!({
        "claims": token_data.claims,
        "headers": token_data.header,
    }))
}
If you want to get a better understanding of the tokens, check out Understanding user pool JSON web tokens (JWTs).
Side Note on Verification
As I have mentioned above, we don’t have the choice of attaching the authorizer or not to individual methods we have since we are only using API Gateway as a Proxy.
If you need to control exactly which methods are protected and which ones are not, two options.
- Ditch the Proxy and create the Mapping by yourself
- Ditch the authorizer and verify the JWT token by yourself. AWS has an entire page: Verifying a JSON Web Token for that so I bet it is something legit to do!
CDK
That’s it for the console! Time for the CDK!
Code Time!
import { join } from 'path';
import { RustFunction } from 'cargo-lambda-cdk';
import { EndpointType, LambdaRestApi } from 'aws-cdk-lib/aws-apigateway'
import { CfnOutput, Duration, RemovalPolicy, Size, Stack, StackProps } from "aws-cdk-lib";
import { Construct } from "constructs";
import { aws_cognito, aws_apigateway } from "aws-cdk-lib";

export class CognitoDemoStack extends Stack {

    constructor(scope: Construct, id: string, props: StackProps) {
        super(scope, id, props);

        // cognito
        const userPool = new aws_cognito.UserPool(this, "CognitoDemoPool", {
            userPoolName: "CognitoDemoPool",
            selfSignUpEnabled: true,
            userVerification: {
                emailSubject: "Verify your email",
                emailBody: "Thanks for signing up! Your verification code is {####}",
                emailStyle: aws_cognito.VerificationEmailStyle.CODE,
            },
            autoVerify: {
                email: true,
                phone: false
            },
            mfa: aws_cognito.Mfa.OFF,
            signInAliases: {
                username: false,
                email: true,
                phone: false
            },
            // Choose the standard and custom attributes this app can read and write.
            // Required attributes are locked as writable.
            // We recommend that you set immutable custom attributes as writable to allow the app client to set initial values during sign-up.
            standardAttributes: {
                email: {
                    required: true,
                    mutable: true
                },
                fullname: {
                    required: true,
                    mutable: true
                }
            },
            keepOriginal: {
                email: true
            },
            accountRecovery: aws_cognito.AccountRecovery.EMAIL_ONLY,
            removalPolicy: RemovalPolicy.DESTROY,
            // passwordPolicy
            // advancedSecurityMode
            // lambdaTriggers
        })

        // IDP like Apple, facebook, and etc. can be added here.
        // userPool.registerIdentityProvider(aws_cognito.UserPoolIdentityProvider.fromProviderName(this, "CognitoDemoAppleProvider", aws_cognito.UserPoolClientIdentityProvider.APPLE.name))

        const userPoolClient = userPool.addClient("CognitoDemoClient", {
            userPoolClientName: "CognitoDemoClient",
            authFlows: {
                userSrp: true
            },
            disableOAuth: false,
            oAuth: {
                callbackUrls: ["http://localhost:3000/auth/callback"],
                logoutUrls: [],
                flows: {
                    authorizationCodeGrant: true,
                },
                scopes: [aws_cognito.OAuthScope.OPENID, aws_cognito.OAuthScope.EMAIL],
            },
            authSessionValidity: Duration.minutes(3),
            refreshTokenValidity: Duration.days(5),
            accessTokenValidity: Duration.minutes(60),
            idTokenValidity: Duration.minutes(60),
            enableTokenRevocation: true,
            preventUserExistenceErrors: true,
            // IDP like Apple, facebook, and etc. can be added here.
            // Default to all identify providers defined on the pool
            supportedIdentityProviders: [aws_cognito.UserPoolClientIdentityProvider.COGNITO]
        })

        // managed login not supported
        // userPool.addDomain("CognitoDemoDomain", {
        //     cognitoDomain: {
        //         domainPrefix: "itsukidemo",
        //     },
        // });

        const cfnUserPoolDomain = new aws_cognito.CfnUserPoolDomain(this, 'CognitoDemoManagedLoginDomain', {
            domain: `itsuki-demo-${process.env.CDK_DEFAULT_ACCOUNT}`,
            userPoolId: userPool.userPoolId,
            // * Version `1` is hosted UI (classic). Version `2` is the newer managed login with the branding designer.
            // For more information, see [Managed login](https://docs.aws.amazon.com/cognito/latest/developerguide/cognito-user-pools-managed-login.html) .
            managedLoginVersion: 2
        });

        new aws_cognito.CfnManagedLoginBranding(this, 'CognitoDemoManagedLoginBranding', {
            userPoolId: userPool.userPoolId,
            clientId: userPoolClient.userPoolClientId,
            // true: applies the default branding style options.
            useCognitoProvidedValues: true
        })

        // apigateway lambda
        const apigatewayLambda = new RustFunction(this, 'CognitoDemoLambda', {
            // Path to the root directory.
            manifestPath: join(__dirname, '..', '..', 'lambda/'),
            timeout: Duration.minutes(5)
        });

        const cognitoAuthorizer = new aws_apigateway.CognitoUserPoolsAuthorizer(this, 'CognitoDemoGatewayAuthorizer', {
            authorizerName: 'CognitoDemoGatewayAuthorizer',
            cognitoUserPools: [userPool],
        });

        const restApi = new LambdaRestApi(this, 'CognitoDemoGateway', {
            handler: apigatewayLambda,
            endpointTypes: [EndpointType.REGIONAL],
            defaultMethodOptions: {
                authorizationType: aws_apigateway.AuthorizationType.COGNITO,
                authorizer: cognitoAuthorizer
            }
        });
        cognitoAuthorizer._attachToApi(restApi)

    }
}
Wait! It seems like we are creating resources that we did not while using console? Client? Domain?
Yes, those are created by default while using the console, but we will have to add it explicitly while using CDK.
In addition, there are couple notes I would like to make here.
Self Sign Up
This is the option that specify whether the user can register for an account themselves or through invitations only.
When creating from the console, as you might already tried out above, this is default to true. However, when using CDK, the selfSignUpEnabled is default to false.

You can leave out the userVerification for configurations such as email title and body since the default implementations indeed meet what we need.
In addition to the selfSignUpEnabled , I have also specified a bunch of other ones such as
Managed Login
Unfortunately, this is a still fairly new feature and is only supported by the L1 CFN construct.
If we have added using addDomain , it will be the classic Hosted UI instead. (By the way, if you are using this method, not that you cannot pass in empty string from domain prefix.)
userPool.addDomain("CognitoDemoDomain", {
    cognitoDomain: {
        domainPrefix: "itsukidemo",
    },
});
While creating the CfnManagedLoginBranding , we have set useCognitoProvidedValues to true to use the default branding style like what we had while creating from the console, but I will be sharing with you on how to add custom ones next!
Couple side notes on the managedLoginVersion parameter we have specified in CfnUserPoolDomain
- Version 1 for hosted UI (classic) and 2 is for managed login.
- Since, again, Managed Login is fairly new, older version of aws-cdk and aws-cdk-lib do NOT come with the CfnManagedLoginBranding parameter. I am using 2.173.2 for both.
Properties with Different names
Some of the properties are named a little differently from that in the console.
For example, for OAuth, the information is under App Client > Login pages.
signInAliases is the Options for sign-in identifiers and standardAttributes is the Required attributes.

That’s it!
cdk deploy it and use the token from the NextJs App (or React or whatever) to make a API Call and confirm you can indeed authorise yourself!
Bonus: Custom Branding
I really don’t like the default managed login branding that much. If we were to create custom branding entirely from scratch directly using CDK, it is a pain (I will say almost impossible)!
But!
There is this DescribeManagedLoginBrandingByClient command, both in the SDK as well as the CLI, for us to retrieve the detailed information about a specific style we have created!
Here is how we can use it.
First of all, head to the console and click on the Style ID assigned to the app client.

Choose Launch branding designer and design!
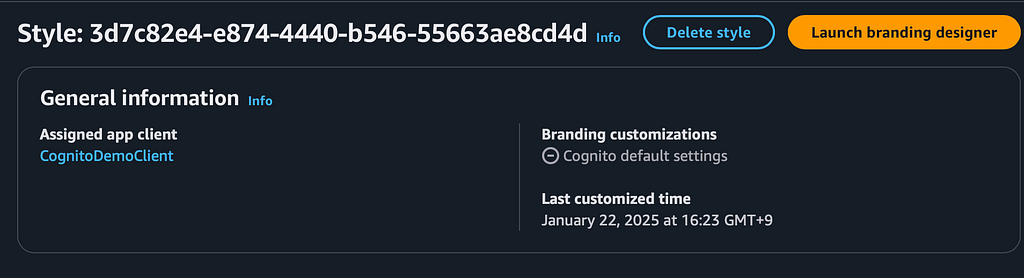
Add assets (logos), change background and all the styles in the designer. Save it when you finished!
Here is mine by the way.
Then run the following command.
aws cognito-idp describe-managed-login-branding-by-client --user-pool-id USER_POOL_ID --client-id CLIENT_ID > output.json
Replace the USER_POOL_ID and CLIENT_ID with that of yours. I am too lazy to upgrade my CLI locally so I simply used the CloudShell on AWS…
You should see the response being something like following.
{
    "ManagedLoginBranding": {
        "ManagedLoginBrandingId": "...",
        "UserPoolId": "...",
        "UseCognitoProvidedValues": false,
        "Settings": {
            "components": {
                "secondaryButton": {
                    "lightMode": {
             // ...super long settings
        },
        "Assets": [
            //... some assets you added
        ],
        "CreationDate": "2025-01-22T07:23:50.877000+00:00",
        "LastModifiedDate": "2025-01-22T07:50:10.688000+00:00"
    }
The settings and assets are super long so I cut those here but those two properties are what we are interested in. Assets is an array of image files that we want to apply to roles like backgrounds, logos, and icons. And Settings is the settings that we want to apply to the style.
Copy and paste those two values to our CDK file where we have called CfnManagedLoginBranding and set useCognitoProvidedValues to true.
new aws_cognito.CfnManagedLoginBranding(this, 'CognitoDemoManagedLoginBranding', {
    userPoolId: userPool.userPoolId,
    clientId: userPoolClient.userPoolClientId,
    // true: applies the default branding style options.
    useCognitoProvidedValues: false,
    settings: {
       // ... copy and paste from above
    },
    assets: [
       // ... copy and paste from above
    ]
})
That’s it!
We can now deploy the custom branding using cdk as well!
Thank you for reading!
That’s it for today! Again, feel free to grab the demo code on my GitHub!
Happy Access controlling!
AWS Cognito For API Gateway (Lambda Proxy) Access Control: Step By Step was originally published in Level Up Coding on Medium, where people are continuing the conversation by highlighting and responding to this story.
This content originally appeared on Level Up Coding - Medium and was authored by Itsuki
Itsuki | Sciencx (2025-01-24T01:42:38+00:00) AWS Cognito For API Gateway (Lambda Proxy) Access Control: Step By Step. Retrieved from https://www.scien.cx/2025/01/24/aws-cognito-for-api-gateway-lambda-proxy-access-control-step-by-step/
Please log in to upload a file.
There are no updates yet.
Click the Upload button above to add an update.