
This content originally appeared on HackerNoon and was authored by Vladislav Guzey
Obsidian is one of the best note-taking apps available today. It provides a powerful, Markdown-based experience with local-first storage. However, there is one problem: the official sync feature costs around $8 per month. What if I told you there’s a way to sync your notes across multiple devices completely free? In this guide, I will walk you through a method using GitHub and Git that allows you to keep your notes in sync without spending a dime.
What Would Need
It could feel that you need to do a lot of things, but don’t worry; in an ideal scenario, you would need about 10–15 minutes and these things:
- GitHub Account & Repository
- GitHub Access Token
- SSH key (optional)
- Git
- Obsidian
- Git Plugin for Obsidian
- iSH app for iPhone
- Obsidian App for iPhone
Step 1: Create a GitHub Account and Repository
GitHub is a cloud-based platform primarily used for software development, but it can also be used for managing personal projects and files — including Obsidian notes.
A Git repository (or repo) is a storage space where Git tracks all the changes to a set of files. It records modifications, allowing you to revert to previous versions, collaborate with others, and synchronize your files across different devices. In the context of Obsidian, a Git repository helps store and sync your notes while keeping track of all edits.
\
- Go to GitHub.com, and sign up.
- Once logged in, click on the New button to create a new repository.
- Give it a name (e.g., “Obsidian-Notes”).
- Make sure to set the repository to Private so your notes are not publicly accessible.
- Click Create Repository.
\

\
Step 2: Install Git on Your Computer
If you don’t have Git installed, follow these steps:
- Windows: Download and install Git from git-scm.com.
\
- Mac: Install Git using Homebrew with
brew install git.
\
- Linux: Use
sudo apt-get install git(for Debian-based systems) or sudo dnf install git (for Fedora-based systems).
\ Once installed, open your terminal (Command Prompt, PowerShell, or macOS Terminal) and verify installation by running:
git --version
Basic Git Commands
Here are three essential Git commands that you’ll use frequently:
git status
\ This command shows the current state of your repository. It tells you which files have been modified, added, or staged for commit.git status
git pull
\ This command fetches the latest changes from the remote repository (GitHub) and updates your local repository.
git push
\ After making changes, you need to upload them to GitHub using git push. This command sends your committed changes from your local repository to the remote repository.
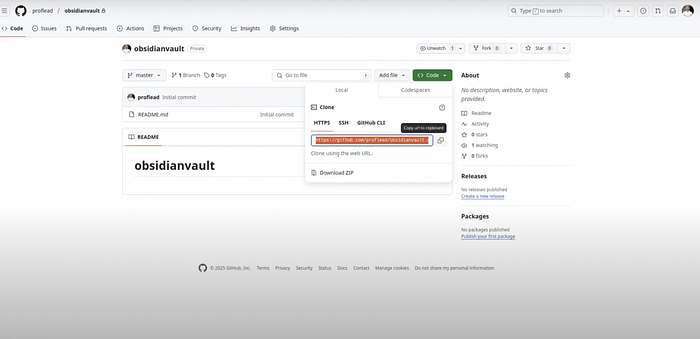
Step 3: Clone the GitHub Repository
Now, let’s connect your local Obsidian vault to GitHub:
- Open your terminal, and navigate to the folder where you want to store your notes.
\
- Run the following command, replacing YOUR-REPO-URL with your GitHub repository URL:
git clone YOUR-REPO-URL
\
- This will create a local folder linked to your GitHub repository.
\
\ Move your Obsidian notes into this folder so they are ready for syncing.
Step 3. How to Get a GitHub Classic Token
GitHub has deprecated password-based authentication for Git operations. Instead, it requires you to use a Personal Access Token (PAT), which provides a more secure way to authenticate.
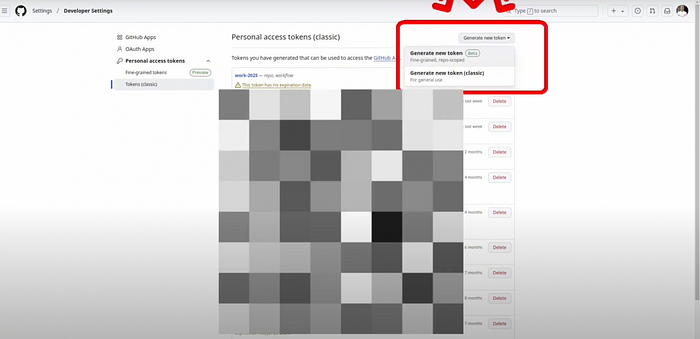
How to Get a GitHub Classic Token
Go to GitHub Developer Settings:
- Open GitHub Token Settings.
- Click Generate new token → Select Classic.
\ Set Expiration & Permissions:
- Choose an expiration date or set it to No Expiration (not recommended for security).
Select the necessary scopes:
- repo → For accessing private repositories.
\ Generate and Copy the Token:
- Click Generate token and copy it immediately.
- GitHub won’t show it again after you leave the page.
\ Use the Token in Git Authentication:
- When prompted for a password in Git operations, paste the token instead.
Step 4: Set Up SSH for Authentication (Optional)
To avoid entering your password every time you sync, you can set up SSH authentication:
- Generate an SSH key by running:
ssh-keygen -t ed25519 -C "your-email@example.com"
\
- Copy the SSH key using:
cat ~/.ssh/id_ed25519.pub
\
Go to GitHub, navigate to Settings > SSH and GPG keys, and add the copied key.
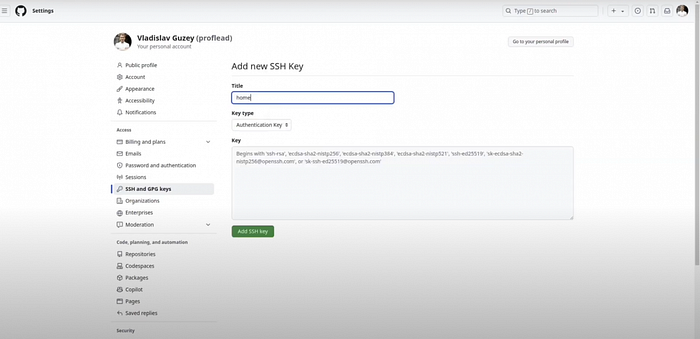
\ Now, your system will authenticate with GitHub automatically.
Step 5: Set Up Git Plugin in Obsidian
I assume you already have the Obsidian App, which is why I won’t cover the installation process for it here. I will only show you the quick steps to install the Git plugin.
\ Obsidian has a plugin that makes Git syncing easier:
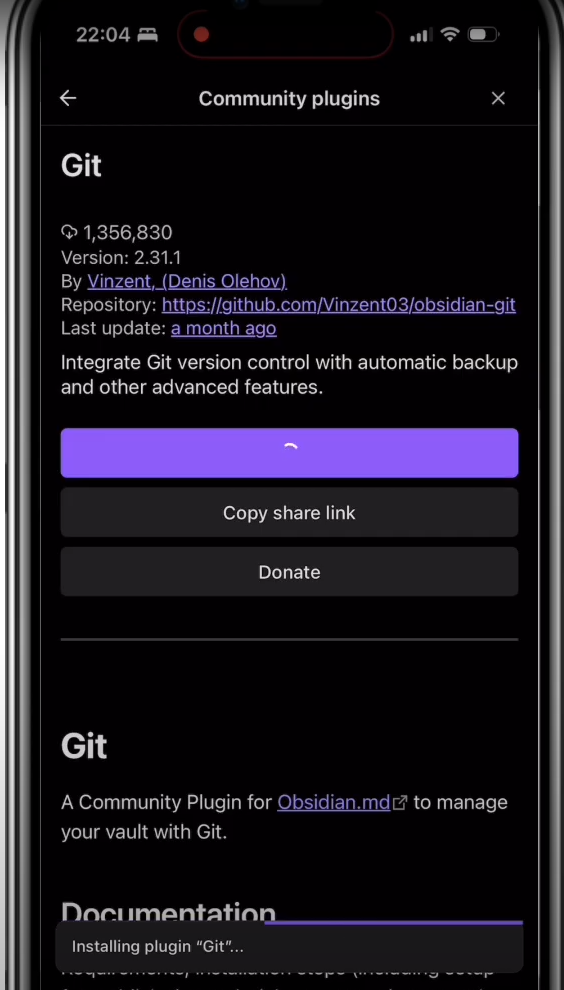
- Open Obsidian, and go to Settings > Community Plugins.
- Search for “Git,” and install it.
- Enable Auto Commit and Sync (set an interval, e.g., 5 minutes).
- Enable Pull on Startup to prevent conflicts.
\

\ Now, whenever you edit notes, Obsidian will sync them automatically with GitHub.
Step 6: Syncing Notes on Mobile (iOS, iPhone, iPad)
Syncing on mobile is slightly more complicated but still doable.
- Install Obsidian from the App Store.
\
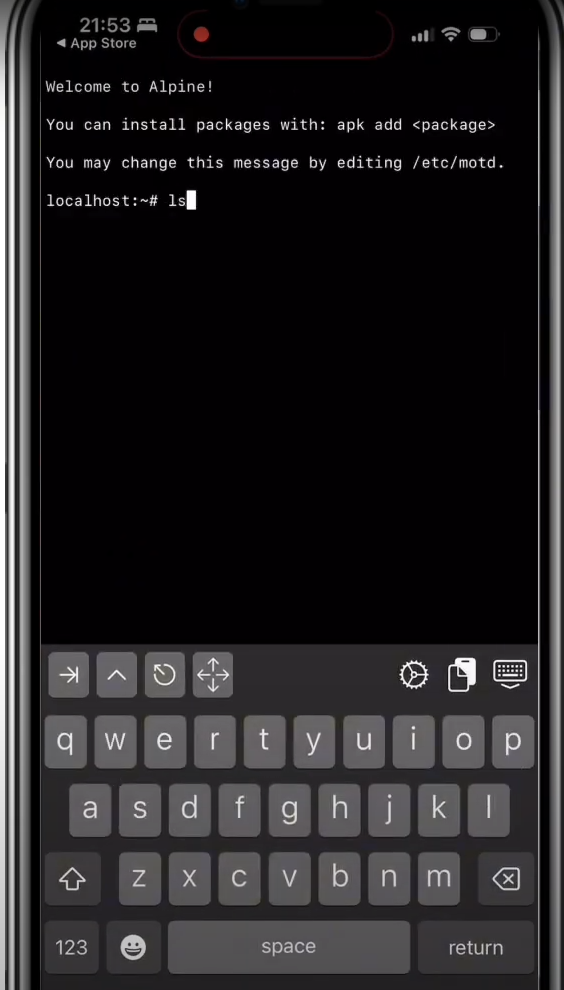
Install iSH, a terminal app that allows you to run Linux commands.
iSH App
\
Open iSH, and install Git using:
apk add git
\
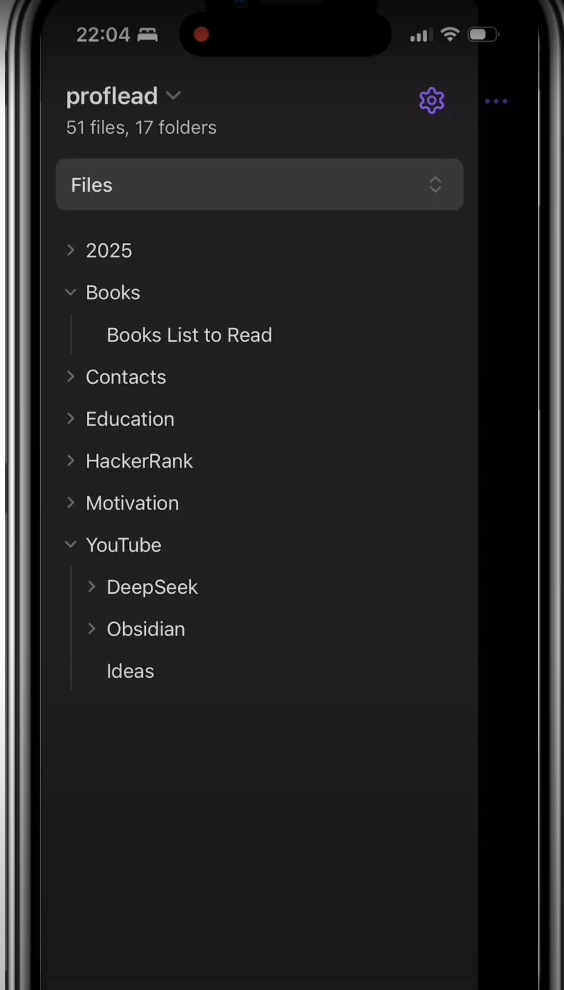
- Create a folder for your obsidian notes:
mkdir obsidian
\
Run the mount command to mount the obsidian vault folder.
\
mount -t ios . obsidian
\
- A file picker will show up. Choose the folder with your local vault.
\
- Then use the following commands:
\
cd obsidianrm -rf .git clone YOUR-REPO-URL .
Once this step is done, you will see your notes in the Obsidian application.
\
Step 7: Install Obsidian Git Plugin on iPhone
The last step in our tutorial - the Git community plugin.
Open Obsidian.
Go to Settings > Community Plugins.
Tap Browse and search for Obsidian Git.
Tap Install, then Enable the plugin.
Set up an auto-commit interval (e.g., every 5 minutes).
Enable Pull on Startup to sync changes when opening Obsidian.
\
\
Video Tutorial
If you are struggling with the steps, I recommend you to watch my detailed video tutorial.
https://youtu.be/PScdHzUiBLA?si=C5UNiV7Ou1BJhEbr&embedable=true
Conclusion
While it takes a bit of setup, once done, it works seamlessly. If you found this guide helpful, let me know in the comments, and feel free to ask any questions!
\ Cheers! ;)
This content originally appeared on HackerNoon and was authored by Vladislav Guzey
Vladislav Guzey | Sciencx (2025-02-19T21:35:07+00:00) How to Obsidian Sync for FREE! (No Paid Plan Required). Retrieved from https://www.scien.cx/2025/02/19/how-to-obsidian-sync-for-free-no-paid-plan-required/
Please log in to upload a file.
There are no updates yet.
Click the Upload button above to add an update.