
This content originally appeared on Level Up Coding - Medium and was authored by Shashi Khanal

Why OAuth??
Imagine you’re leading the development of a healthcare management platform where doctors, patients, and administrators all need different levels of access to sensitive medical records. Traditional username/password authentication isn’t just insufficient, it’s a liability. Before OAuth, users had to enter their credentials directly into each application, creating security vulnerabilities and a fragmented user experience. Each service storing passwords meant multiple points of failure and potential breach.
OAuth 2.0 revolutionized this approach by introducing a secure delegation model: users authenticate once with a trusted authorization server, which then grants specific permissions to applications without exposing credentials. This means doctors can access patient histories, administrators can view billing information, and patients can see their own records without compromising the entire system.
OAuth 2.0 is the industry-standard protocol for authorization. Read more at https://oauth.net/2
By implementing OAuth 2.0 with Auth0, we can create a secure, scalable system that not only protects sensitive information but also provides a seamless user experience. The beauty of this solution lies in its flexibility: we can easily add new roles, modify permissions, and track access patterns while maintaining robust security at every level.
Auth0 is an easy to implement, adaptable authentication and authorization platform. Read more at https://auth0.com
Let’s walk through implementing OAuth 2.0 and role-based access control(RBAC) in a NodeJs application using Auth0. We’ll create a web application and secure APIs with different permission levels and protect routes based on user permissions.
Project Overview
We’re building a NodeJs application and API with the following features:
- OAuth 2.0 authentication using Auth0
- Role-based access control
- Protected API endpoints
Technical Stack
- NodeJs
- Express.js
- Auth0 Authentication/Authorization
- express-openid-connect (JS library for web authentication)
- express-oauth2-jwt-bearer (JS library for API authentication/authorization)
Implementation Steps
1. Setting up the basic Express application
First, we set up a basic Express application with the necessary dependencies.
index.js
import 'dotenv/config';
import express from 'express';
import routes from './src/routes.js';
import pkg from 'express-openid-connect';
const { auth } = pkg;

const app = express();
app.use(express.json());
2. Configuring Auth0
Now we configure Auth0 tenant to handle both web authentication and API authorization in our application with role-based access control. Sign in or Sign up (if you haven’t) to Auth0 at https://auth0.com.
From Auth0 Dashboard, perform the following steps:
1. Create a Regular Web Application
- Applications > Create Application
- Select “Regular Web Application”
- Note down Client ID and Client Secret
- Configure Allowed URLs (We’ll use these URLs later in our Express app):
Allowed Callback URLs: http://localhost:3000/callback
Allowed Logout URLs: http://localhost:3000
Allowed Web Origins: http://localhost:3000
2. Create API
- APIs > Create API
- Set Identifier (audience): e.g. https://oauth-test.example.com
Identifier is used to specify the intended recipient of an access token (which we later receive from Auth0)
- Select Signing Algorithm: RS256
- Enable RBAC (Role-Based Access Control)
3. Configure API Permissions
- Go to your API created in the above step > Permissions
- Add the following permissions:
read:profile
read:messages
admin:access
read:admin-messages
4. Assign Permissions to Users
- Go to User Management > Roles
- Create a new role messages-admin
- Add permissions (except admin:access) from the API created above to the messages-admin role
- Go to User Management > Users
- Select/(Or create a new user if you don’t have one already) User > Roles
- Assign messages-admin role to your user created/selected above
We now configured Auth0 authentication with both web authentication and API authorization.
Following is the required configuration we need to connect our application with Auth0:
index.js now looks like this
import 'dotenv/config';
import express from 'express';
import routes from './src/routes.js';
import pkg from 'express-openid-connect';
const { auth } = pkg;

const app = express();
app.use(express.json());

const config = {
 authRequired: false,
 auth0Logout: true,
 secret: process.env.AUTH0_SECRET,
 baseURL: process.env.AUTH0_BASE_URL,
 clientID: process.env.AUTH0_CLIENT_ID,
 clientSecret: process.env.AUTH0_CLIENT_SECRET,
 issuerBaseURL: process.env.AUTH0_ISSUER_BASE_URL,
 routes: {
  login: '/login',
  callback: '/callback'
 },
 authorizationParams: {
  response_type: 'code',
  audience: process.env.AUTH0_AUDIENCE,
  scope: 'openid profile email',
  // Request all possible permissions (in practice, you might want to request fewer)
  permissions: 'read:profile read:messages admin:access read:admin-messages'
 }
};
3. Create environment file
Find these values in Auth0 dashboard and store them in the environment file.
.env
AUTH0_SECRET=your-long-random-string
AUTH0_CLIENT_ID=your-client-id
AUTH0_CLIENT_SECRET=your-client-secret
AUTH0_BASE_URL=http://localhost:3000
AUTH0_ISSUER_BASE_URL=https://your-tenant.auth0.com
AUTH0_AUDIENCE=your-api-identifier
4. Implementing role-based access control (RBAC)
Let’s create a custom middleware to check user permissions since access_tokens we get from Auth0 already have permissions in them:
src/middleware/checkPermissions.js
import { claimCheck } from 'express-oauth2-jwt-bearer';

export const checkPermissions = (requiredPermissions) => {
    return claimCheck((claims) => {
        const permissions = claims.permissions || [];
        const hasAllPermissions = requiredPermissions.every(
            (permission) => permissions.includes(permission)
        );

        if (!hasAllPermissions) {
            throw new Error('Insufficient permissions');
        }
        return true;
    });
};
4. Setting Up Protected Routes
Let’s implement different types of protected routes:
src/routes.js
import pkg from 'express-openid-connect';
const { requiresAuth } = pkg;
import { auth as requireJWT } from 'express-oauth2-jwt-bearer';
import { checkPermissions } from './middleware/checkPermissions.js';

const jwtCheck = requireJWT({
 audience: process.env.AUTH0_AUDIENCE,
 issuerBaseURL: process.env.AUTH0_ISSUER_BASE_URL,
 tokenSigningAlg: 'RS256'
});

export default (app) => {
 app.get('/', (req, res) => {
  res.send({
   message: 'Public endpoint',
   isAuthenticated: req.oidc.isAuthenticated()
  });
 });

 // Login status endpoint
 app.get('/auth/status', (req, res) => {
  res.send({
   isAuthenticated: req.oidc.isAuthenticated(),
   user: req.oidc.isAuthenticated() ? req.oidc.user : null
  });
 });

 // Token endpoint - requires authentication
 app.get('/auth/token', requiresAuth(), async (req, res) => {
  try {
   if (!req.oidc.accessToken) {
    throw new Error('No access token available');
   }

   res.send({
    access_token: req.oidc.accessToken,
    token_type: 'Bearer',
    user: req.oidc.user
   });
  } catch (error) {
   console.error('Token error:', error);
   res.status(500).send({
    error: 'Could not retrieve access token',
    details: error.message
   });
  }
 });

 // User profile endpoint - requires read:profile permission
 app.get('/profile',
  jwtCheck,
  checkPermissions(['read:profile']),
  (req, res) => {
   res.send({
    user: req.auth
   });
 });

 // Protected API endpoint - requires read:messages permission
 app.get('/protected',
  jwtCheck,
  checkPermissions(['read:admin-messages']), // read:messages
  (req, res) => {
   res.send({
    message: 'Protected endpoint',
    token_details: {
     // Standard JWT claims
     sub: req.auth.sub,
     iss: req.auth.iss,
     aud: req.auth.aud,
     iat: req.auth.iat,
     exp: req.auth.exp,
     // Auth0 specific claims
     azp: req.auth.azp,
     scope: req.auth.scope,
     permissions: req.auth.permissions,
     // Full token payload for reference
     full_payload: req.auth
    }
   });
 });

 // Admin endpoint - requires admin permission
 app.get('/admin',
  jwtCheck,
  checkPermissions(['admin:access']),
  (req, res) => {
   res.send({
    message: 'Admin endpoint',
    admin_data: {
     sensitive: 'This is sensitive admin data',
     user: req.auth
    }
   });
 });
};
You can clone this repo and follow its README to get started quickly:
GitHub - shashikhanal/secure-api-with-oauth: POC of securing an API in NodeJS application with oAuth
Let’s Test the Authentication and Authorization Flow!
Run application:
npm run dev
1. Web Authentication:
- User visits /login
http://localhost:3000/login
- User is redirected to Auth0 login page
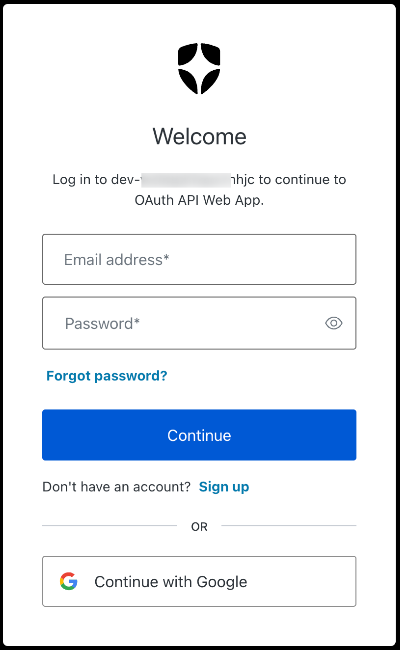
- After successful login with the user created in one of the above steps in Auth0 dashboard, the user is redirected back to your application
Session cookie maintains authentication state. This is different from the API authorization which uses JWT Bearer tokens instead of cookies. This dual-authentication approach allows for both traditional web applications (cookie-based) and API clients (token-based) to securely access your application.
2. API Authentication/Authorization:
- Client obtains access token from /auth/token
http://localhost:3000/auth/token
- Include access_token in /protected API request as Bearer token
curl http://localhost:3000/protected \
  -H "Authorization: Bearer YOUR_ACCESS_TOKEN"
- Server validates token and checks permissions
- Access granted or denied based on permissions
- Try accessing /admin API
curl http://localhost:3000/admin \
  -H "Authorization: Bearer YOUR_ACCESS_TOKEN"
- Since your user doesn’t have admin:access permission to /admin API, you get the following API response (sorry for this ugly error response, I should have done better :P):
<!DOCTYPE html>
<html lang="en">
<head>
<meta charset="utf-8">
<title>Error</title>
</head>
<body>
<pre>Error: Insufficient permissions<br> at file:///.../src/middleware/checkPermissions.js:11:19<br> at .../node_modules/express-oauth2-jwt-bearer/dist/index.js:392:14<br> at .../node_modules/express-oauth2-jwt-bearer/dist/index.js:419:9<br> at Layer.handle [as handle_request] (.../node_modules/express/lib/router/layer.js:95:5)<br> at next (.../node_modules/express/lib/router/route.js:149:13)<br> at .../node_modules/express-oauth2-jwt-bearer/dist/index.js:404:13</pre>
</body>
</html>
Conclusion
This implementation provides a secure, scalable authentication and authorization system for your NodeJs application/API using Auth0. The role-based access control allows for fine-grained control over who can access what in your application.
Thank you for sticking with me until the end! Before you head out:
- If you found this helpful, clap it and hit follow for more updates! 👏
- Follow on LinkedIn | Medium
- Please find more of my writings here.
Building Secure APIs: OAuth 2.0 and Role-Based Access Control (RBAC) with Auth0 was originally published in Level Up Coding on Medium, where people are continuing the conversation by highlighting and responding to this story.
This content originally appeared on Level Up Coding - Medium and was authored by Shashi Khanal
Shashi Khanal | Sciencx (2025-03-04T17:45:32+00:00) Building Secure APIs: OAuth 2.0 and Role-Based Access Control (RBAC) with Auth0. Retrieved from https://www.scien.cx/2025/03/04/building-secure-apis-oauth-2-0-and-role-based-access-control-rbac-with-auth0/
Please log in to upload a file.
There are no updates yet.
Click the Upload button above to add an update.