
This content originally appeared on Telerik Blogs and was authored by Héctor Pérez
Learn about the powerful Telerik UI for Blazor Spreadsheet component and how it can add Excel-like experiences to your Blazor app.
Have you ever wanted to create a web application with an interface similar to an Excel-like spreadsheet? In this post, you’ll learn about the Telerik Spreadsheet for Blazor component and how to integrate it into your own Blazor applications. Let’s get started!
What Is the Blazor Spreadsheet Component?
The Blazor Spreadsheet component from Progress Telerik UI for Blazor allows you to add a control to your applications for viewing and editing data in a tabular format, very similar to Excel, making it easy for your users to acclimate. The Spreadsheet control is so powerful that it enables users to perform tasks like applying styles to cells, formatting values, using links, inserting images, utilizing formulas and applying a vast collection of mathematical functions, among other features.
How to Integrate the Blazor Spreadsheet Component into Your Blazor Apps
To add a Spreadsheet component to your Blazor application, you first need to follow the Blazor components installation guide. Then, add the component to the page where you’d like to use it, as illustrated in the following example:
@page "/spreadsheet"

<TelerikSpreadsheet>
</TelerikSpreadsheet>

@code {

}
By running the Blazor application, you’ll be able to see the Spreadsheet component displayed on your page:
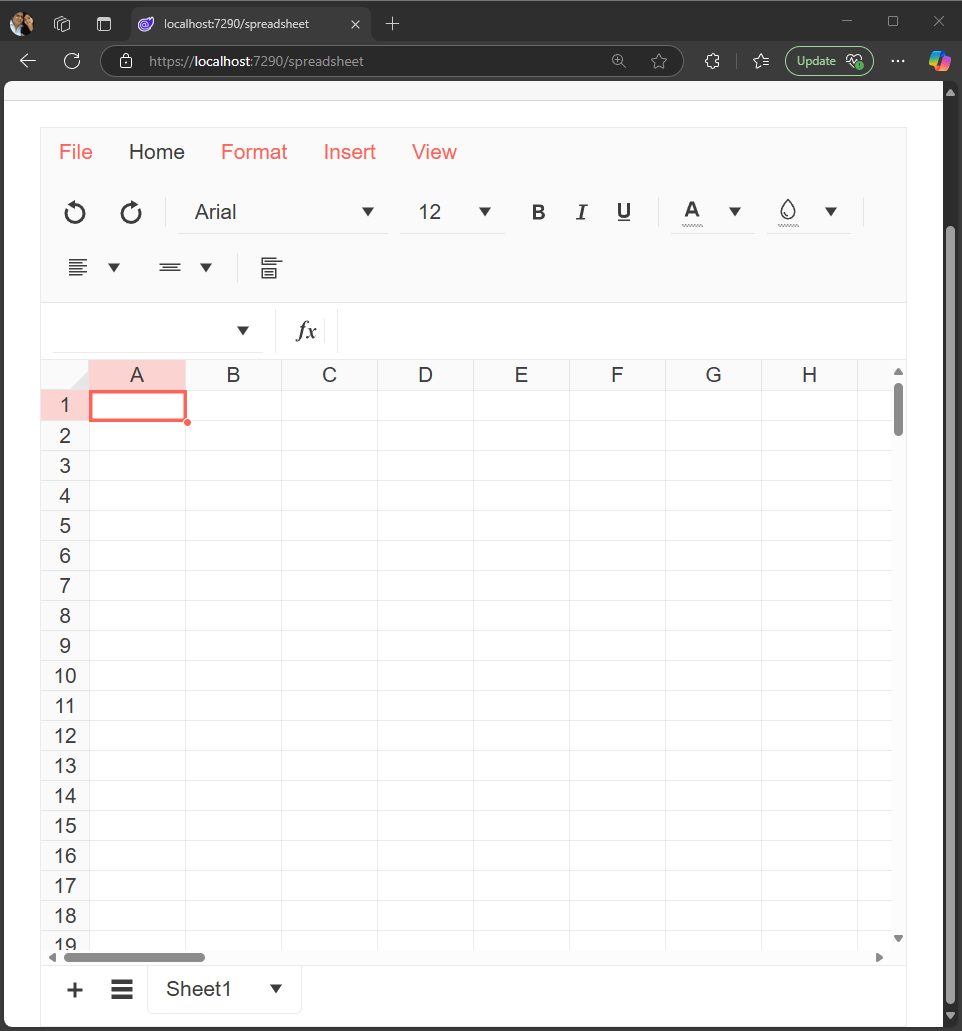
It’s quite easy, isn’t it?
Loading Data into a Blazor Spreadsheet from Code
The Spreadsheet component has a Data parameter of type byte[] that we can use in case we need to load information via code. For example, I downloaded a file about the most popular baby names in New York several years ago, converted it into Excel format, and added it as part of my project at the root level. To load it, we just need to read the file as a byte array and assign it to a variable or property bound to the Spreadsheet component, as shown below:
@page "/spreadsheet"
@inject HttpClient HttpClient

<TelerikSpreadsheet Data="SpreadsheetData">
</TelerikSpreadsheet>

@code {

    private byte[]? SpreadsheetData { get; set; }

    protected override async Task OnInitializedAsync()
    {
        SpreadsheetData = System.IO.File.ReadAllBytes("Popular_Baby_Names.xlsx");

        await base.OnInitializedAsync();
    }
}
After running the application with the above change applied, you’ll be able to see the following result:
Working with Spreadsheet Tools
It’s important to know that the Spreadsheet component consists of a Spreadsheet tool set (Menu + ToolBar). This tool set, in turn, is composed of one or more tool set items, which can ultimately contain one or more tools. Here’s an example of its hierarchical structure for clarity:
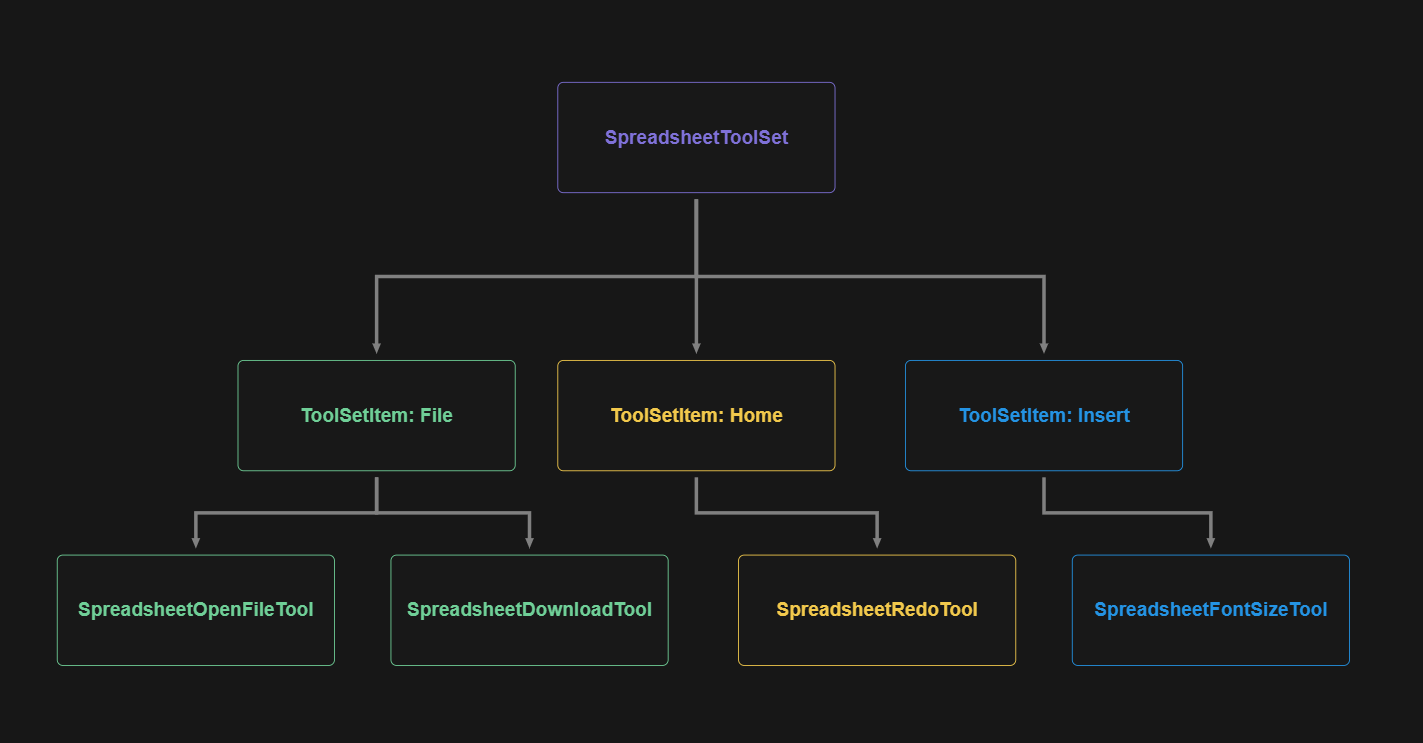
You can view the complete list of tools and their belonging to tool sets at this link in the official documentation. Knowing this information is essential since it’s possible to customize the menu by adding, removing and rearranging tools according to your needs.
To obtain a reference to the tool sets belonging to a Spreadsheet, you need to bind the Tools property of the Spreadsheet to a property of type SpreadsheetToolSet, as shown in the following example:
@page "/spreadsheet"
...

<TelerikSpreadsheet Data="SpreadsheetData" Tools="@DefaultToolsWithCustomizations">
</TelerikSpreadsheet>

@code {

    private SpreadsheetToolSet DefaultToolsWithCustomizations { get; set; } = SpreadsheetToolSets.All;

    ...

    protected override async Task OnInitializedAsync()
    {
       ...

        var toolSetItems = DefaultToolsWithCustomizations.Items;

        await base.OnInitializedAsync();
    }
}
By running the above code, you’ll see that the Items property contains a list of the tool set names available in the component:
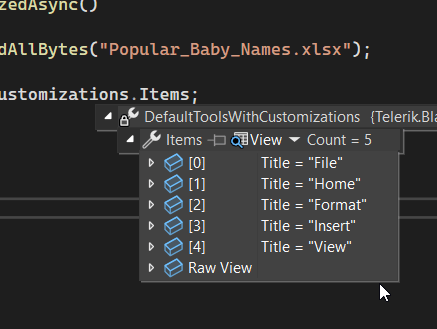
With this instance, we can perform different actions, as I’ll show you below.
Changing the Title of a Tool Set
Suppose we want to modify the text of the toolset named Home by replacing it with the text Start. To achieve this, we could filter the Items property for the Title property with the desired value and then replace it with the new value as shown in the following example:
protected override async Task OnInitializedAsync()
{
    SpreadsheetData = System.IO.File.ReadAllBytes("Popular_Baby_Names.xlsx");

    var toolSetItems = DefaultToolsWithCustomizations.Items;
    var homeToolSet = toolSetItems.FirstOrDefault(x => x.Title == "Home");
    homeToolSet.Title = "Start";

    await base.OnInitializedAsync();
}
Modifying Tools Within a Tool Set
The Spreadsheet control allows us to make changes to the tools inside the tool sets. For example, we can add items, remove them, reorder them, among many other actions.
For example, you could add the tool to insert images to the Home (renamed Start) tool set as follows:
protected override async Task OnInitializedAsync()
{
    SpreadsheetData = System.IO.File.ReadAllBytes("Popular_Baby_Names.xlsx");

    var toolSetItems = DefaultToolsWithCustomizations.Items;

    var homeToolSet = toolSetItems.FirstOrDefault(x => x.Title == "Home");

    homeToolSet.Title = "Start";

    homeToolSet.Tools.Add(new SpreadsheetInsertImageTool
    {
            Title = "Insert Image"
    });

    await base.OnInitializedAsync();
}
Since the Tools property is a list, we can work with it using our prior knowledge of list operations.
Creating a Custom Tool Set
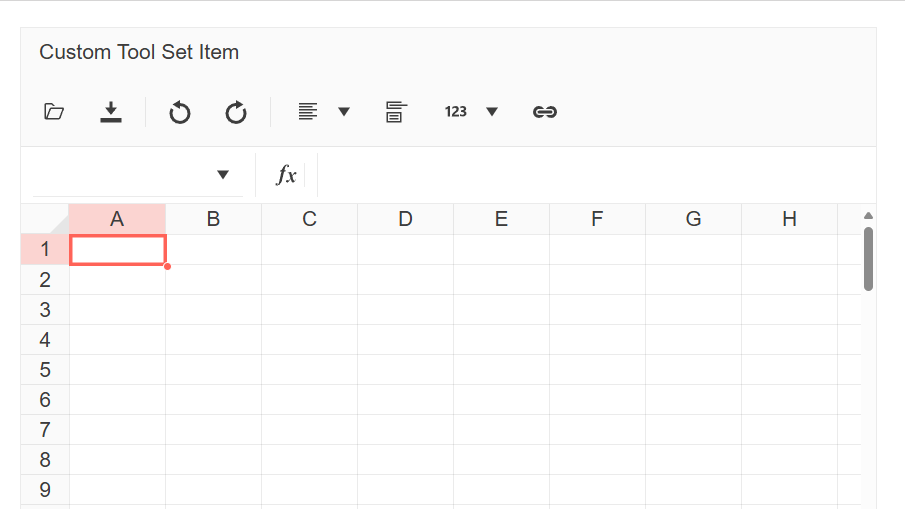
If you don’t want to modify the predefined tool sets and instead prefer to create a tool set from scratch with your preferred tools, you can create a new instance of the SpreadsheetToolSet type bound to the Tools property, and then assign the Items property a new list of tool set items, as shown in the following example:
@page "/spreadsheet"
@using Telerik.Blazor.Components.Spreadsheet
@inject HttpClient HttpClient

<TelerikSpreadsheet Tools="@SpreadsheetTools">
</TelerikSpreadsheet>

@code {

    private byte[]? SpreadsheetData { get; set; }

    private SpreadsheetToolSet SpreadsheetTools { get; set; } = new SpreadsheetToolSet();

    protected override async Task OnInitializedAsync()
    {
        SpreadsheetData = System.IO.File.ReadAllBytes("Popular_Baby_Names.xlsx");

        SpreadsheetTools.Items = new List<SpreadsheetToolSetItem>()
        {
            new SpreadsheetToolSetItem()
            {
                Title = "Custom Tool Set Item",
                Tools = new List<SpreadsheetTool>()
                {
                    new SpreadsheetOpenFileTool(),
                    new SpreadsheetDownloadFileTool(),

                    new SpreadsheetToolSeparator(),

                    new SpreadsheetUndoTool(),
                    new SpreadsheetRedoTool(),

                    new SpreadsheetToolSeparator(),

                    new SpreadsheetHorizontalAlignTool(),
                    new SpreadsheetTextWrapTool(),
                    new SpreadsheetNumberFormatTool(),
                    new SpreadsheetInsertLinkTool()
                }
            }
        };

        await base.OnInitializedAsync();
    }
}
The result of the above execution displays the custom tool set:
Creating Custom Tools
One of the great advantages of Telerik’s Spreadsheet component is that it allows you to create your own tools to perform actions on the document or content via code. For example, suppose you want to add a button that enables users to quickly navigate to the documentation that lists the formulas they can use in the component. To achieve this, you can follow these steps:
- Create the component with the
Toolsparameter pointing to a property or variable, with the purpose of adding the tool later:
<TelerikSpreadsheet Data="SpreadsheetData" Tools="@DefaultToolsWithCustomizations">
</TelerikSpreadsheet>
...
@code{
    private SpreadsheetToolSet DefaultToolsWithCustomizations { get; set; } = SpreadsheetToolSets.All;
}
- Create a
RenderFragmentthat defines the button to appear in the Spreadsheet and that users can press. In this example, I’ve added aTelerikButton, modifying its parameters according to the desired functionality, as well as creating the event handler that enables navigation to the documentation:
private RenderFragment CustomToolFragment =>
    @<TelerikButton Icon="@SvgIcon.FormulaFx"
                            ButtonType="@ButtonType.Button"
                            ThemeColor="@ThemeConstants.Button.ThemeColor.Primary"
                            Title="Function List"
                            FillMode="@ThemeConstants.Button.FillMode.Flat"
                            OnClick="@OnCustomToolClick">
    </TelerikButton>
;

private async Task OnCustomToolClick()
{
    var url = "https://www.telerik.com/blazor-ui/documentation/components/spreadsheet/functions-formulas#function-list";
    await JS.InvokeVoidAsync("open", url, "_blank");

}
- Add a new tool set for your custom tools (although you could modify any existing tool set). In the list of tools, create a new one of type
SpreadsheetCustomTooland set theTemplateparameter to theRenderFragmentcreated in the previous step:
protected override async Task OnInitializedAsync()
{
    SpreadsheetData = System.IO.File.ReadAllBytes("Popular_Baby_Names.xlsx");

    var toolSetItems = DefaultToolsWithCustomizations.Items;

    var myToolSet = new SpreadsheetToolSetItem()
        {
            Title = "Docs",
            Tools = new List<SpreadsheetTool>()
            {
                new SpreadsheetCustomTool
                {
                    Template = CustomToolFragment
                }
            }
        };

    toolSetItems.Add(myToolSet);

    await base.OnInitializedAsync();
}
When you run the application, you’ll see how pressing the button redirects the user to the new tab:
It’s worth noting that more complex operations using the component’s data are possible, as shown in this article.
Available Events in the Spreadsheet Component
With the Spreadsheet component, you can determine when a user presses the Download button to download a document, thanks to the OnDownload event. You can also know when the user presses the Open button and opens a document from their local machine through the OnOpen event. Below is an example of its implementation:
<TelerikSpreadsheet Data="SpreadsheetData"
OnDownload="@OnSpreadsheetDownload"
OnOpen="@OnSpreadsheetOpen">
</TelerikSpreadsheet>

@code {

    private byte[]? SpreadsheetData { get; set; }

    protected override async Task OnInitializedAsync()
    {
        SpreadsheetData = System.IO.File.ReadAllBytes("Popular_Baby_Names.xlsx");

        await base.OnInitializedAsync();
    }
    private void OnSpreadsheetDownload(SpreadsheetDownloadEventArgs args)
    {
        Debug.WriteLine($"OnDownload event executed");
    }

    private void OnSpreadsheetOpen(SpreadsheetOpenEventArgs args)
    {
        var file = args.Files.First();
        Debug.WriteLine($"OnOpen event executed - Opened file: {file.Name}, with size {file.Size.ToString("n0")}");
    }
}
Conclusion
Throughout this article, you’ve learned about the powerful Telerik UI for Blazor Spreadsheet component, which enables you to create Excel-like experiences for your application’s users. We’ve seen how to add a Spreadsheet to your Blazor applications and how to modify the toolbar using tool sets.
It’s your time to create extraordinary applications easily using Telerik components.
This content originally appeared on Telerik Blogs and was authored by Héctor Pérez
Héctor Pérez | Sciencx (2025-08-05T15:43:32+00:00) Getting Started with the Blazor Spreadsheet Control. Retrieved from https://www.scien.cx/2025/08/05/getting-started-with-the-blazor-spreadsheet-control/
Please log in to upload a file.
There are no updates yet.
Click the Upload button above to add an update.