
This content originally appeared on Level Up Coding - Medium and was authored by Rany ElHousieny

When I started migrating to Microfrontends using Module Federation, I faced two challenges with apps built using create-react-app (CRA). The first challenge was the compatibility with Webpack 5 (https://github.com/facebook/create-react-app/issues/9994). The second challenge was the abstracted configuration in CRA. They do not allow you to change or access configurations. All legacy apps created using create-react-app can’t be upgraded to Microfrontends easily. Therefore, I decided to invest in showing how to build react apps without CRA. It is not that hard, especially if you compared it with all the time spent fixing compatibility issues and getting around the CRA framework.
What is Create React App (CRA)
Facebook, the creator of CRA, defined it as follows:
Create React App is a comfortable environment for learning React, and is the best way to start building a new single-page application in React.
It sets up your development environment so that you can use the latest JavaScript features, provides a nice developer experience, and optimizes your app for production. You’ll need to have Node >= 10.16 and npm >= 5.6 on your machine. To create a project, run:
npx create-react-app my-app
cd my-app
npm start
Why it is better to avoid Create React App (CRA)
CRA was created for beginners (according to Facebook) to learn React without understanding the underline configurations of Webpack. However, it is not created for production. Unfortunately, devs have been using it for all their projects. CRA limits your ability to change any configurations, it has tons of unneeded dependencies, you can’t customize configurations, you can’t build microfrontends … Most of the challenges that I face with my clients and at work when they migrate to microfrontends are because they depend heavily on CRA without understanding the underline configurations.
The following article will explain how to create a full website and configure Webpack without CRA. Also, I will deploy the website to AWS. You can access the final page online at (http://mfe1.s3-website-us-east-1.amazonaws.com/).
The code for the project at (https://github.com/ranyelhousieny/new-react-app)
This article has all the needed steps to Create React App without create-react-app
=========================
1. Setup The Development Environment
Follow the article/video below to prepare your machine and install nodejs, if needed:
Preparing Your Mac for React and Node development, install NodeJS, npm, VS Code, and configure VS…
============================
2. Initialize NPM
mkdir new-react-app
cd new-react-app
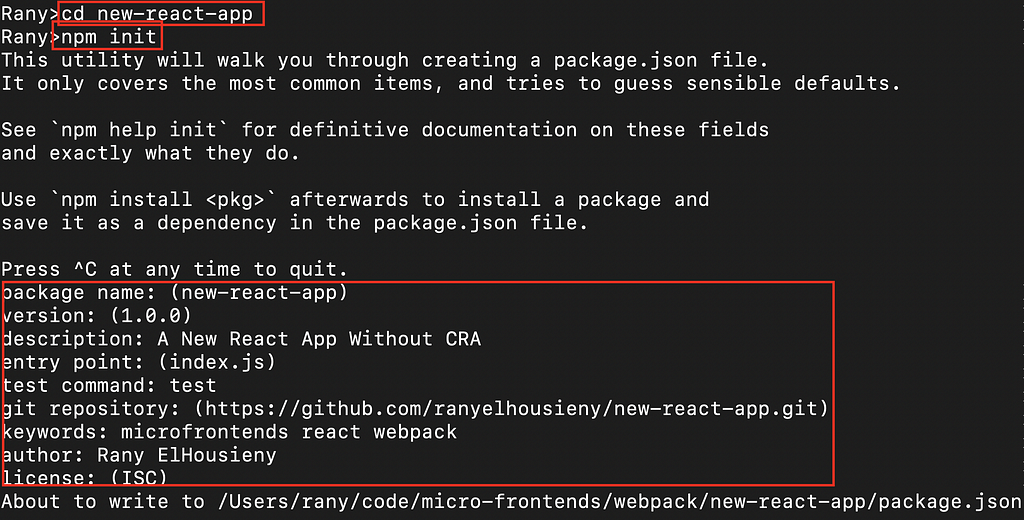
npm init
npm init will initiate the project and add the needed boilerplate for you. You be prompted to answer some questions/options as follows (inside the red boxes):
Then provide you with the content of the package.json to review and accept
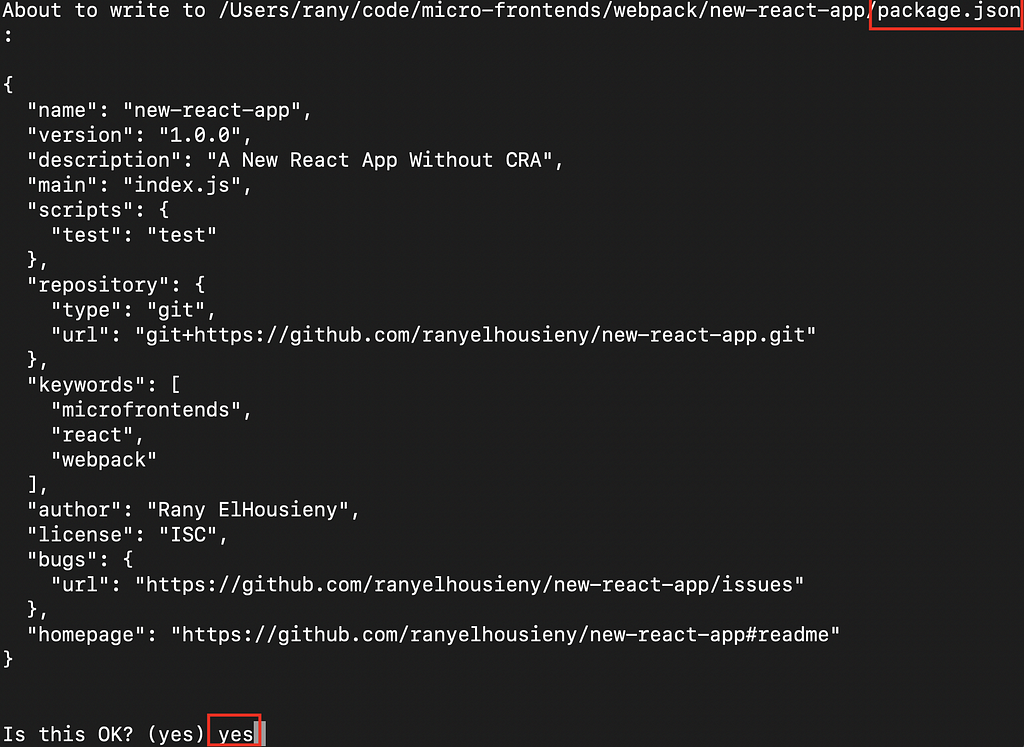
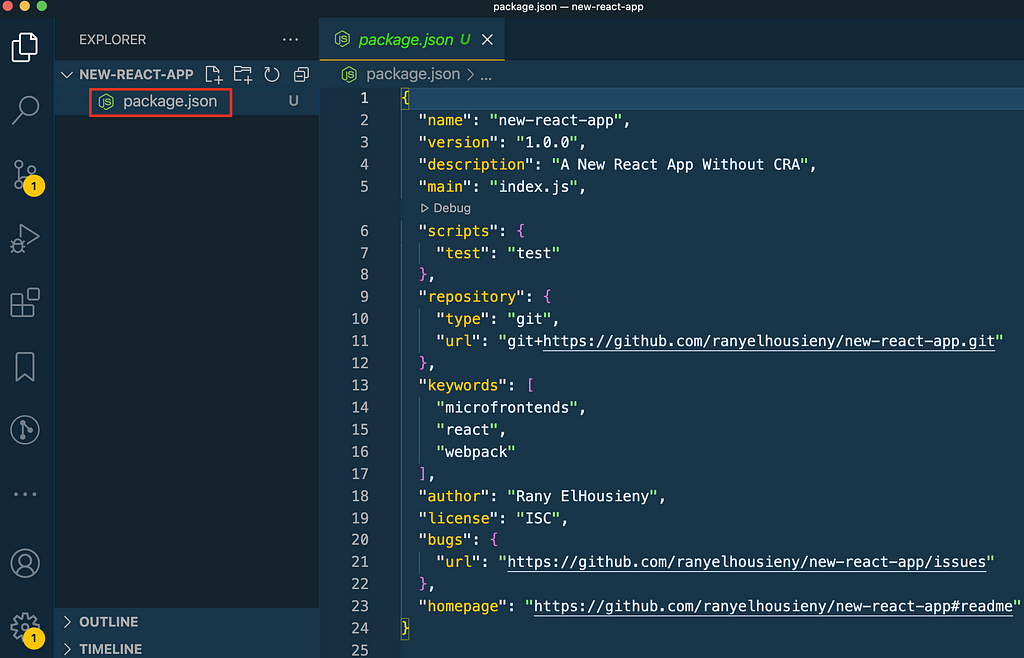
Write “yes” and click enter. Now, you have an empty project. You can open it inside Visual Studio Code (Code .).
The directory will only contain package.json
===========================
Install Webpack
cd new-react-app
npm install webpack
or
yarn add webpack
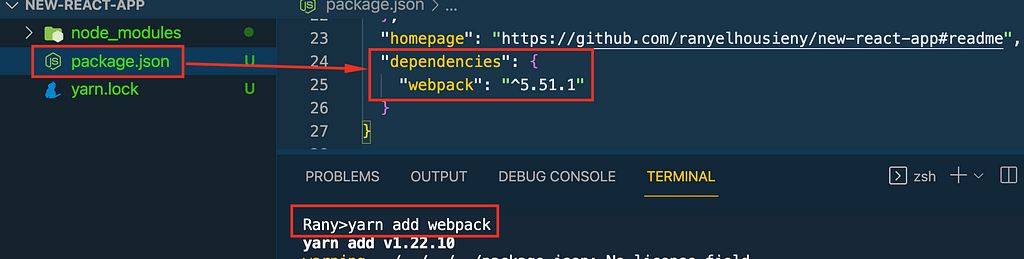
This will create the following items:
- dependencies for Webpack (currently release 5.51.1) inside package.json
- A new directory for node modules (node_modules) where dependencies will be installed
- yarn.lock (if you used yarn)
===============================
Configure Webpack
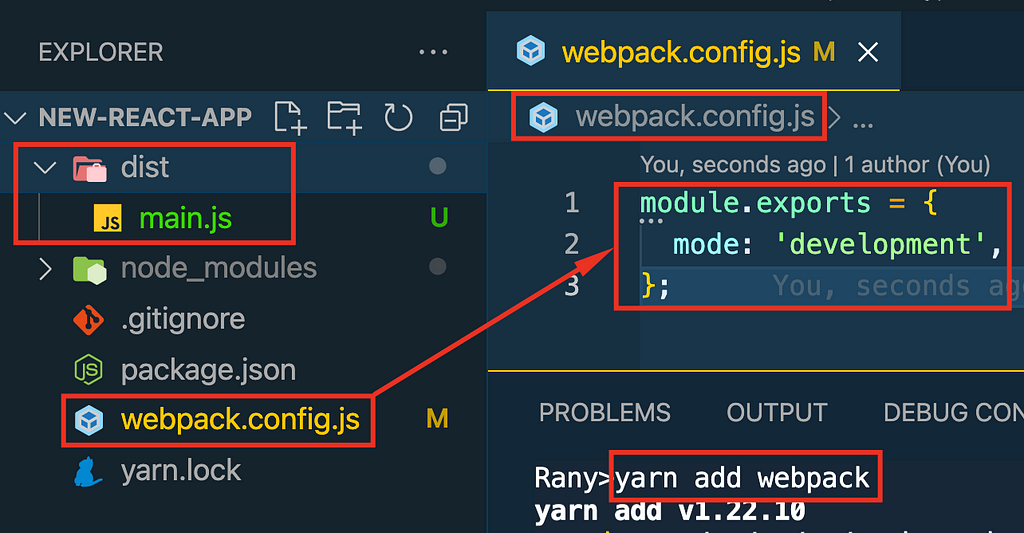
Let’s create a config file on the root and name it webpack.config.js.
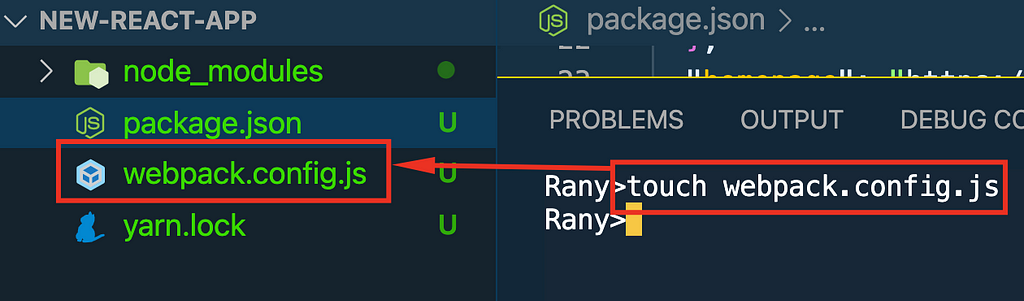
This is the main configuration file for Webpack, and this is what we will spend most of our time.
Note: I initialized git (git init) and added node_modules to .gitignore to sync with my project in Github. You will find the .gitignore file on my screenshots.
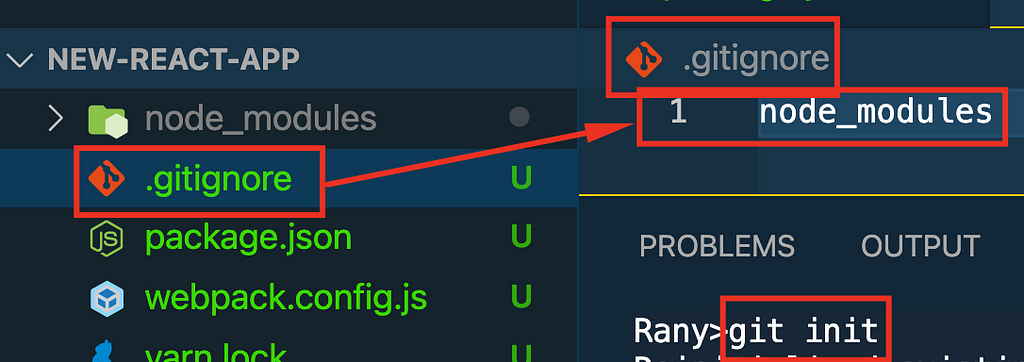
Here is the commit so far in Github (https://github.com/ranyelhousieny/new-react-app/commit/da82ea6b42f8aa1b4497413bc6760f90edd3de40)
Add Development mode
Now, let’s try to build and see what happens. Run the following command:
yarn webpack
You will get few errors. Let’s take the first error.
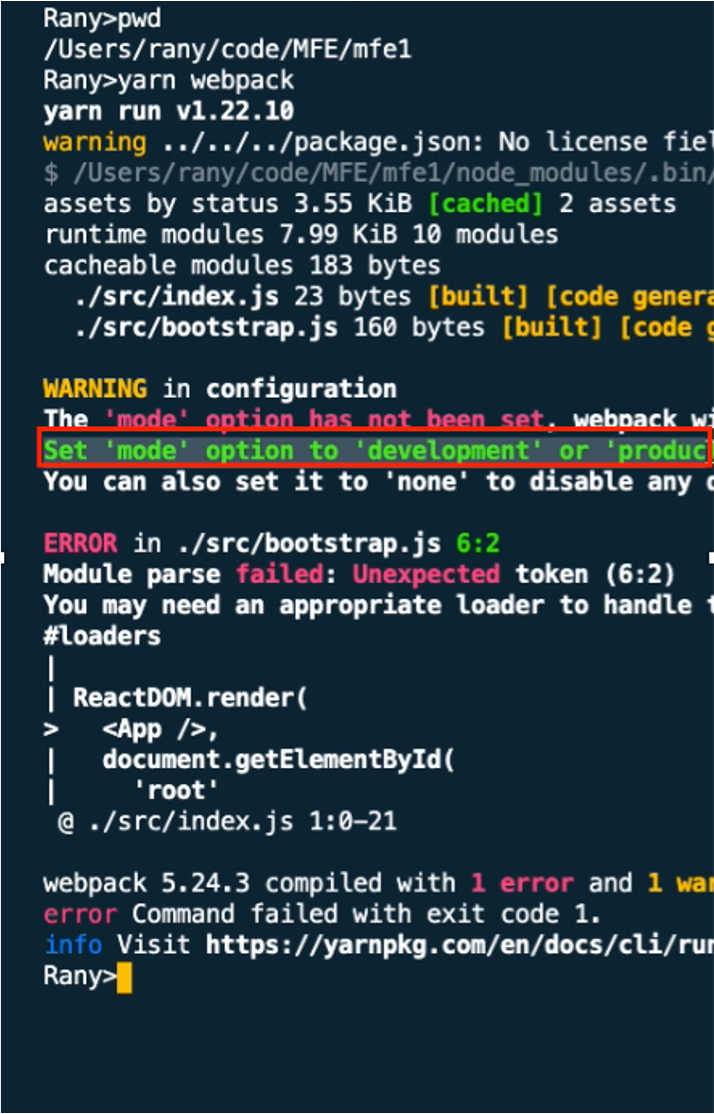
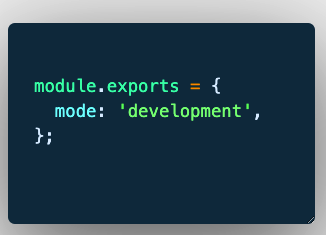
The first error is asking about the mode. Webpack needs to know which mode to run with to be able to bundle the dependencies accordingly. Let’s use Development mode. In webpack.config.js, add the following.
module.exports = {
  mode: 'development',
};
This will take care of the first error and tell Webpack to build in development mode. Now, build again and watch the folders on the left-hand side. You will notice a destination folder named “dist” will be created.
Now, we solved the first error. However, it is still complaining about the src directory and an entry file.

Each project has to have an src file with at least one entry point (ex: index.js). Let’s create an src directory and add index.js
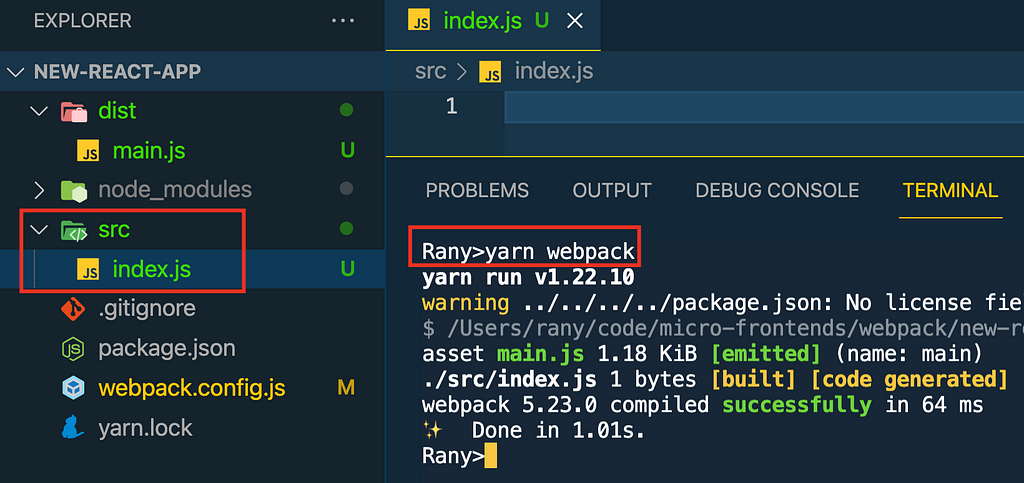
This will take care of all errors and build successfully. However, we still have an empty project.
Let’s stop here and explain what happened:

Webpack is a module bundler. It takes index.js (or any entry file we define) and packs all its dependencies into one file (main.js). That is why we will be using this trick in Microfrontends, as each microfrontend will be a single bundled remote.js file, as we will see in this article.
now, we need to present it to the browser using webpack-dev-server
================================
Add the Webpack server.
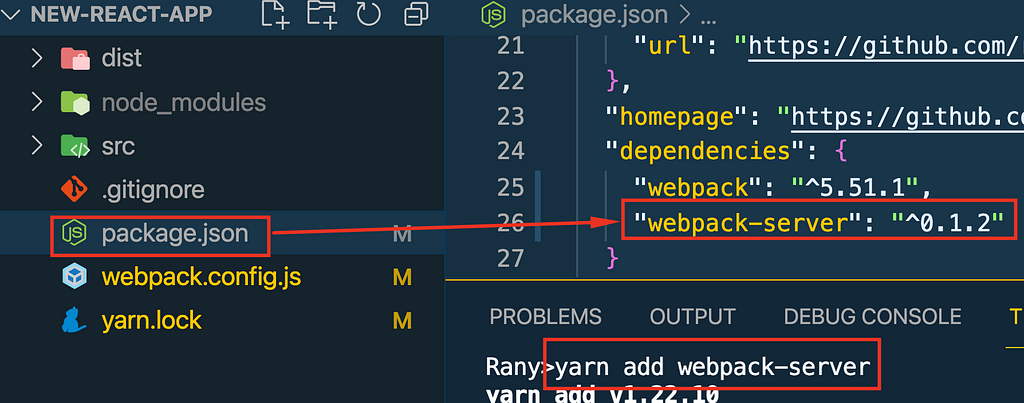
Let’s add a webpack-server to be able to see output on the browser during the development.
yarn add webpack-server webpack-cli webpack-dev-server
This will add one more dependency in the package.json file.
Now, let’s add Webpack serve command to package.json scripts, as follows
“start”: “webpack serve”
This way, we can run using yarn or npm to compile and serve the site.
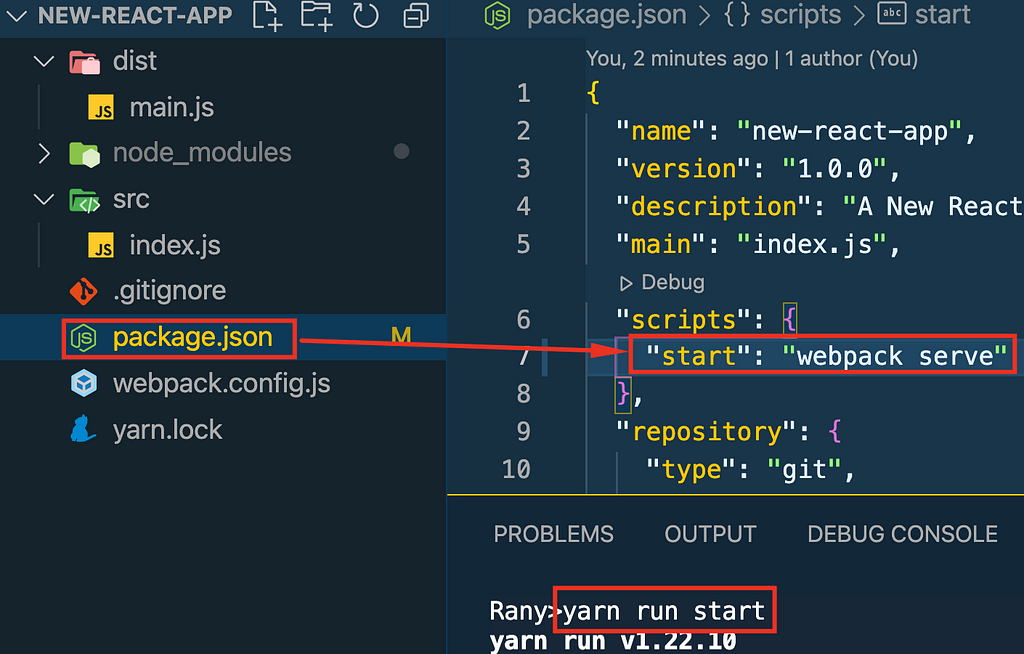
In the terminal, run the command
yarn run start
Go to the browser and put the URL http://localhost:8080.
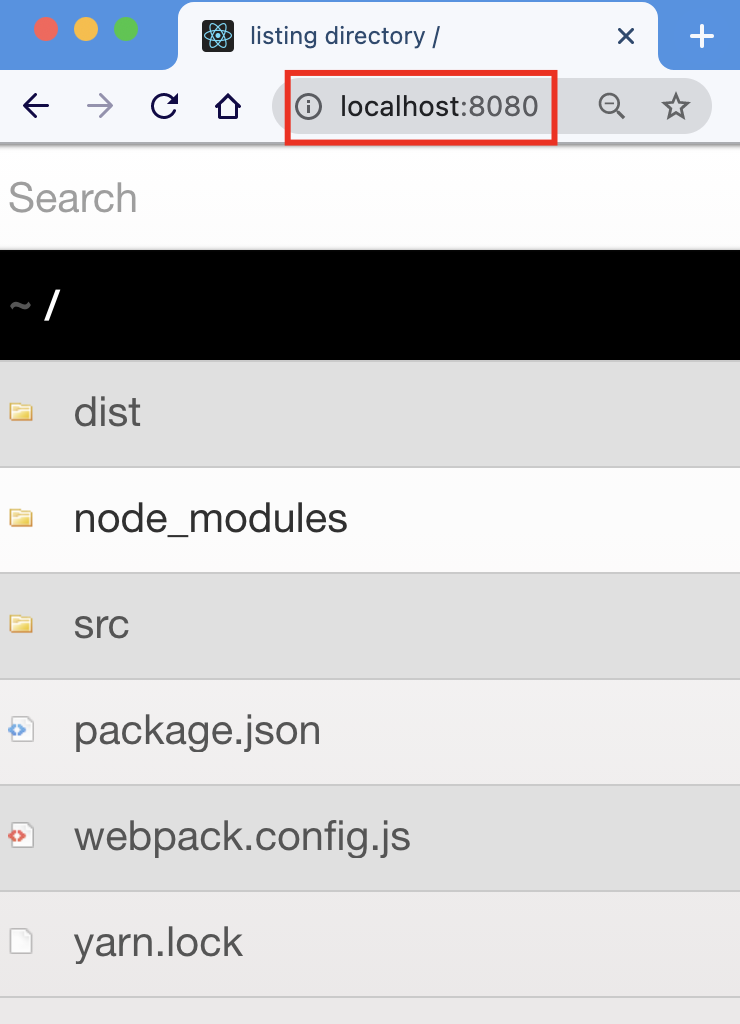
You can see the content of main.js here http://localhost:8080/main.js.
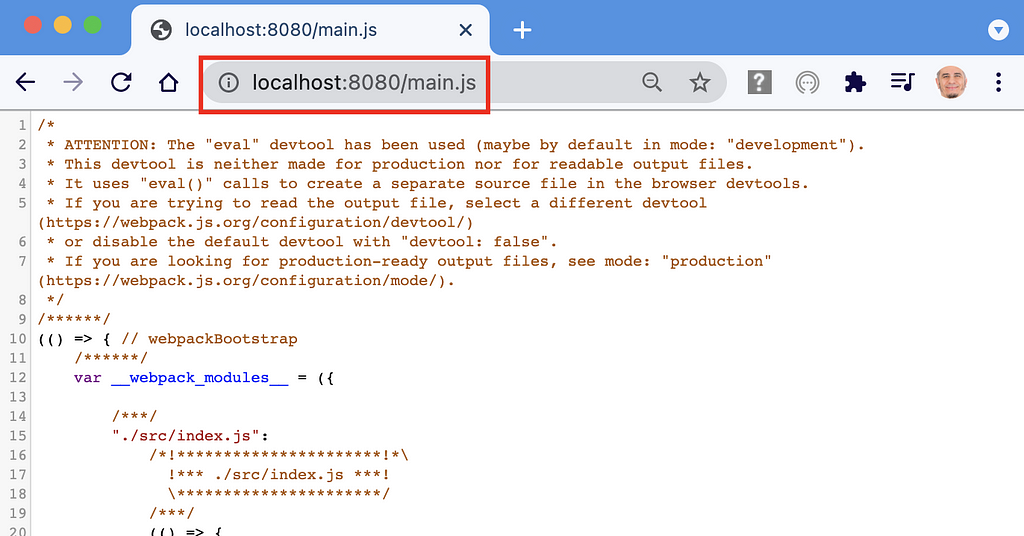
As you can see, the content of the js file is not that interesting. We need to add an HTML file and an HTML Webpack Plugin to understand how to render it. Let’s do that in the next step.
============================
Add HTML Webpack Plugin
We need to add html-webpack-plugin
yarn add html-webpack-plugin
Then, we need to import the html-webpack-plugin for Webpack to generate index.html and add the bundled js files.
const HtmlWebpackPlugin = require('html-webpack-plugin');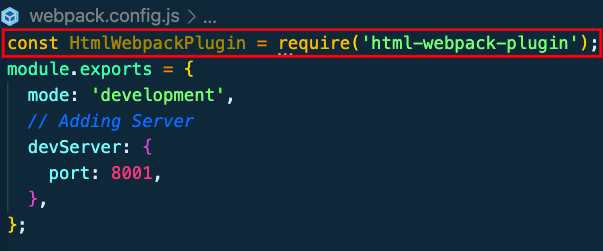
Then we add the plugin to the module.exports object as plugins array of plugins, as follows:
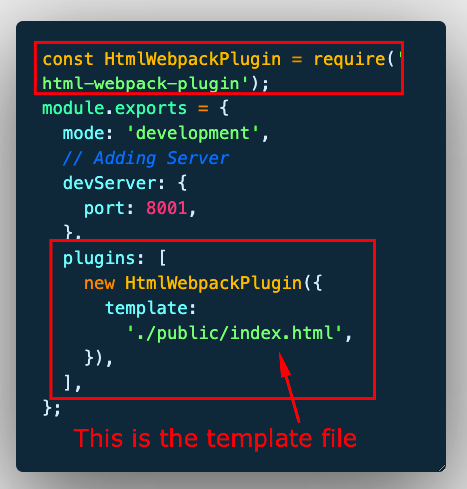
As you notice here, we need to include a template index.html that Webpack will use to generate a new Index.html with the generated main.js
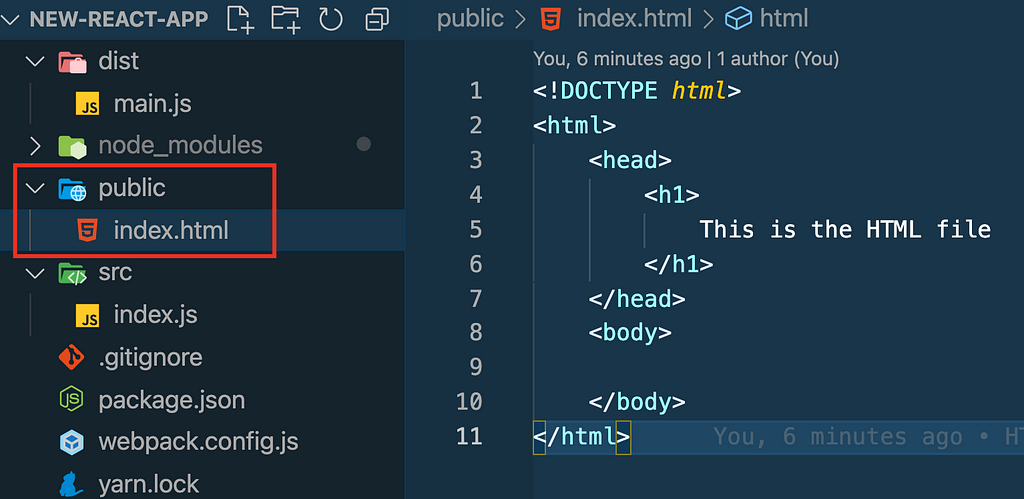
Add a simple public/index.html file as follows (You can find it here):
Now run yarn run startagain and browse to HTTP://localhost:8080
yarn run start
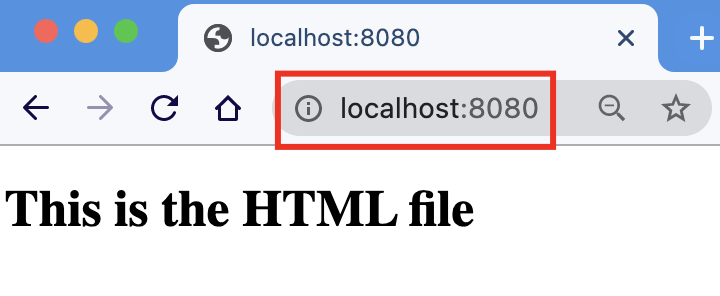
Of course, we do not have any javascript code yet. But if you look in the page's source, you will find that Webpack injected main.js, which is empty for now.
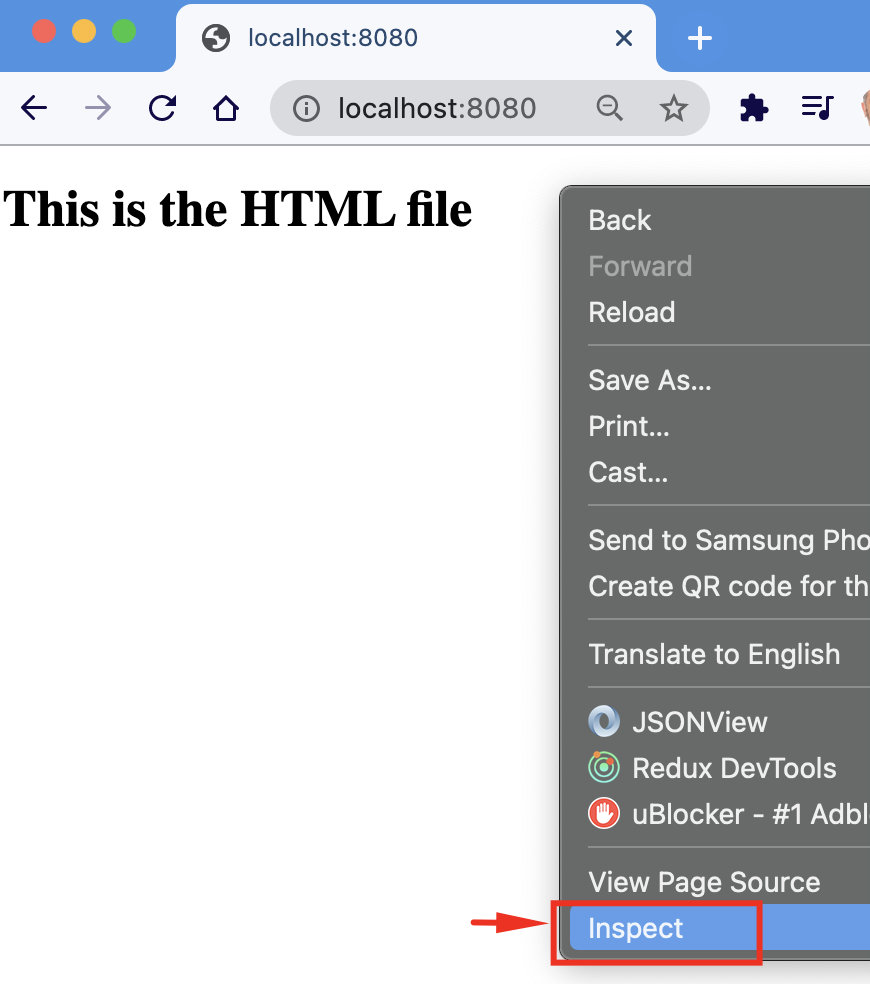
right-click on the page and select inspect, then select the source as shown below:
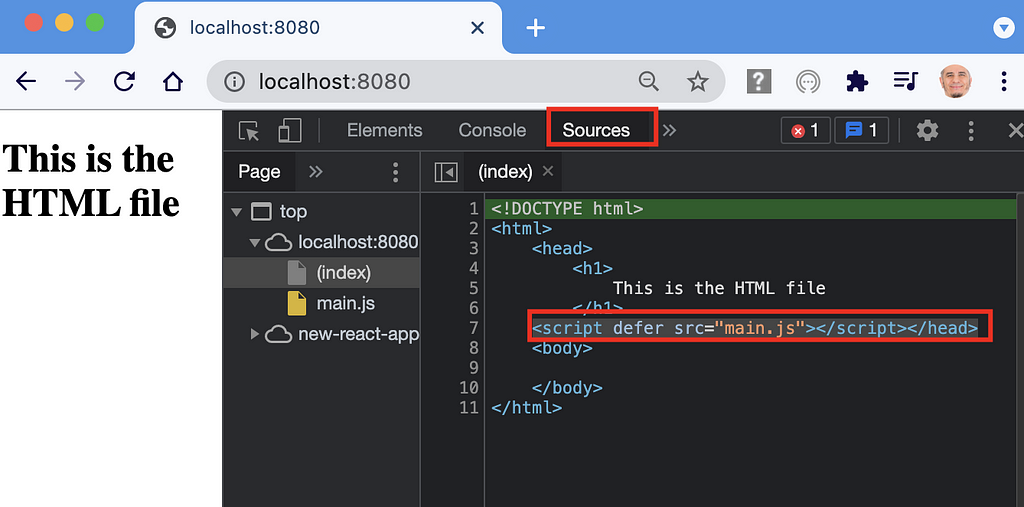
We did not add this line
<script defer src="main.js"></script></head>
The webpack HTML plugin added it
Congratulations! You have your first web page. Now, let’s start adding Javascript and then React.
=============
Add Logging
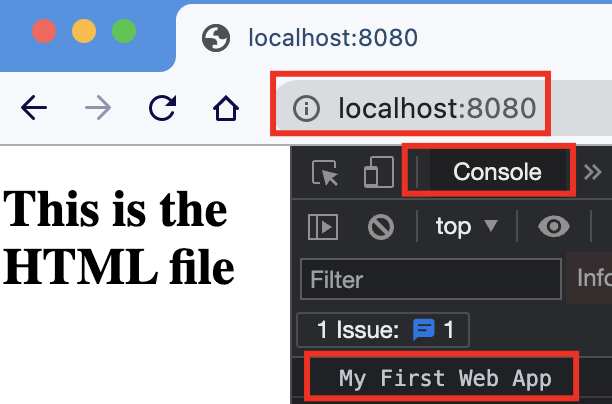
Let’s print a logging sentence to the console
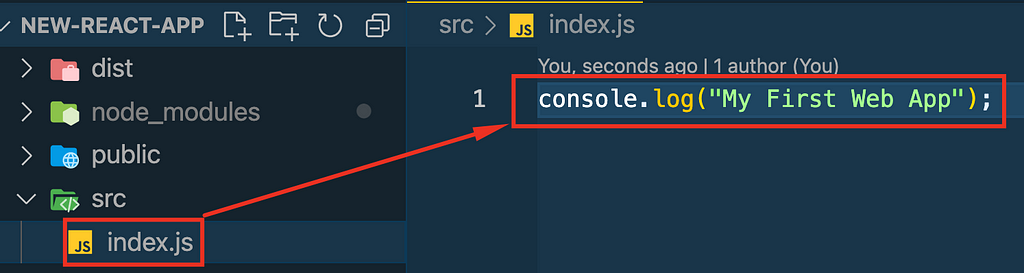
Navigate inside src/index.js and add
console.log(“My First Web App”);
Go to the localhost page, inspect and select Console, and see the output as shown below.
===================
Link Javascript with HTML
Next step, we need to show the content of the javascript file on the browser through the HTML file. To do that, we will need to link the two together as follows:
- Decide the place to show the js on the HTML file and tag it with an ID
<div id="fromjs"></div>
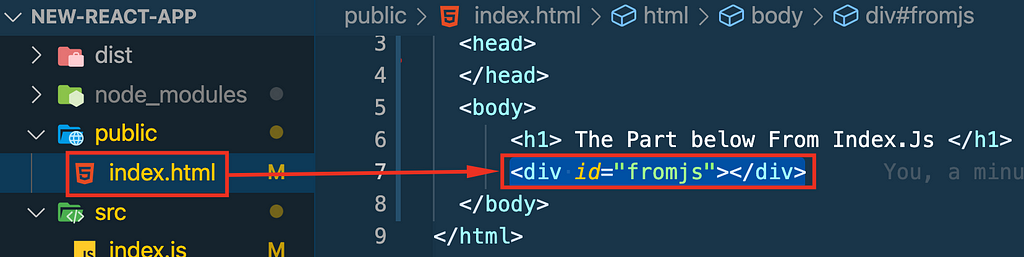
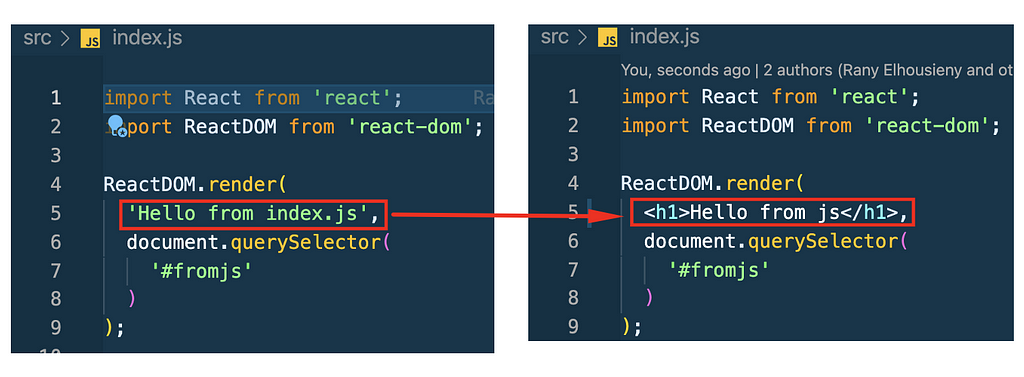
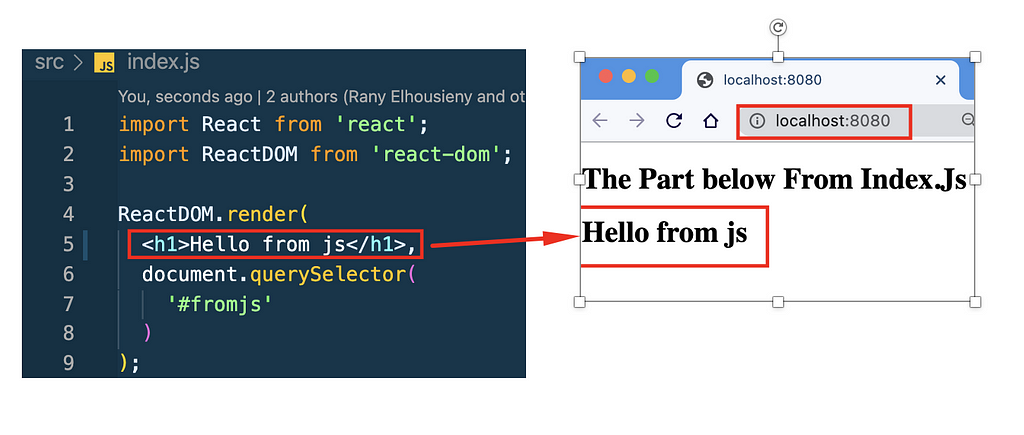
Link index.js to this id as follows:
document.querySelector('#fromjs').innerHTML = `<h1>From index.js</h1>`;
Now, you learned how to build pages and add js to them with Webpack. The next step is to add React.
==================
Adding React to Webpack
Follow the following article to add React to your project
While we added React, we still can’t translate jsx. To be able to add HTML elements inside js, we will need to install babel that will allow adding HTML elements instead of text, as shown below:
If you tried to add an HTML element to your index.js, it would not compile.
================
Adding Babel to Webpack
The following article will explain how to add babel and babel-loader to Webpack
That is it. Now, you can add React.js with jsx websites
The next step is to add CSS and style loaders
==============
Add CSS
https://www.linkedin.com/pulse/adding-css-webpack-rany-elhousieny-phd%E1%B4%AC%E1%B4%AE%E1%B4%B0
Now, you have React App boilerplate without CRA. You may clone the project as a template for future articles
==============
Add Sass
Freedom from create-react-app (How to Create React Apps without CRA) was originally published in Level Up Coding on Medium, where people are continuing the conversation by highlighting and responding to this story.
This content originally appeared on Level Up Coding - Medium and was authored by Rany ElHousieny
Rany ElHousieny | Sciencx (2021-08-29T23:16:50+00:00) Freedom from create-react-app (How to Create React Apps without CRA). Retrieved from https://www.scien.cx/2021/08/29/freedom-from-create-react-app-how-to-create-react-apps-without-cra/
Please log in to upload a file.
There are no updates yet.
Click the Upload button above to add an update.