
This content originally appeared on Level Up Coding - Medium and was authored by Christopher Adams
Improving The Thruster Effect Using a Slider in Unity
Overview:
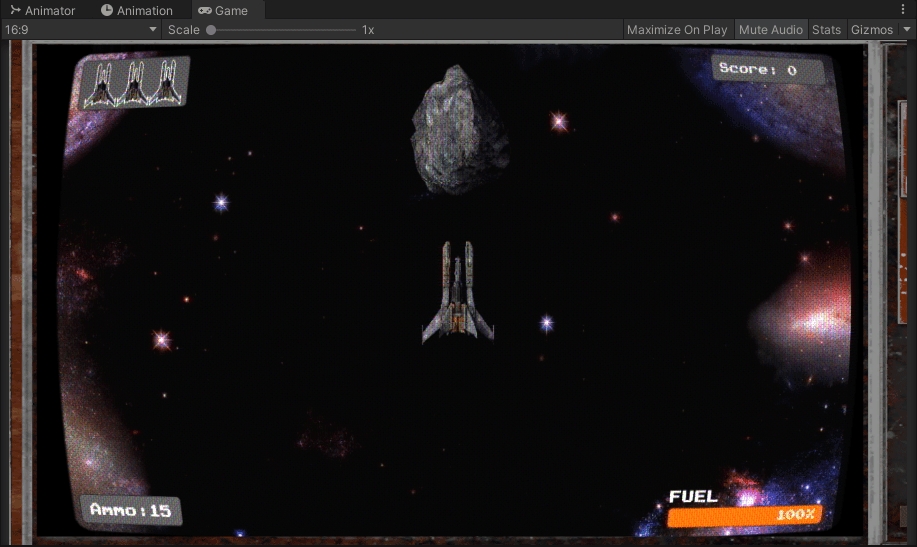
Today we are going to look at improving the thruster effect using a slider and a temporary speed boost. Let’s get started.
Creating The Slider UI:
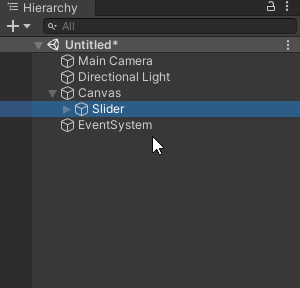
- To create the slider, we can right-click on the canvas and select UI>Slider. Position it how you like.
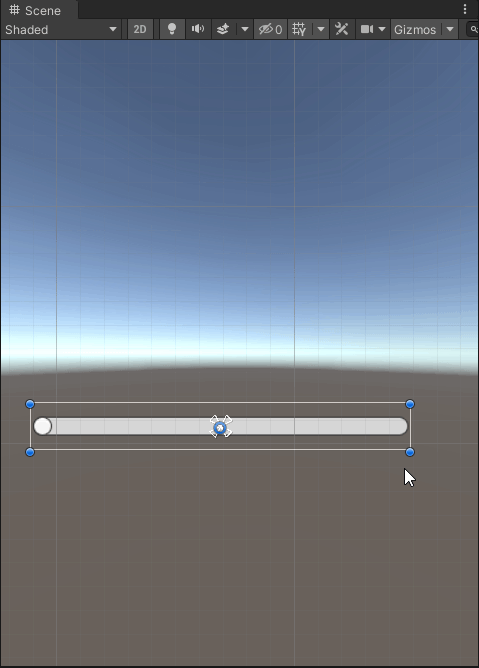
2. Click the drop-down then delete the handle and Handle Slide Area or just deactivate them.
3. Scale the slider how you like.
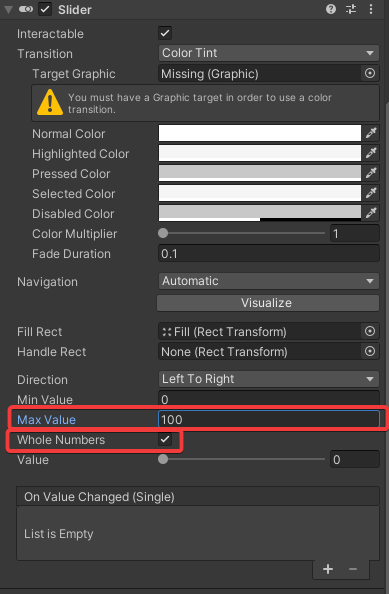
4. Select the slider and check whole numbers and set the max value to 100.
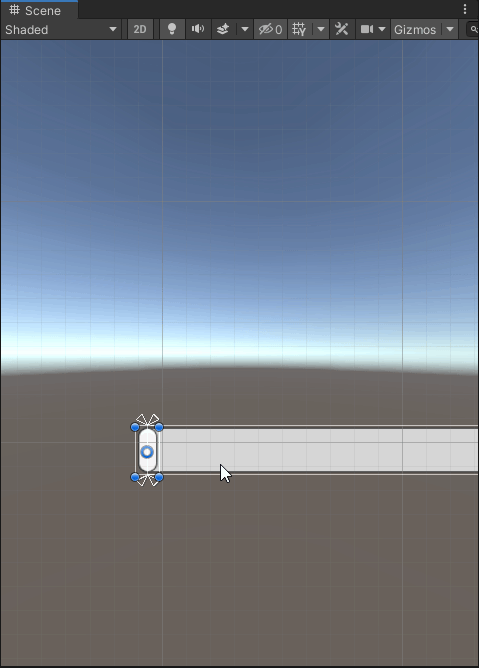
5. Select the Fill and scale it back.
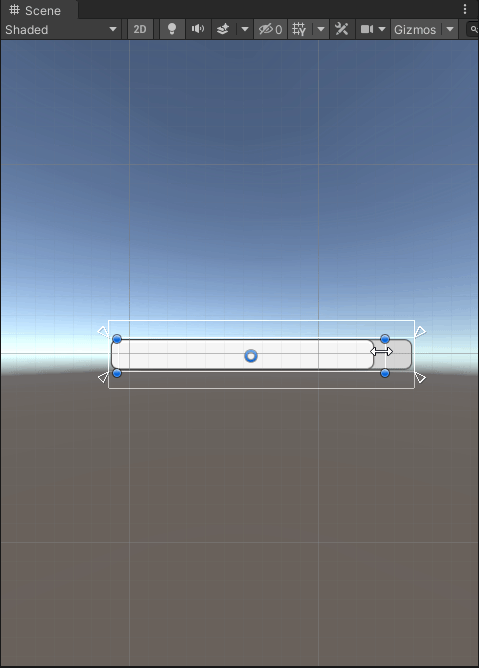
6. Select the Slider and set the value to 100. Select the Fill Area and scale it like so to roughly match the background.
Now when we move the slider value it should change and look like so.

7. Create a new TextMeshPro Text that will be used for the percentage.
I have mine positioned like so.

Thats it for setting the slider up let's start to manipulate its value through code.
Changing The Slider Value Through Code:
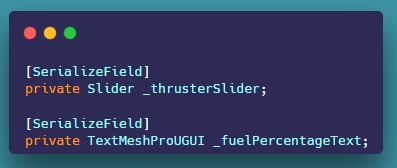
1. To start we are going to open our Ui Manager script and create a new serialized private Slider variable called _thrusterSlider and a new private TextMeshProUGUI variable for our fuel percentage.
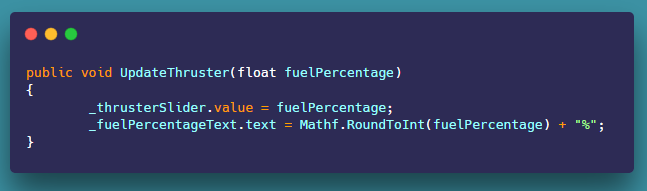
2. Next we can create a new public method called UpdateThruster that takes in the float parameter. Next, we can set the slider value equal to the float parameter. for the text, we can set the text equal to the fuel percentage, but we need to use Mathf.RoundToInt() to round the float to a whole.
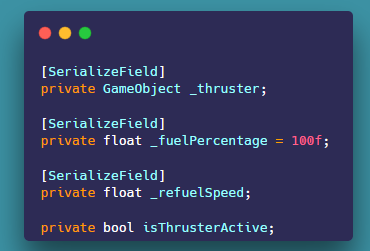
3. That’s it for setting up the Ui Manager now inside the player script we create four new variables.
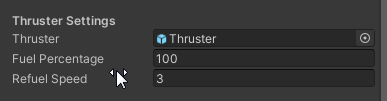
Make sure to assign the thruster game object inside the inspector.
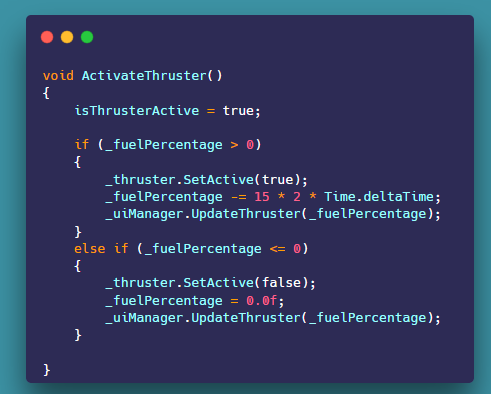
5. Now we can create a new method called Activate thruster we set isThrusterActive true then we check if the fuel is above zero. if it is then we simply set the thruster game object active and then we minus 15 multiplied by 2 and multiply that by Time.DeltaTime.
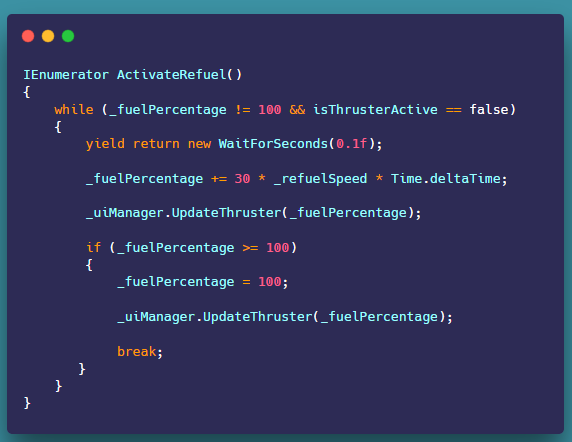
6. We also create an IEnumerator that we run a while loop checking if our fuel is not equal to zero and if isThrusterActive equal to false. then we add 30 multiplied by our refuel speed and multiply that by Time.DeltaTime. Then we check if we have reached 100 if so, then set the fuel to 100, update the UI and break.
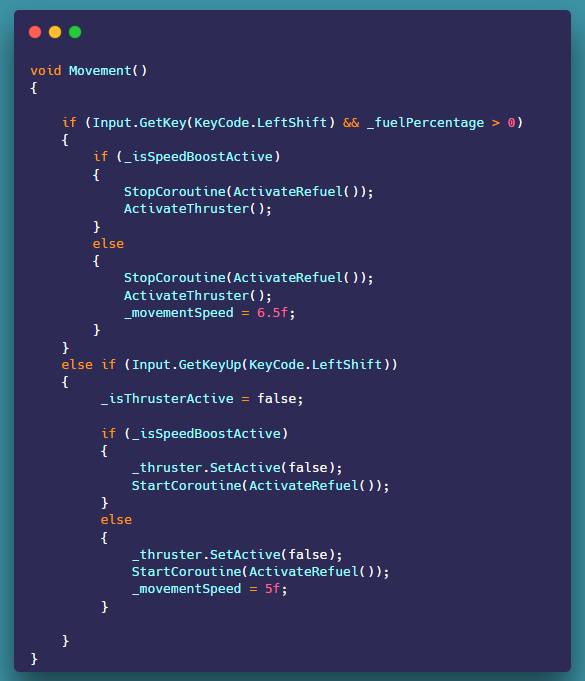
7. Now inside our movement method, we can check if the user is holding down the left shift key and fuel is greater than 100. we also check if our speed boost is active if it’s active don’t change the speed. we also check when the user releases the left shift key, we set isThrusterActive to false. we also perform the same check for the speed boost.
Now our slider should work, and we have a better-looking thruster effect.
That’s it for this article.
Thank you for your time and attention.
Before you go, please Clap and Fallow for more.
Level Up Coding
Thanks for being a part of our community! Before you go:
- 👏 Clap for the story and follow the author 👉
- 📰 View more content in the Level Up Coding publication
- 🔔 Follow us: Twitter | LinkedIn | Newsletter
🚀👉 Join the Level Up talent collective and find an amazing job
Improving The Thruster Effect Using a Slider in Unity was originally published in Level Up Coding on Medium, where people are continuing the conversation by highlighting and responding to this story.
This content originally appeared on Level Up Coding - Medium and was authored by Christopher Adams
Christopher Adams | Sciencx (2022-09-04T19:13:37+00:00) Improving The Thruster Effect Using a Slider in Unity. Retrieved from https://www.scien.cx/2022/09/04/improving-the-thruster-effect-using-a-slider-in-unity/
Please log in to upload a file.
There are no updates yet.
Click the Upload button above to add an update.