
This content originally appeared on Level Up Coding - Medium and was authored by Shaik Ahron
Explaining Android Product Flavors using a Real-life Example
The flow of the article:
- What are Product Flavors?
- Scenarios Where we can use Product Flavors.
- Creating a CodingQuestions App using Product Flavors
What are Product Flavors?
A product flavor is a variant of your app. It is very useful when you want to create multiple versions of your app. Using Product Flavors we can develop multiple variants of our app using the same base code.
Scenarios Where we can use Product Flavors
scenario 1: Suppose you have an app that is very popular and Companies reach out to you for using the same features of your popular app with a few customizations in your app and adding a few more features this is called white-labeling.
scenario 2: Suppose you have an app that is free to use. now you want to make another app with the same features and additional features but this will be paid app. we can use product flavors in this scenario as well.
Creating a CodingQuestions App using Product Flavors
Now, we will be creating an app that shows coding questions in recycler view. Consider the scenario where you want one app to be free which has a few questions locked and a few unlocked and the second app which is a premium app that has all questions unlocked plus you can play contests as well. So we will be creating these two apps using common code using the power of product flavors.
I will explain a few basics:
Build Variants are formed by Build Types and Product Flavors. Build variants are the result of Gradle using a specific set of rules to combine settings, code, and resources configured in your build types and product flavors.
Build Type applies different build and packaging settings. An example of build types are “Debug” and “Release”. Build Type refers to build and packaging settings like signing configuration for a project. For example, debug and release build types. The debug will use an android debug certificate for packaging the APK file. While the release build type will use a user-defined release certificate for signing and packaging the APK.
Here is the Github repo
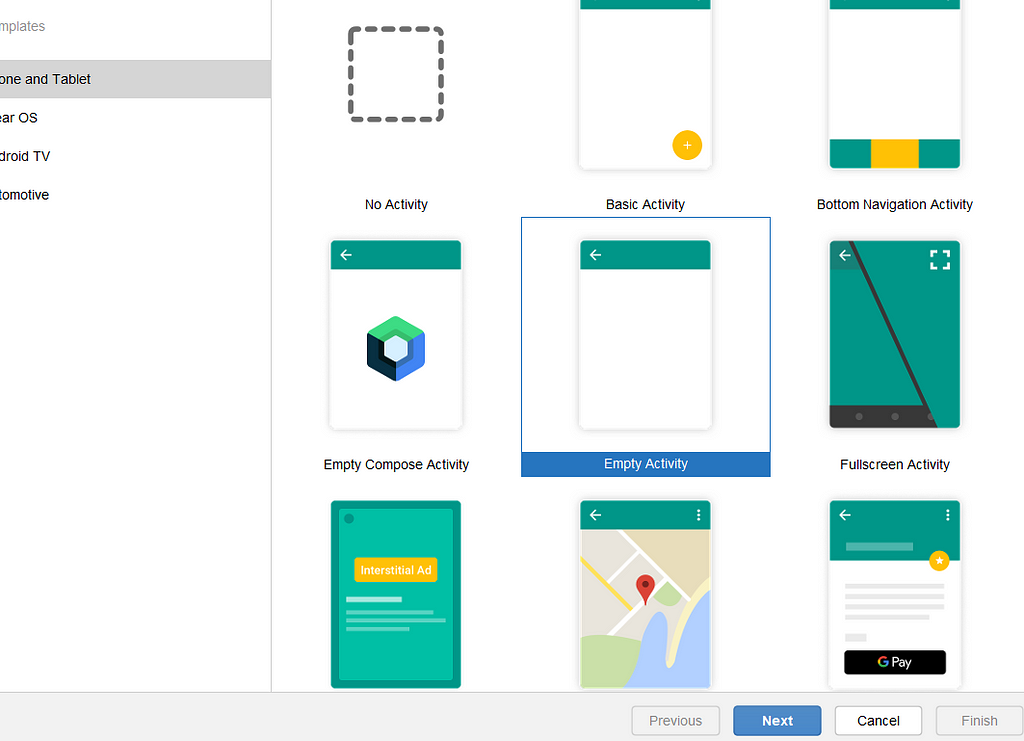
First, Create an empty android studio project. I named it CodingPlatform.
Now, to work with product flavors.
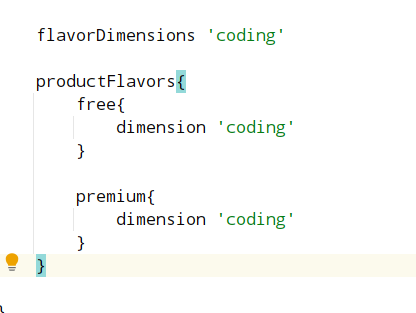
go to build.gradle(:app) file.
In android, add these lines and then press sync now.
Click on the BuildVariants tab at the bottom left. you will see something like this.
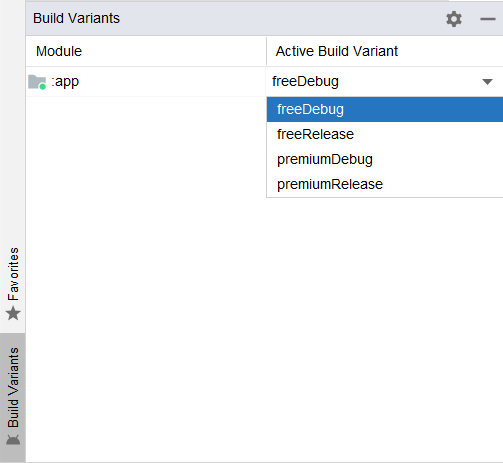
Congratulations, you have created 4 different build variants.
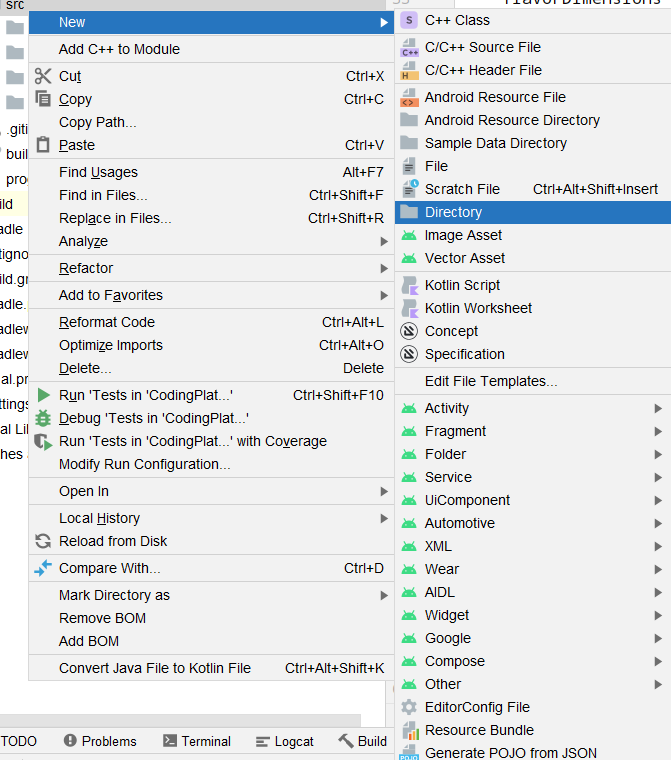
Now go to app->src. right-click on src goto new -> directory.
Now, click on
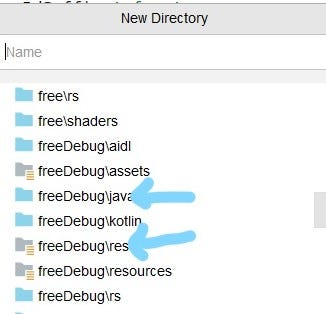
Choose them one by one.
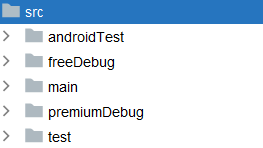
Now, you should see something like this.

You won’t see premium options in a new directory. for that choose preimumDebug from the build variants tab. And then create folders for them as well.
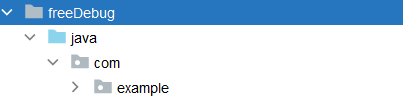
After performing the steps. you should see something like this.
Now, we will focus on building our app which shows a list of problems using recycler views. I am not going to explain recycler views as we just want to focus on Product Flavors.
But, Here is the code.
You have to create these kotlin files in the main folder as you do while making an android app without using product flavors.
this is a data class named Problem
Now go to the freeDebug folder. create folders in this order.
Now, create MainActivity.kt in the example folder.
This is the MainActivity.kt file code
In the same follow the same steps for Premiumdebug. Paste the code in MainActivity.kt
If you have observed I am using activity_main.xml and item_views.xml files which are present in the main directory this is the beauty of product flavors.
Note: I am using view binding here. so please refer to this view-binding article for a better understanding.
I have put strings values in res->values->strings.xml of the respective variants.
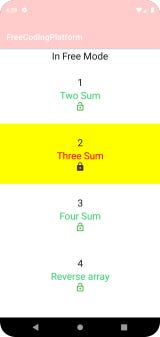
Now, if you have selected freeDebug from BuildVariant Tab. You will see this.
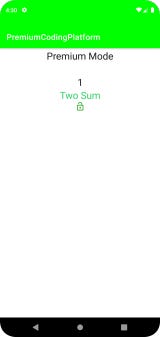
Now, if you choose premium debug you will see this.
It will be in Horizontal orientation.
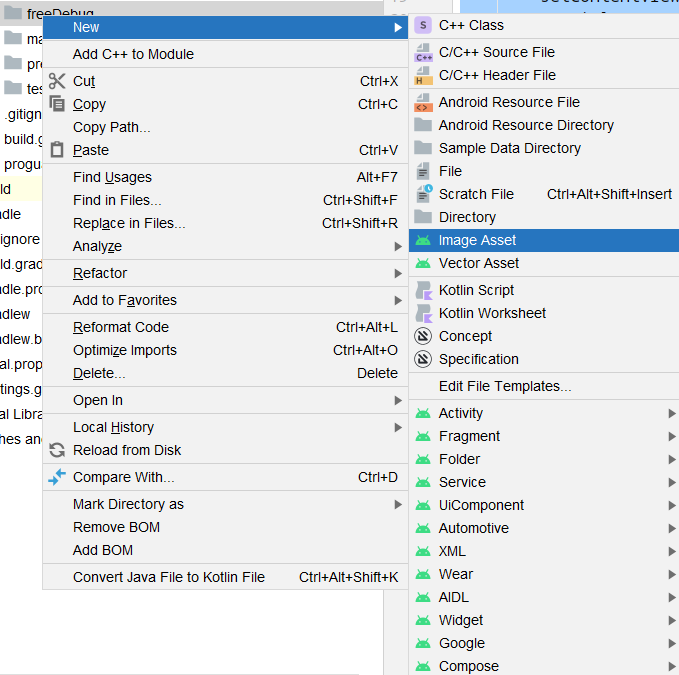
Now, to change the app launcher icon of respective variants. Follow these steps.
Right-click on src->new->imageAsset
choose your launcher icon and click next
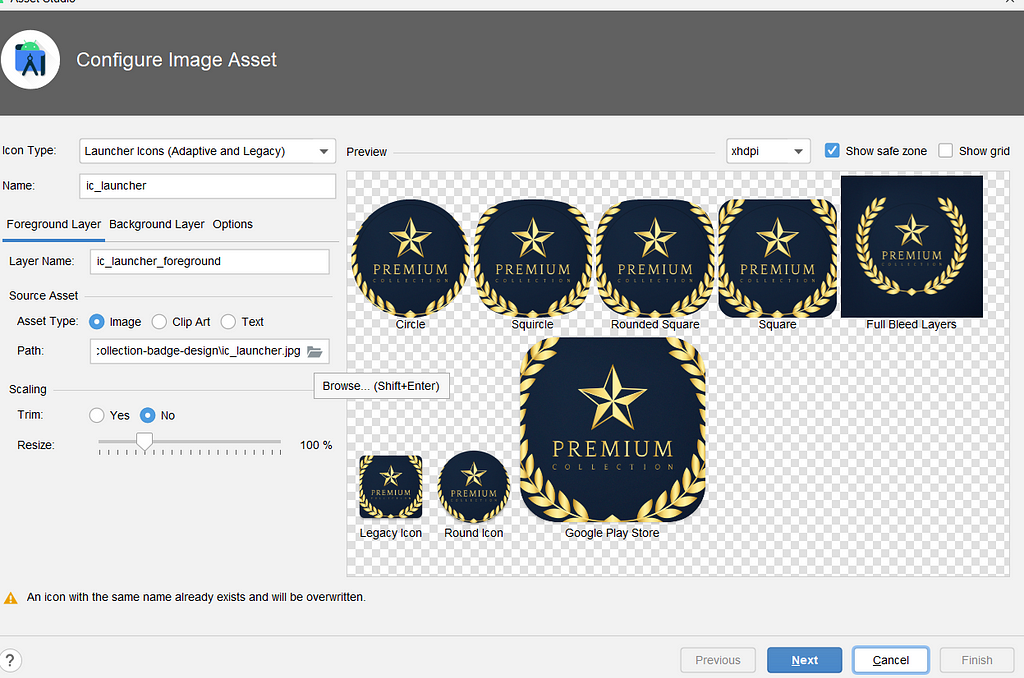
select preiumDebug as root directory
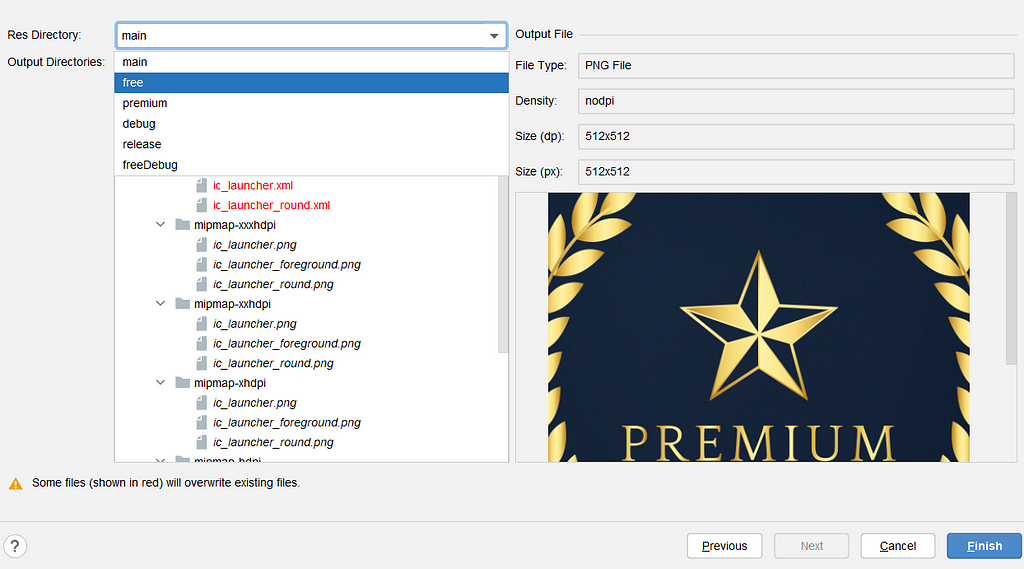
Click finish.
Follow the same steps for FreeDebug.
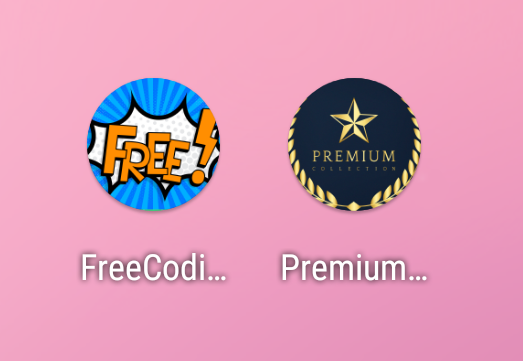
You will see your icons like these.
You can change the app name by changing the app_name in the strings.xml file.
You can change the theme of different variants by just making changes in the themes.xml file as we do in the main.
And you are done creating Free and Premium apps using Product Flavors.
Thank You For reading
Explaining Android Product Flavors using a real-life example was originally published in Level Up Coding on Medium, where people are continuing the conversation by highlighting and responding to this story.
This content originally appeared on Level Up Coding - Medium and was authored by Shaik Ahron
Shaik Ahron | Sciencx (2022-11-23T02:31:31+00:00) Explaining Android Product Flavors using a real-life example. Retrieved from https://www.scien.cx/2022/11/23/explaining-android-product-flavors-using-a-real-life-example/
Please log in to upload a file.
There are no updates yet.
Click the Upload button above to add an update.