
This content originally appeared on Zell Liew and was authored by Zell Liew
After a horrible experience with my 2018 Macbook, I decided it was time to buy a Windows device as my backup machine. I chose to use Windows as a backup because:
- Mac is expensive!
- My old Mac is a goner
- I need a Windows computer for accessibility testing (NVDA + Firefox combination anyone?)
I ended up buying a Surface Laptop 3.
Setting up Windows was harder than I imagined. It was especially hard because I wanted this Windows machine to mirror everything I do on Mac.
In this series of articles, I’ll explain everything I did to configure my new Windows machine. This should help you out if you’re switching from Mac to Windows.
For this very first article, I’ll talk about setting up the command line and Git.
Windows Subsystem for Linux
If you google about setting up a machine for development on Windows, you’d definitely have heard about the Windows Subsystem for Linux. It’s like the coolest kid on the block.
Windows Subsystem for Linux is hard to type, so I’m going to call it WSL from this point onwards.
WSL puts a Linux machine inside a Windows machine. It lets you use bash scripts just like in Linux and Mac.
WSL is great, but it can be pretty hard to configure for actual coding purposes. I got so frustrated with WSL, I wanted to ditch it entirely. Fortunately, Mike Riethmuller came and helped me out.
Installing WSL
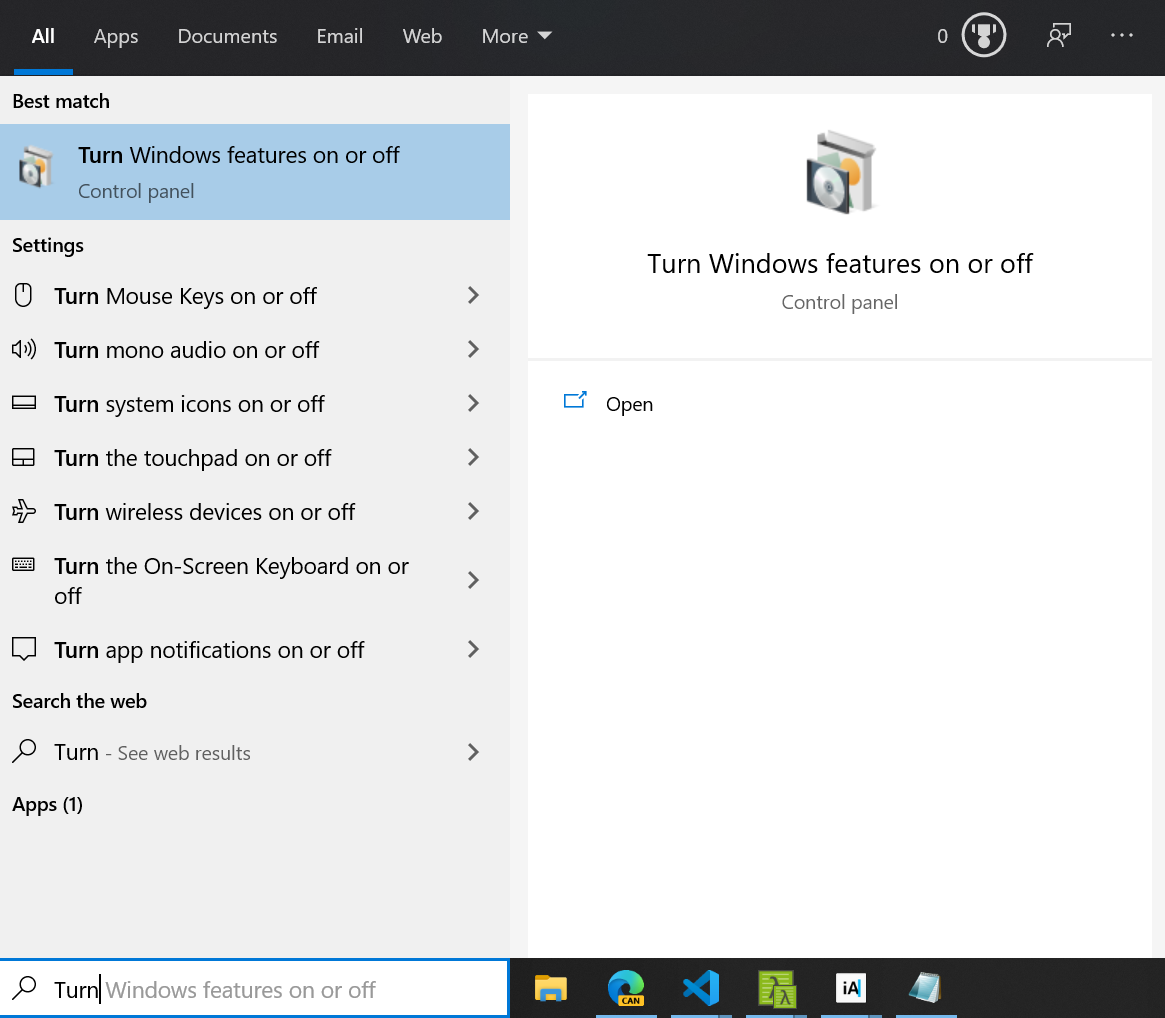
First, you need to turn on WSL for Windows.
You do this by searching for “Turn Windows features on and off” in the start menu.
Next, scroll down and check Windows Subsystem for Linux. Restart your computer after checking this option.

Next, search for Powershell in the start menu. Run it as administrator and enter the following code. (This code can be found from Microsoft’s official WSL installation documentation). Restart your computer again when you’re done.
Enable-WindowsOptionalFeature -Online -FeatureName Microsoft-Windows-Subsystem-Linux
Next, you need to open the Microsoft store and search for a Linux distribution of your choice.
I went with Ubuntu here.
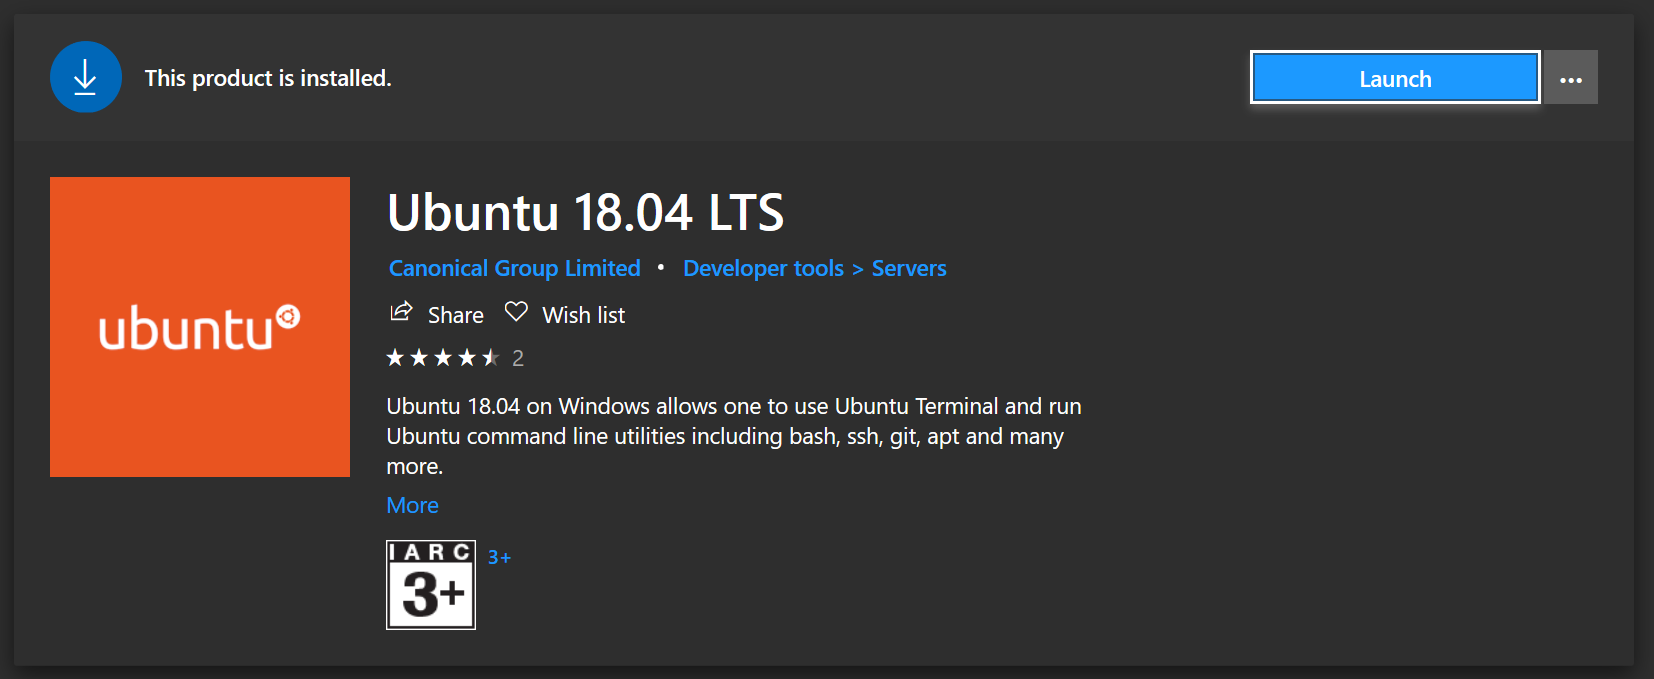
Download the distribution, install it, and launch it.
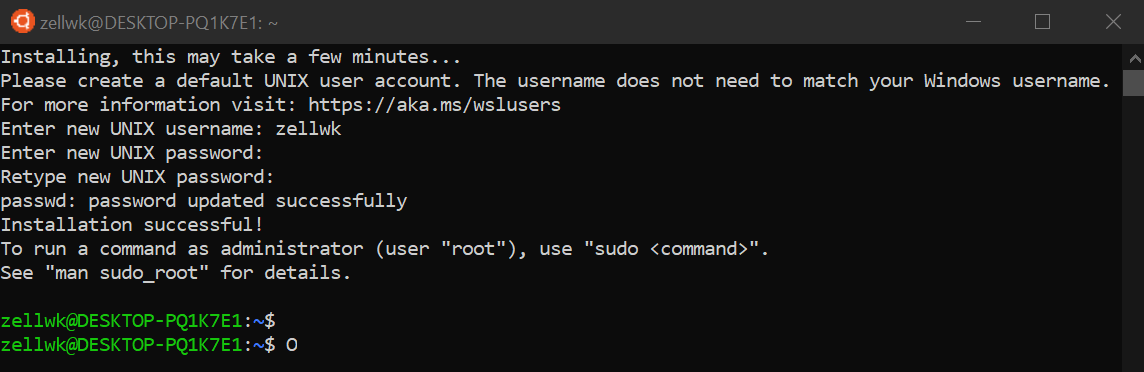
Open up Powershell again and type in wsl. The path should switch to a value that contains /mnt/c. You’ll know you have installed WSL properly if this command works.

Installing Chocolatey
You may be familiar with Homebrew (for Mac) and apt (for Linux). Chocolatey does the same thing, but for Windows. It lets you install binaries and applications.
We have apt since we use WSL. We’ll use apt for most of our development efforts. But I still like to use Chocolatey to install Windows applications.
You can install Chocolatey with the following command in Powershell. (Get this command from Chocolatey’s official installation page if you don’t feel safe copying it here).
Set-ExecutionPolicy Bypass -Scope Process -Force; iex ((New-Object System.Net.WebClient).DownloadString('https://chocolatey.org/install.ps1'))
At this point, I use Chocolatey to install Visual Studio Code (which is my primariy text editor). Again, run this in Powershell.
choco install vscode -y
You can also use Chocolatey to install browsers like Edge, Chrome, Firefox, etc. You can check out what I install with Chocolatey here.
That’s it with Powershell for now. I don’t use it much. I only use Powershell if I want to use Chocolatey to install something.
Integrating WSL with Visual Studio Code
Visual Studio Code comes with an integrated terminal. We can this terminal to use WSL.
Open up Visual Studio Code.
You may see a popup at the bottom right corner that that asks you to install the Remote WSL extension.
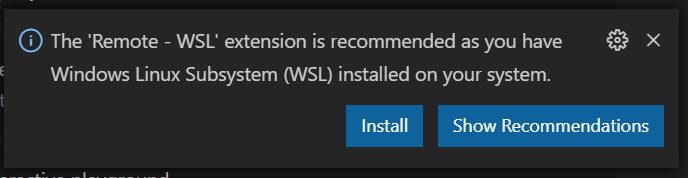
DO NOT install the Remote WSL Extension. It creates a set of weird quirks. For example, you’ll have to manually download VSCode extensions from your Local computer to the WSL remote. Sounds weird? Definitely is.
Mike Riethmuller showed me a much better way to integrate WSL with Visual Studio Code. I’m going to show you how to do this.
Open up Visual Studio Code’s integrated terminal and click on the powershell near the top-right corner. This lets you switch between shells in Visual Studio Code.
Here, click on “Select Default Shell”.

A listbox should pop up at the top. Select WSL Bash here.
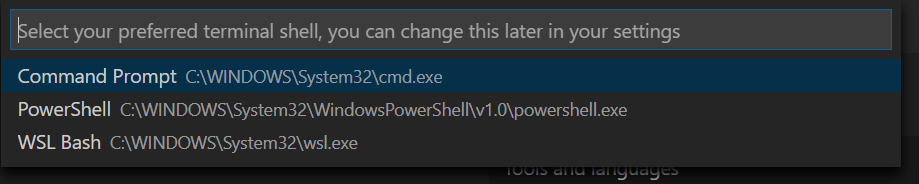
Restart Visual Studio Code and open the integrated terminal again. You should see the same /mnt/c path as before.

WSL is now integrated with Visual Studio Code. You can use bash commands from now on. You can also use apt to download Linux packages too.
Git and Visual Studio Code
There are two ways to use Git with Visual Studio Code:
- Through the Integrated Terminal
- Through the Source Control panel on the sidebar
Git through the Integrated Terminal
We can use Git through the Integrated Terminal already. Try typing git --version the version status.

Feel free to clone a Git repository of your choice to test it out.
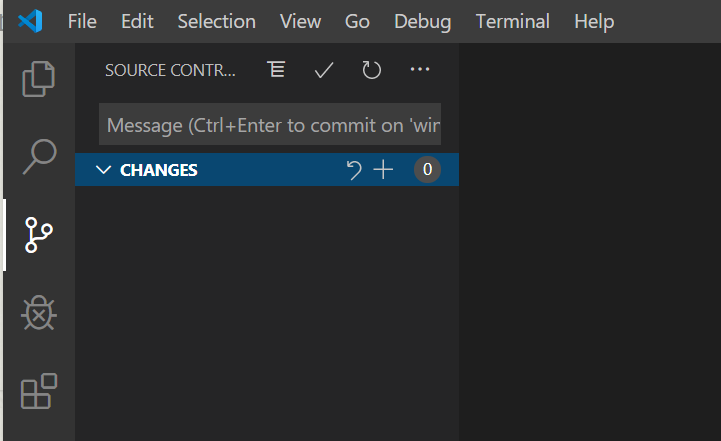
Git through the Source Control panel on the Sidebar
For the Source Control panel to work, you need to use Visual Studio Code to open a folder that contains a Git repository. You can do this by cding to the repository you cloned. Then, run code . in the Integrated Terminal.
You can also use git init if you wish to try this on a bare repo.
# Opens current folder in Visual Studio Code
code .
Visual Studio Code will complain that Git is not installed. It prompts you to install Git.
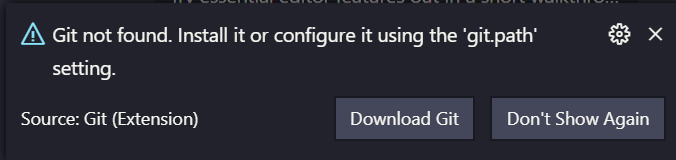
We need to install Git on Windows for the Source Control panel to work.
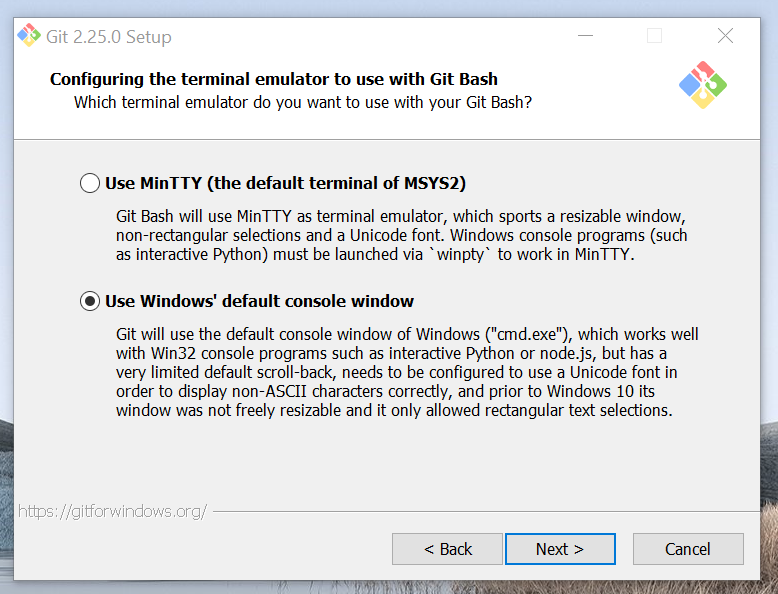
First, go here and download the Git setup file. Then, click on the file you downloaded to run the installer.
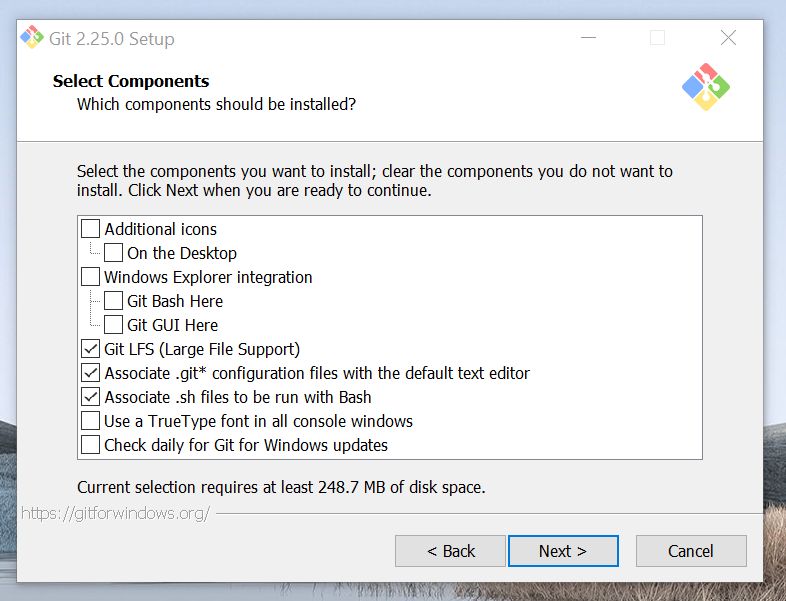
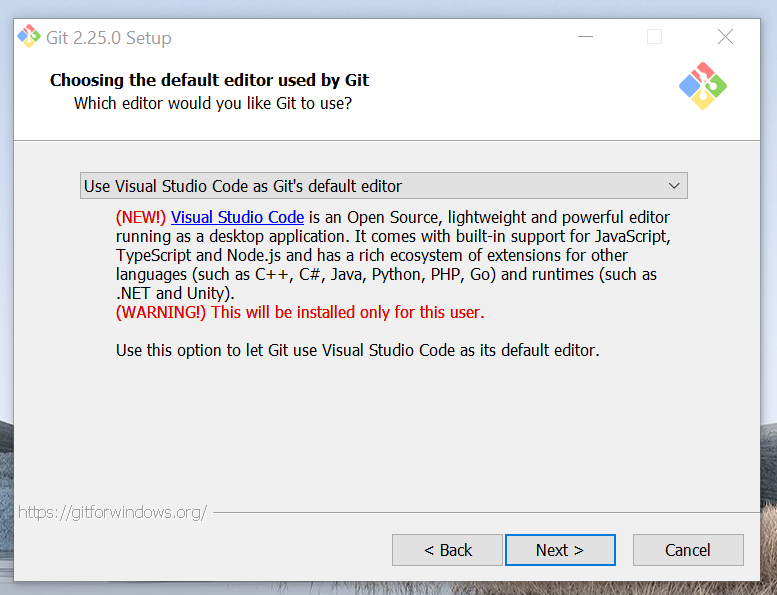
The installation process can be complicated. There are lots of options to choose from. I’m lucky Mike was here to guide me through the options, or I’d get endlessly lost.
Here are the options I changed:
- Uncheck Git Explorer integration
- Set default editor to Visual Studio Code
- Use Window’s default console window
I went with the default setting for all other options.
Restart Visual Studio Code once you’re done installing Windows Git. The Source Control Panel should work now.
Configuring Git credentials
You need to set your name and email address before you can make a commit on Git. Since we have Git on WSL and Windows Git, we need to set the name and email address in both places.
Credentials on WSL
Open up Visual Studio Code’s integrated terminal and type in the following commands (one at a time):
git config --global user.name "Your name"
git config --global user.email "Your email"
Credentials on Windows Git
Fire up Powershell and enter the same commands above to set up your Git credentials.
You should be able to write commit messages now.
SSH credentials
First, you need to generate a SSH key. Fire up the integrated terminal and follow the Linux instructions on Github to create one.
This allows you to use SSH via WSL.
SSH Credentials for the Source Control panel
Remember the Source Control uses Windows Git? Well, SSH credentials for WSL and Windows Git reside in different locations.
- WSL: In
~/.ssh - Windows Git: In
/mnt/c/Users/YOUR_USERNAME/.ssh
Most programmers would try to create a symbolic link from ~/.ssh to /mnt/c/Users/ YOUR_USERNAME/.ssh at this point. I did it too.
Unfortunately, symbolic links don’t work. They don’t work because Linux and Windows require different permissions for .ssh files.
We can’t create hard links either since they’re files on different “devices”. (Linux and Windows are different devices).
The simplest way to set things up is to copy the .ssh folder from ~/ to /mnt/c/Users/YOUR\_USERNAME/. This allows you to use SSH via the Source Control panel.
cp -r ~/.ssh /mnt/c/Users/YOUR_USERNAME/
Please replace YOUR_USERNAME with the actual Windows username.
I recommend creating an alias for the cp command above. It’ll let you sync up your .ssh folders anytime.
Bonus: Cmder
I’m a strange lad. I don’t like to use Visual Studio Code’s integrated terminal because it takes up a chunk of space. I rather use that space to read code. I also prefer having extra vertical space to read logs from the shell (in case any error happens). This meant I had to use an external console.
I researched and heard about tried three console emulators for Windows:
- Hyper
- Windows Terminal
- Cmder
I didn’t like Hyper because of the way they handled keyboard shortcuts. You have to press Ctrl + Shift + C to copy and Ctrl + Shift + V to paste. The extra Shift is a hassle.
I didn’t use Windows Terminal because I don’t know how to configure it to fire up WSL by default.
In the end, I went with Cmder.
Installing Cmder
I installed Cmder via Chocolatey. Since we have WSL, we only need the mini version of Cmder. Fire up Powershell as administrator and type the following command.
choco install cmdermini -y
Choco installs Cmder in C:\tools. Open that folder up with the file explorer and double-click on Cmder. Cmder will run some installation scripts and you’re good to go.
You should see the lambda symbol (λ) here. This means you’re on the Cmder terminal. (In case you’re wondering, this is actually Command Prompt).

WSL on Cmder
WSL is already configured on Cmder. You can run the wsl command and the shell would switch to WSL. If you do this, you should see the familiar /mnt/c path.

WSL on Startup
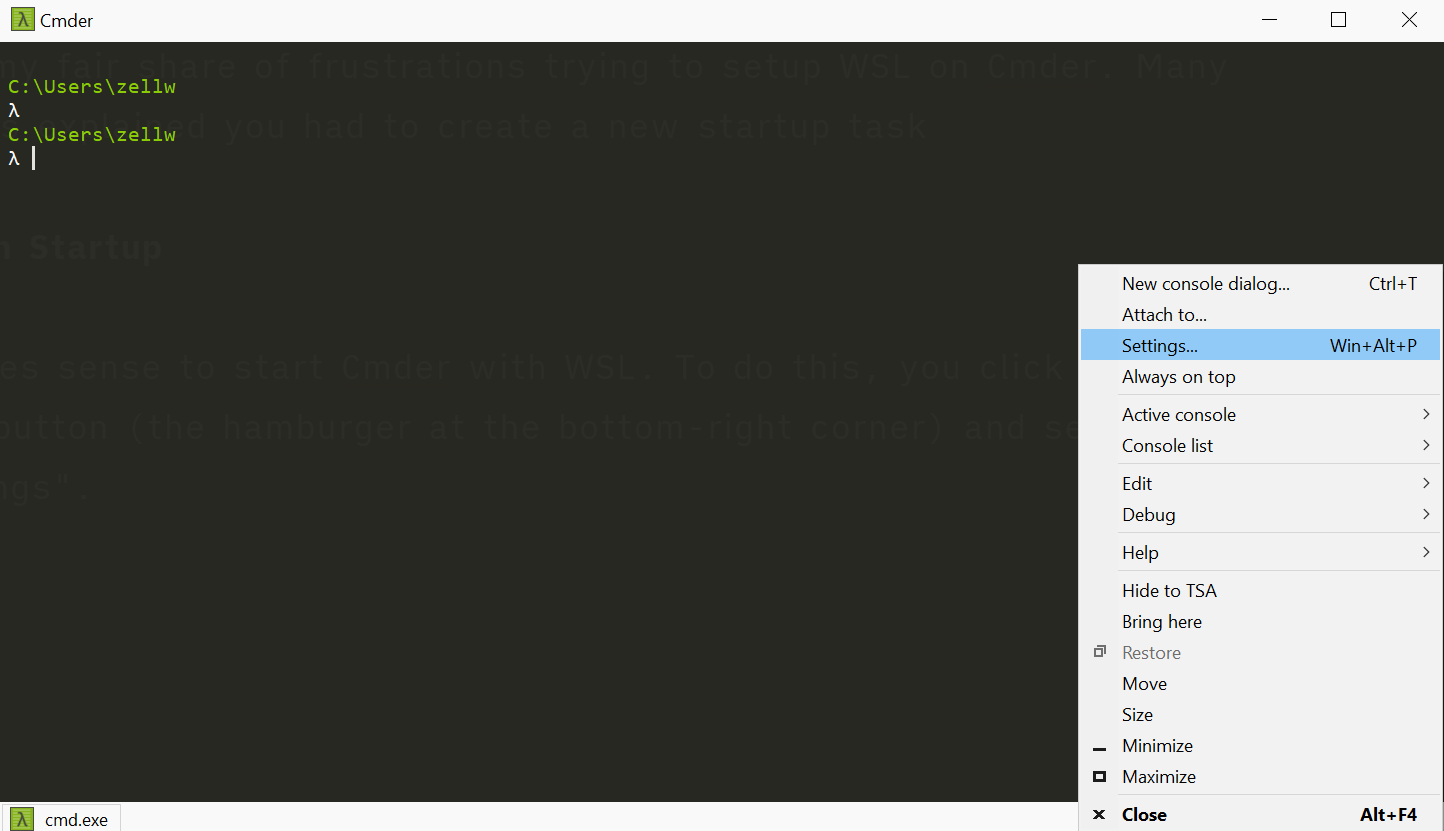
It makes sense to start Cmder with WSL. To do this, you click on the menu button (the hamburger at the bottom-right corner) and select “Settings”.
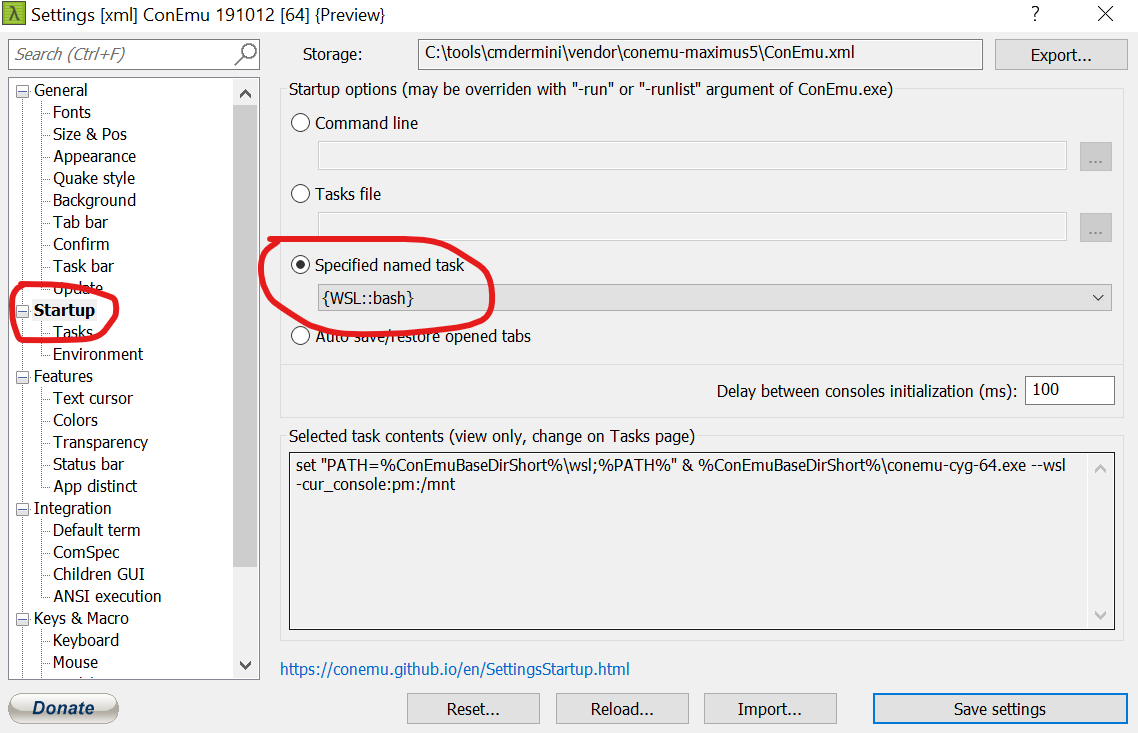
Under Startup, select “Specified name task”. Then, select {WSL::bash}.
Restart Cmder. It should start with WSL now.
That’s it!
This content originally appeared on Zell Liew and was authored by Zell Liew
Zell Liew | Sciencx (2020-04-08T00:00:00+00:00) Setting up Windows for web development. Retrieved from https://www.scien.cx/2020/04/08/setting-up-windows-for-web-development/
Please log in to upload a file.
There are no updates yet.
Click the Upload button above to add an update.