
This content originally appeared on SitePoint and was authored by Wern Ancheta

With the ever-increasing popularity of smartphones, developers are looking into solutions for building mobile applications. For developers with a web background, frameworks such as Cordova and Ionic, React Native, NativeScript, and Flutter allow us to create mobile apps with languages we’re already familiar with: HTML, XML, CSS, and JavaScript.
In this guide, we’ll take a closer look at React Native. You’ll learn the absolute basics of getting started with it. Specifically, we’ll cover the following:
- what React Native is
- what Expo is
- how to set up an React Native development environment using Expo
- how to create an app with React Native
Prerequisites
This tutorial assumes that you’re coming from a web development background. The minimum requirement for you to be able to confidently follow this tutorial is to know HTML, CSS, and JavaScript. You should also know how to install software on your operating system and work with the command line. We’ll also be using some ES6 syntax, so it would help if you know basic ES6 syntax as well. Knowledge of React is helpful but not required.
What is React Native?
React Native is a framework for building apps that work on both Android and iOS. It allows you to create real native apps using JavaScript and React. This differs from frameworks like Cordova, where you use HTML to build the UI, which will then just be displayed within the device’s integrated mobile browser (WebView). React Native has built-in components which are compiled to native UI components, while your JavaScript code is executed through a virtual machine. This makes React Native more performant than Cordova.
Another advantage of React Native is its ability to access native device features. There are many plugins which you can use to access native device features, such as the camera and various device sensors. If you’re in need of a platform-specific feature that hasn’t been implemented yet, you can also build your own native modules — although that will require you to have considerable knowledge of the native platform you want to support (Java or Kotlin for Android, and Objective C or Swift for iOS).
If you’re coming here and you’re new to React, you might be wondering what it is. React is a JavaScript library for the Web for building user interfaces. If you’re familiar with MVC, it’s basically the View in MVC. React’s main purpose is to allow developers to build reusable UI components. Examples of these components include buttons, sliders, and cards. React Native took the idea of building reusable UI components and brought it into mobile app development.
What is Expo?
Before coming here, you might have heard of Expo. It’s even mentioned in the official React Native docs, so you might be wondering what it is.
In simple terms, Expo allows you to build React Native apps without the initial headache that comes with setting up your development environment. It only requires you to have Node installed on your machine, and the Expo client app on your device or emulator.
But that’s just how Expo is initially sold. In reality, it’s much more than that. Expo is actually a platform that gives you access to tools, libraries and services for building Android and iOS apps faster with React Native. Expo comes with an SDK which includes most of the APIs you can ask for in a mobile app development platform:
Those are just few of the APIs you get access to out of the box if you start building React Native apps with Expo. Of course, these APIs are available to you as well via native modules if you develop your app using the standard React Native setup.
Plain React Native or Expo?
The real question is which one to pick — plain React Native or Expo? There’s really no right or wrong answer. It all depends on the context and what your needs are. But I guess it’s safe to assume that you’re reading this tutorial because you want to quickly get started with React Native. So I’ll go ahead and recommend that you start out with Expo. It’s fast, simple, and easy to set up. You can dive right into tinkering with React Native code and get a feel of what it has to offer in just a couple of hours.
But as you begin to grasp the different concepts, and as the need for different native features arises, you might find that Expo is kind of limiting. Yes, it has a lot of native features available, but not all the native modules that are available to standard React Native projects are supported.
Note: projects like unimodules are beginning to close the gap between standard React Native projects and Expo projects, as it allows developers to create native modules that work for both React Native and ExpoKit.
Setting Up the React Native Development Environment
To quickly get started with React Native, the recommended method is to set up Expo.
The only prerequisite of setting up Expo is that you need to have Node.js installed in your machine. To do this, you can either head to the official Node download page and grab the relevant binaries for your system, or you can use a version manager, which allows you to install multiple versions of Node and switch between them at will.
Once you have Node.js installed, install the Expo CLI. This is used for creating, serving, packaging, and publishing projects:
npm install -g expo-cli
Next, install Yarn, the preferred package manager for Expo:
npm install -g yarn
That’s really all there is to it! The next step is to download the Expo client App for Android or iOS. Note that this is the only way you can run Expo apps while you’re still in development. When you’re ready to ship the app, you can follow this guide to create standalone binaries for iOS and Android which can be submitted to the Apple App Store and Google Play Store.
What We’ll Be Building
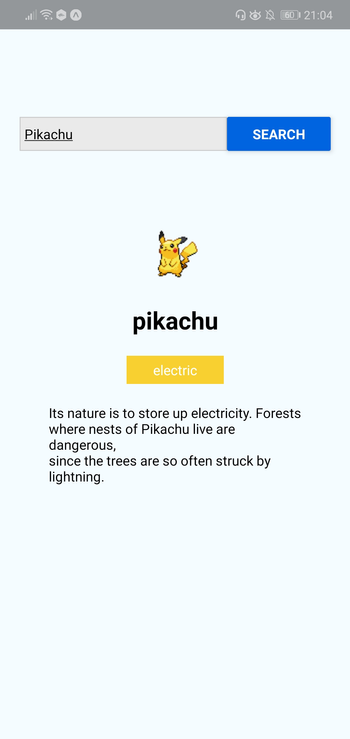
Now that your development environment is set up, we can look at the app we’re going to create — a Pokémon search app. It will allow the user to type the name of a Pokémon into an input box, before fetching the Pokémon’s details from an external API and displaying them to the user.
Here’s what the finished thing will look like:
As ever, you can find the source code for this in our GitHub repo.
Bootstrapping the App
On your terminal, execute the following command to create a new React Native project using Expo:
expo init RNPokeSearch
Under Managed Workflow, select blank. By default, this will install the dependencies using Yarn.
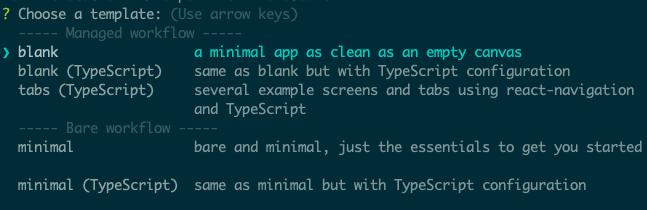
You might be asking what this Managed workflow and Bare workflow is. These are the two types of workflows that Expo supports. With a managed workflow, you only have to deal with JavaScript and Expo manages everything for you. While in Bare workflow, you have full control over the native code. It gives you the same freedom as the React Native CLI, but with the added bonus of Expo’s libraries and services. You can visit this managed vs bare intro page if you want to learn more about workflows in Expo.
Just like in a web environment, you can install libraries to easily implement different kinds of functionality in React Native. Once the project is created, we need to install a couple of dependencies: pokemon and axios. The former is used for verifying if the text entered in the search box is a real Pokémon name, while axios is used to make an HTTP request to the API that we’re using, namely the PokeAPI:
yarn add pokemon axios
React Native Project Directory Structure
Before we proceed to coding, let’s first take a look at the directory structure of a React Native project created with Expo:
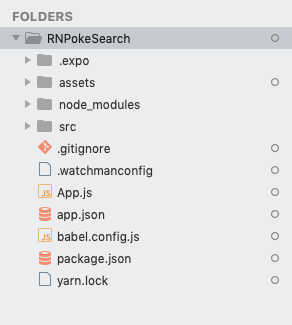
Here’s a breakdown of the most important files and folders that you need to remember:
App.js: the main project file. This is where you’ll start developing your app. Any changes you make to this file will be reflected on the screen.src: acts as the main folder which stores all the source code related to the app itself. Note that this isn’t included in the default project created by Expo CLI. The name of this folder can be anything. Some people useappas well.assets: this is where the app assets such as icons and splash screens are stored.package.json: where the name and versions of the libraries you installed for this project are added.node_modules: where the libraries you installed are stored. Note that this already contains a lot of folders before you installed the two libraries earlier. This is because React Native also has its own dependencies. The same is true for all the other libraries you install.
Don’t mind the rest of the folders and files for now, as we won’t be needing them when just getting started.
Running the App
At this point, you can now run the app by executing the command below. Make sure that you’ve already installed the corresponding Expo client (Android or iOS) for your phone and that it’s connected to the same network as your computer before doing so. If you don’t have an Android or iOS device you can test with, you can use the Android Studio Emulator or the iOS simulator so you can run the app on your machine:
yarn start
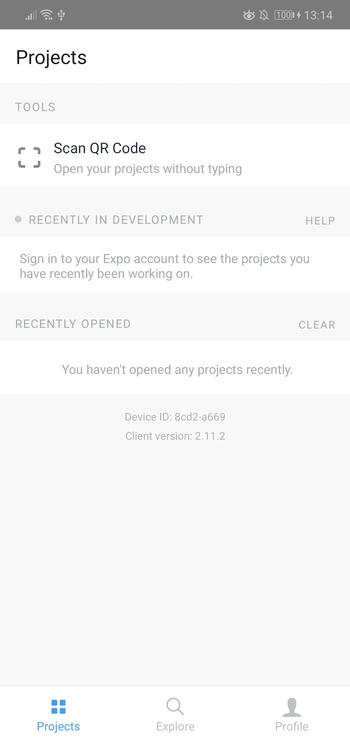
Once it’s running, it will display a QR code:
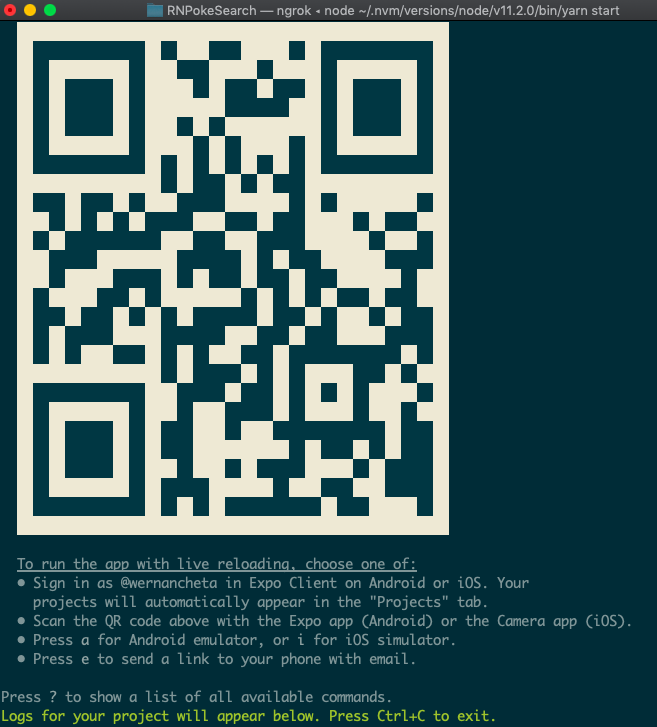
Open your Expo client app, and in the projects tab click on Scan QR Code. This will open the app on your Android or iOS device. If you have an emulator running, you can either press i to run it on the iOS simulator or a to run it on the Android emulator.
If you’re testing on a real device, shake it so the developer menu will show up.
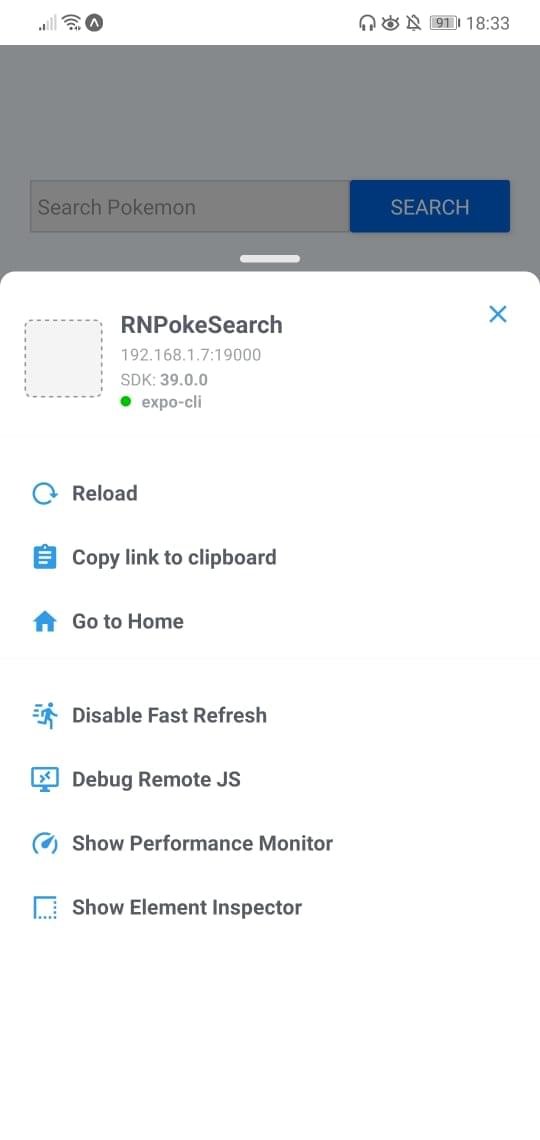
Make sure that Fast Refresh is enabled. This allows you to automatically reload the changes that you make on your components.
Continue reading Getting Started with React Native on SitePoint.
This content originally appeared on SitePoint and was authored by Wern Ancheta
Wern Ancheta | Sciencx (2020-11-09T08:20:17+00:00) Getting Started with React Native. Retrieved from https://www.scien.cx/2020/11/09/getting-started-with-react-native/
Please log in to upload a file.
There are no updates yet.
Click the Upload button above to add an update.