
This content originally appeared on DEV Community and was authored by NaveenKumar Namachivayam ⚡
In this blog article, we are going to use how you can run distributed load testing in JMeter using VirtualBox setup. I have already posted videos about distributed load testing on AWS and Raspberry Pi. You need more than one machine to run the load tests. But in this guide, you will use only your machine and run the JMeter tests by leveraging the VirtualBox software.
Why distributed load testing?
By using one machine, you may not be able to inject more load to your application under test. If you want to stress test your application, you need more threads. Your system resource utilization will reach its limits, if you are trying to inject more threads.
To inject more load, you need to more machines to scale horizontally. JMeter has Master-Worker mode where you can run your tests in server mode.
You will have one master machine with multiple worker machines; master machine will send the instructions to worker machines. After receiving the instructions, worker machines will execute the test plan as per the design.
If you want more load, you need more machines.
Here is the video version of this guide:
Prerequisites
Ideally you need multiple machines to setup this master-worker. But for this demo, we are going to make use of VirtualBox to learn the concept of distributed load testing. This set up is not ideal for production usage as we are not using the multiple machines to inject the load.
Following are the prerequisites required:
- Oracle VM VirtualBox Manager
- CentOS image (or your favorite Linux distro)
CentOS Image Download
To download the CentOS image, visit https://www.osboxes.org/centos/ (direct link), click on the latest version of the image; make sure you are downloading the 64-bit version.
 CentOS Image download
To view the credentials, click on Info tab as shown below.
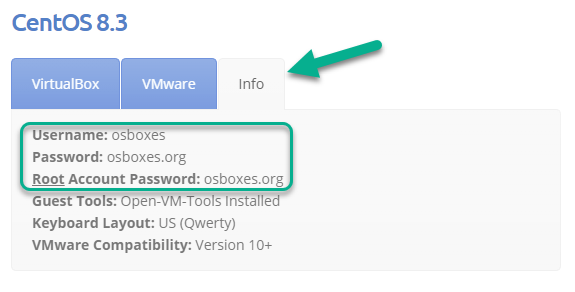 CentOS Image Credentials
After downloading the image, extract it using 7z software. After extraction, you will get *.vdi file.
Oracle VM VirtualBox Manager Download
To download the VirtualBox, visit https://www.virtualbox.org and click on Download button. Using the VirtualBox, you can run multiple guest operating systems locally.
JMeter Master and Worker Machines Setup
Next step is to setup two machines (JMeter Master and JMeter Worker) in VirtualBox using the CentOS image.
First, let us create the CentOS base image, from which we are going to clone it for two machines.
Launch VirtualBox, click on New button to create a new virtual machine as shown below.
 Create new virtual machine
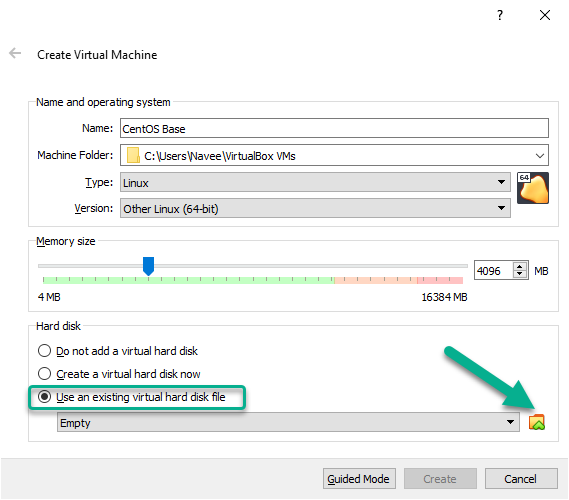
In Create Virtual Machine dialog box, configure the settings as shown below.
 Create new virtual machine config
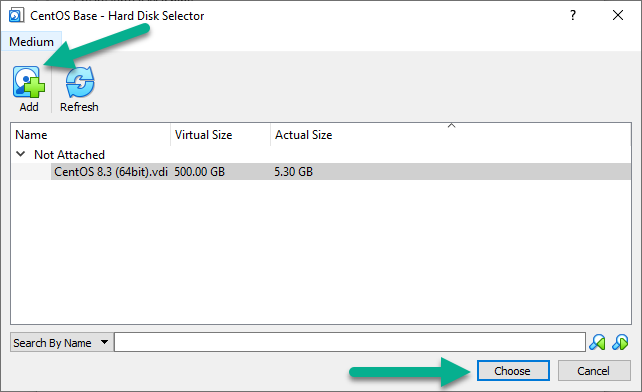
Click on the yellow icon as shown above to map the downloaded vdi file. Then, click on Add button to map the vdi file and then click on Choose as shown below.
 Create new virtual machine config
Now back to Create Virtual Machine dialog, click on Create button. This will create a new virtual machine named CentOS Base.
 Create new virtual machine
CentOS Base Image configuration
Before we start cloning this machine, we need to configure the network settings. Select the CentOS Base image, right click > Settings.
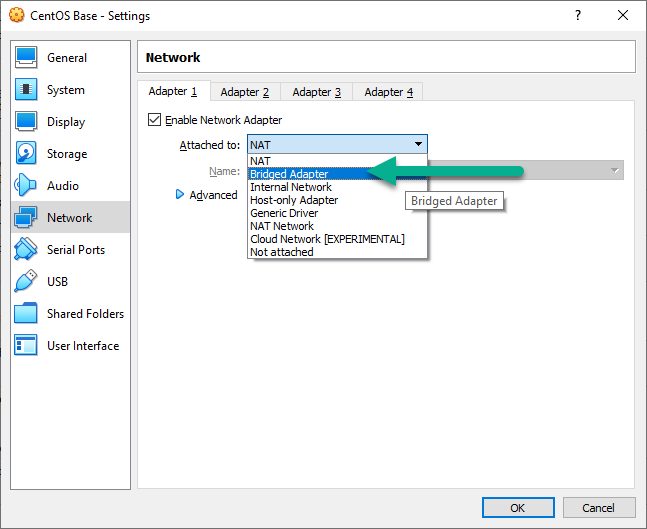
Click on Network in CentOS Base - Settings.
Select Bridged Adapter as shown below, then click on OK.
 Bridged Adapter
This will create the bridged network and also you can access the internet from this virtual machines.
Cloning the Virtual Machines
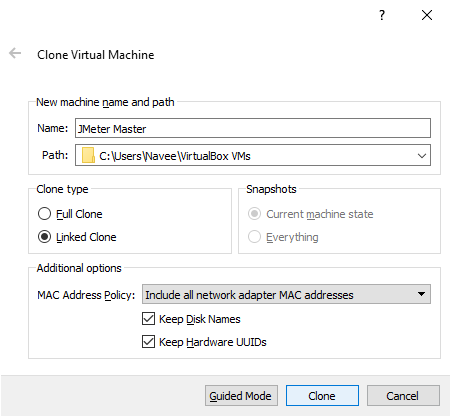
Next step is to clone this machine to create JMeter Master and JMeter Worker machines. Right click on the CentOS Base machine, then click on Clone.
In Clone Virtual Machine dialog box, configure the below settings as-is. Then, click on Clone. This will create a new virtual machine named JMeter Master.
 Cloning
Repeat the same steps again to create JMeter Worker. After creating two machines, in the manager, you will see three machines as shown below.
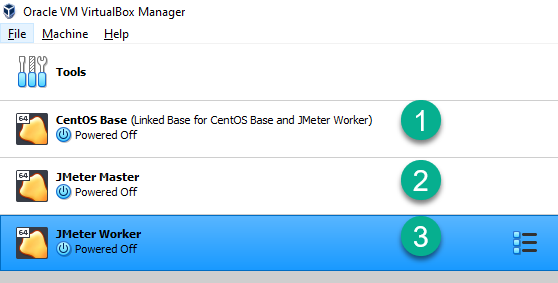 List of machines
Starting the Virtual Machines
Next step is to start the JMeter Master and JMeter Worker machines. Select the machine and then click on Start button as shown below.
 Starting the virtual machine
This will start the two machines which will take couple of minutes for the complete bootup.
After successful boot, you will see the login screen for both the machines as shown below. Enter the password and hit enter to login into the machines.
 CentOS Login Screen
After logging in, launch the Terminal to make changes in the hosts and host name. You have to repeat the steps for both the machines.
To change the host name enter the below command and name your host as jmetermaster.
$ sudo vi /etc/hostnameTo change the hosts file, enter the below command and configure as shown in the below screenshot.
$ sudo vi /etc/hosts Changing the hosts
It is time to restart the machines. Enter the below command to restart.
$ shutdown now -rAfter restart login again and get the IP address using the below command.
$ ifconfigMinimize the virtual machine windows, because it will be hard to navigate. Instead, we can use the SSH to login and perform the commands.
To login into the virtual machines, I am using MobaXterm software. But you can use your favorite.
Installing Java in Master and Worker Machines
After you login into the master/worker machine, the first step is to download and install Java. To install Java, you can use the below command:
$ sudo yum install java -yThis will install Java 8. To verify, you can issue the below command:
$ java -version Java version check
Repeat the same steps for Worker machine as well.
Installing JMeter in Master and Worker Machines
To install JMeter, you can use the below command:
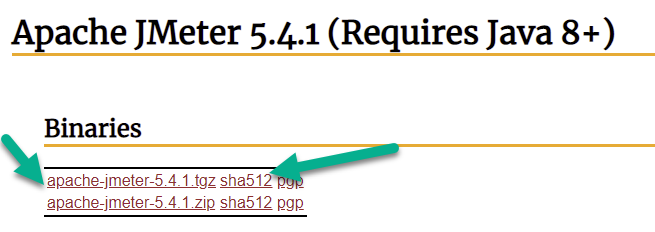
$ curl -O https://downloads.apache.org//jmeter/binaries/apache-jmeter-5.4.1.tgz
This will download the 5.4.1 tar file from JMeter site.
To veriy the integrity, you can issue the below command.
$ sha512sum apache-jmeter-5.4.1.tgz
The output string must match with the SHA512 value which you can get it from the JMeter site.
 JMeter Download
To extract the tar file:
$ tar -xzf apache-jmeter-5.4.1.tgzNow cd into bin folder:
$ cd apache-jmeter-5.4.1/bin/Repeat the above steps in both the machines.
Distributed Load Testing Mode
JMeter Master Setup
In the master machine, open the user.properties using your favorite editor and configure the below properties.
$ vim user.propertiesuser.properties
remote_hosts=<worker_ip>
server.rmi.localport=4000
By default, JMeter uses secured communication between the master and worker machines. To generate the secured tunnel, we need to make use of rmi key store.
To add multiple workers, use comma separated values.
Execute create-rmi-keystore.sh file to generate the keystore file as shown below. Let us go with the default values: rmi as first and last name and the password as changeit
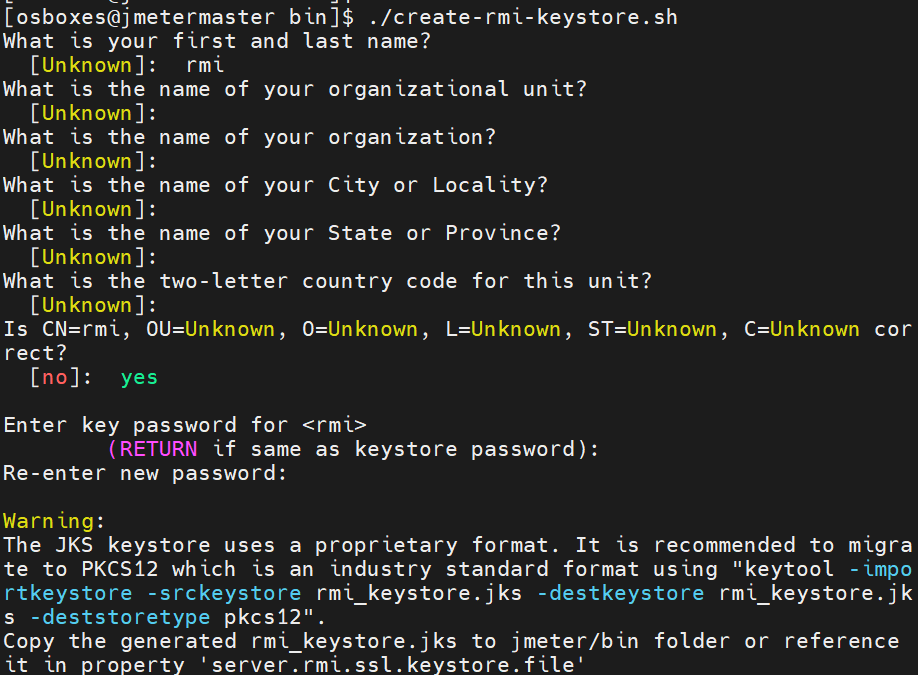 keystore generation
rmi_keystore.jks will be generated in the bin folder. You have to place this file in all the worker machines.
To transfer this file to the worker machine, you can use scp command.
$ scp rmi_keystore.jks osboxes@<worker_ip>:.Above command transfer the keystore to the home directory of the worker machine.
Next step is to disable to firewall service. If the firewall is enabled JMeter tests will not run in distributed mode.
To disable firewall:
$ sudo systemctl stop firewalld.serviceTo check firewall status:
$ sudo systemctl status firewalld.serviceJMeter Worker Setup
Open a new SSH session to login into worker machine. The keystore file now present in the home directory, paste that into bin folder.
Next step is to configure the user.properties. Open it in your favorite editor and configure the below property.
server.rmi.localport=4000Now disable the firewall by following the above mentioned steps.
Starting the Distributed Load Mode in Worker Machine
To begin the distributed load testing, first step is to start the worker machine. Issue the below command to get started.
$ ./jmeter-server -Djava.rmi.server.hostname=<Worker_IP>Output
 Worker Machine Startup
If you get the above output, you are good.
Starting the Distributed Load Testing in Master Machine
To begin the distributed load test, you can issue the below command.
$ ./jmeter.sh -Djava.rmi.server.hostname=<Master_IP> -n -t examples/CSVSample.jmx -l Run1.log -R<Worker_IP>Above command start the sample JMeter test which is located in examples folder, store the output in current directory named Run1.log, the load will be injected using the remote worker machine (-R).
JMeter Master Output
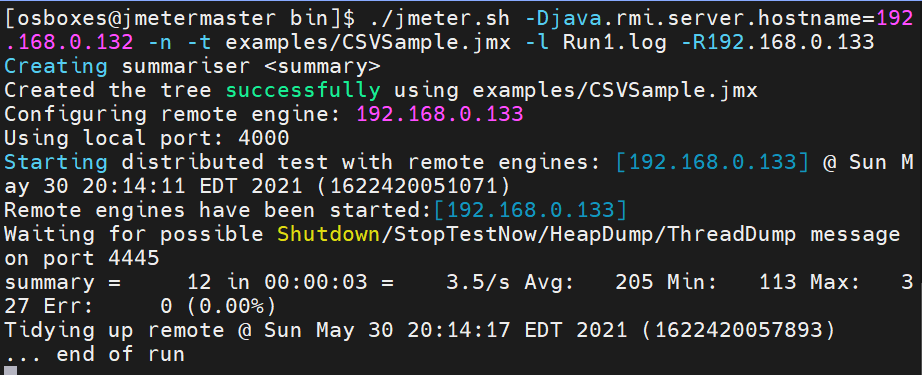 JMeter Master Ouput
JMeter Worker Output
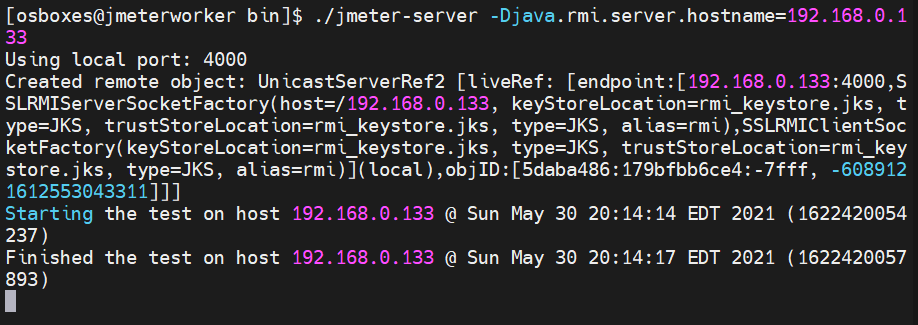 JMeter Worker Output - Distributed Load Testing in JMeter using VirtualBox
Important Points
- Use the identical version of Java and JMeter in all the machines
- Disable firewall
- Master and Worker machines must be in the same subnet
- try pinging the machines from each other to verify the connectivity
- SSL for RMI certificate has the validity of 7 days by default, make sure you generate the certificate once in 7 days. The number of days can be changed in the
create-rmi-keystorefile:keytool -genkey -keyalg RSA -alias rmi -keystore rmi_keystore.jks -storepass changeit -validity 365 -keysize 2048 %* - If the test plan uses, plugins and/or CSV Data set config, make sure it is available in the worker nodes
Here is the GitHub Repo to star.
GitHub Repo: Remote Distribution Load Testing in JMeter
<!-- /wp:button -->
Conclusion
For beginners, this setup might be overwhelming, but this guide will be very helpful to understand the setup without needing of multiple machines. This setup should not be used in production, this is just for learning purpose :).
This content originally appeared on DEV Community and was authored by NaveenKumar Namachivayam ⚡
NaveenKumar Namachivayam ⚡ | Sciencx (2021-06-01T18:47:20+00:00) Distributed Load Testing in JMeter using VirtualBox. Retrieved from https://www.scien.cx/2021/06/01/distributed-load-testing-in-jmeter-using-virtualbox/
Please log in to upload a file.
There are no updates yet.
Click the Upload button above to add an update.