
This content originally appeared on DEV Community and was authored by Kingsley Ubah
Laravel is a PHP-based web framework which follows the Model-View-Controller (MVC) architecture.
A core part of the MVC trilogy is View. All of the UI markup which a user sees and interacts with on the web browser goes into the views folder, which automatically gets created when a Laravel project is initialized.
The view can be built using blade templates. Blade is a templating language which Laravel uses by default to create the HTML layout of the website.
There are certain best practises to adhere to when building the markup for your full-stack website in Laravel. These are especially important to follow if you are building a site which comprises of many pages and UI functionalities.
In this article, we are going to take a look at the several ways which we can structure our templates so that they are more clean, lean and readable.
Organize your views in folders
A recommended approach is organizing views into folders. Using folders leads to a cleaner codebase, especially for big websites. For example, suppose you have a website with 5 main pages like:
/home/faqs/about/blog/contact
Some of these pages might have other subpages.
For example, the Blog page may have other subpages to create, delete and update a blog post.
The create page will consist a form for submitting a blog post. The delete page might contain a single post with a confirmation question of whether you want to delete that post. The update view might return a form with the body of a post already passed in.
This means that the blog page will be composed of the following views:
index.blade.php
To show list of blog posts
create.blade.php
A form to create and post a new blog post
edit.blade.php
A form to edit and update a existing blog post
single.blade.php
A page showing a single blog post
A very clean way to organise this is to create separate folders for each page. Then store the views in their respective folders , like so:
└── views

    └── about // About views

    ├── index.blade.php // homepage for /about

    └── faqs // FAQ views

    ├── index.blade.php // homepage for /faqs

    └── blog // Blog views

        ├── index.blade.php

        ├── create.blade.php

        ├── edit.blade.php

        ├── single.blade.php
Then from the controllers, you can return each of these views in a consistent manner:
app/Http/Controllers/FaqController.php:
class FaqController extends Controller
{

    public function index()
    {
        return view('faq.index');
    }

}
app/Http/Controllers/AboutController.php:
class AboutController extends Controller
{

    public function index()
    {
        return view('about.index');
    }

}
app/Http/Controllers/BlogController.php:
<?php

class BlogController extends Controller
{

    public function index()
    {
        // get blog posts from database
        return view('blog.index', compact('blogs'));
    }


    public function create()
    {
        return view('blog.create');
    }


    public function store(Request $request)
    {

        // validate request

        // add blog post to blog table for user

        return back()->withMessage('Post Created!');
    }


    public function show(Blog $blog)
    {
        return view('blog.single', compact('blog'));
    }


    public function edit(Blog $blog)
    {
        return view('blog.edit', compact('blog'));
    }


    public function update(Request $request, Blog $blog)
    {

        // validate form data

       // update current post

        return redirect()->route('blog.show', $blog->id);
    }


    public function destroy(Blog $blog)
    {

        // authenticate

        $blog->delete();

        return redirect()->route('blog.index');
    }
}
Don't worry too much about the code.
Instead focus on what we are returning inside in view(). You can notice the consistency (they all have their folder names). All view files are categorized based on the name of the page.
That way, all you need to do in the controller is pass in the view’s name preceded by the folder name.
This simplifies the whole process and makes it more intuitive to understand.
Extending layouts
Sometimes, in your Laravel application, you might be required to share certain UI elements and UI styling across many pages. This is easily achieved with a layout file.
Inside this file, you can define the elements which you want to share across multiple pages. A good example of this are the navigation menu and the footer section.
By default, Laravel ships with welcome.blade.php as the default layout file.
It is better to create a standalone folder for all layouts. So we can move welcome.blade.php into the layouts folder.
└── views

    └── layouts

    ├── welcome.blade.php // layout page

    // ... Other layouts go inside the layouts folder
Inside this file, we define the layouts (Navbar, Footer, Sidebar), and then yield a section of the page to other pages using the @yield statement:
views/layouts/welcome.blade.php:
<body>
        <div class="contain">
            <div class="navbar">
                  <h1>Navigation</h1>
            </div>

        <div class="flex">
            <div class="sidebar">
                 <h1>Sidebar</h1>
            </div>

        <div class="content">
           <h2> @yield('heading') </h2>

            @yield('content')
        </div>
        </div>
            <div class="footer">
                <h1>Footer</h1>
            </div>
        </div>
    </body>
Then from inside the other pages, we can extend the layouts and supply the (unique) content section, like in the following pages:
views/about/index.blade.php:
@extends('layouts.welcome')
@section('content')
<p>This is a content for the about page</p>
@endsection
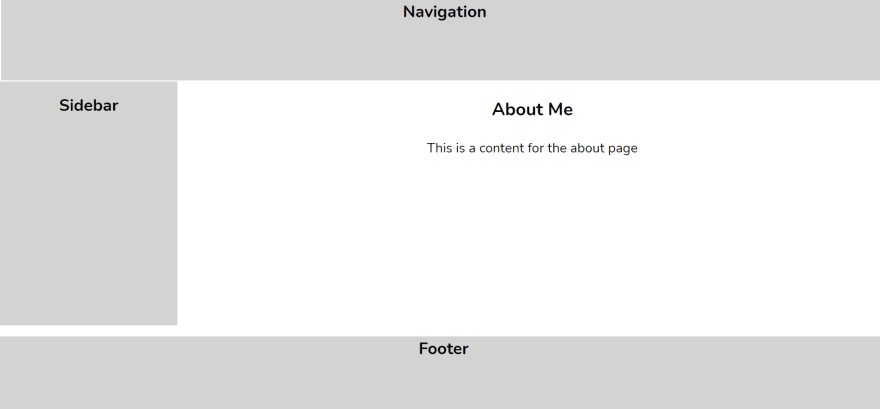
@section('heading', "About Me")
views/about/index.blade.php:
@extends('layouts.welcome')
@section('content')
<p>This is a content for the FAQ page</p>
@endsection
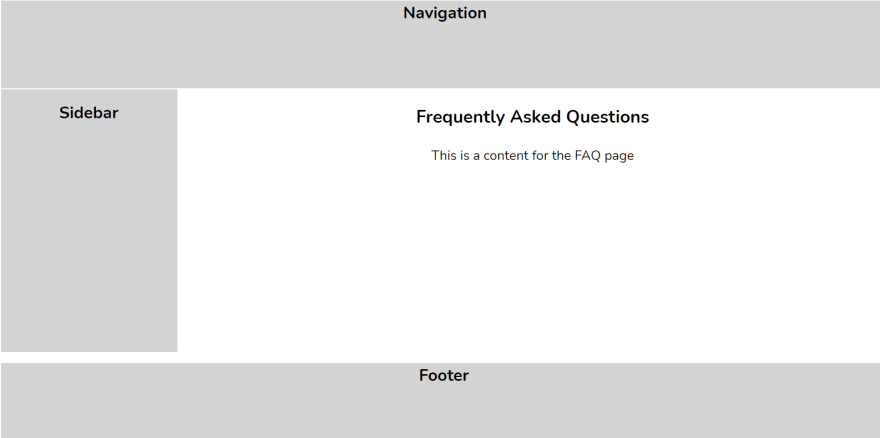
@section('heading', "Frequently Asked Questions")
Now the layouts will persist across all three pages:
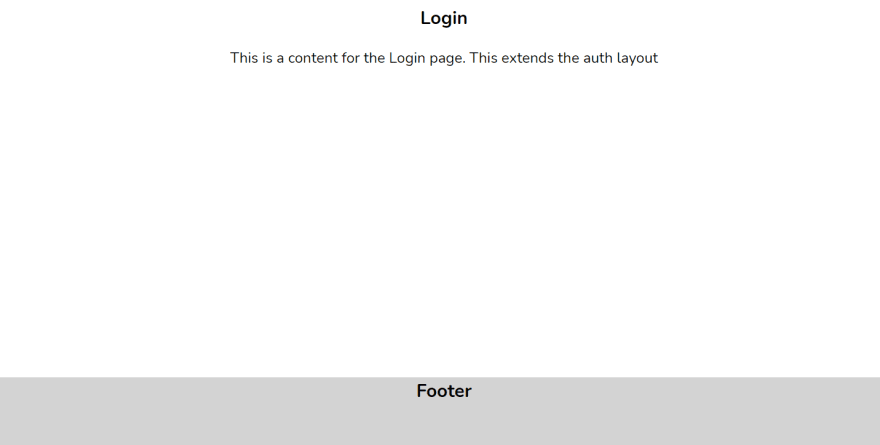
Now, certain pages might not require the layouts. For example, we might not want to extend the Navbar and Sidebar for the login and register pages. Instead, we only want the footer.
For auth-related pages, we can create a separate layout file which contains just the footer.
views/layouts/auth.blade.php:
<body>
        <div class="contain">
            <div class="content">
                <h1> @yield('heading') </h1>

                @yield('content')
            </div>

            <div class="footer">
                <h1>Footer</h1>
            </div>
        </div>
    </body>
Then we can extend that layout from our auth views:
views/auth/login.blade.php:
@extends('layouts.auth')

@section('content')
<p>This is a content for the Login page. This extends the auth layout</p>
@endsection

@section('heading', "Login")
And this is how the login page will look like:
Notice how the auth-related pages were grouped inside the auth folder.
Creating modular and reusable UI components with partials
We can take on a more modular approach when building views. This is highly useful when creating a piece of UI or functionality which you intend to reuse across multiple sections and pages.
Some examples of this are:
- A navigation menu
- A form which you want to reuse for creating a blog post and updating a blog post.
- A modal UI which you want to reuse in different places
Partials are essentially UI modules which can be included in any page. If you are from a React background, you can think of it as UI components.
We will refactor the layout file (welcome.blade.php) by moving the Navigation section, Sidebar and Footer section into separate partials:
views/partials/navbar.blade.php
<div class="navbar">
    <h1>Navigation</h1>
</div>
views/partials/sidebar.blade.php
<div class="sidebar">
    <h1>Sidebar</h1>
</div>
views/partials/footer.blade.php
<div class="footer">
    <h1>Footer</h1>
</div>
Then we will include the partials in the layout:
views/layouts/welcome.blade.php:
<body>
        <div class="contain">
        @include('layouts.partials.navbar')

        <div class="flex">
        @include('layouts.partials.sidebar')

        <div class="content">
           <h2> @yield('heading') </h2>

            @yield('content')
        </div>
        </div>
            @include('layouts.partials.footer')
        </div>
    </body>
This reduces the amount of code we write in the layout file.
Conclusion
The views folder is one of the most important parts of the Laravel framework, and is also an important part of the MVC trilogy.
Properly organizing your view templates doesn’t just make the code more understandable to yourself, but also to your fellow developer colleagues.
In this article we saw different ways to organize views in Laravel. This included folder-based organization, proper use of layouts and breaking down the UI into reusable partials.
Thanks for reading along.
You can also find me on Twitter .
This content originally appeared on DEV Community and was authored by Kingsley Ubah
Kingsley Ubah | Sciencx (2021-11-01T20:24:46+00:00) A Beginner’s Guide to Organizing Blade Templates in Laravel. Retrieved from https://www.scien.cx/2021/11/01/a-beginners-guide-to-organizing-blade-templates-in-laravel/
Please log in to upload a file.
There are no updates yet.
Click the Upload button above to add an update.