
This content originally appeared on DEV Community 👩💻👨💻 and was authored by M. Akbar Nugroho
This article is a basic knowledge of how to create a load balancer using docker and PHP as its services.
In real-world use cases, it is more complex than we think and I prefer you to choose a cloud provider then setup your load balancer over there.
But before you go, reading this article will help you to understand the mental model of load balancing and the purpose of that thing.
Let's start it out 😼
Introduction to Load Balancer
In computing, load balancing is the process of distributing a set of tasks over a set of resources (computing units), with the aim of making their overall processing more efficient. Load balancing can optimize the response time and avoid unevenly overloading some compute nodes while other compute nodes are left idle.
I know that fancy words are confusing, so let's simplify that definition.
A load balancing is a technique in computer field where you have two or more servers to handle the user requests.
To make this thing more concrete, let's imagine you have a delivery service. Your business can receives 100 packages to deliver in a day, but you only have one currier where its max capacity is handling 10 delivery in a day.
You realize that you need 10 days to deliver those packages. If one currier can handles 10 delivery in a day, by add 9 more curriers, your business can handles 100 delivery in a day.
In real-world case, the curriers are act as a server to handle high traffic website like marketplace, movie streaming, etc nearest at a same time.
This technique is aimed to distribute high traffic workload to two or more servers. So, everyone can be handled by the servers.
Big Picture of Our Goals
At the end of this article, we should be able to create and running one nginx service and two php services.
We will create and configure:
- Custom nginx docker image
- Custom php docker image
- Custom docker network
Take a look at the following image for better understanding.

Task 1: Creating custom NGINX image
Let's start creating a custom nginx image using nginx:1.23.1-alpine as the base image.
First, create a directory called docker-basic-lb with a child proxy.
mkdir docker-basic-lb; mkdir docker-basic-lb/proxy;
Create a Dockerfile.
cd docker-basic-lb/proxy; touch Dockerfile;
Open the Dockerfile and put the codes below...
FROM nginx:1.23.1-alpine

RUN rm /etc/nginx/conf.d/default.conf

COPY ./default.conf /etc/nginx/conf.d/default.conf
Create nginx configuration file.
touch default.conf;
# docker-basic-lb/proxy/default.conf

upstream gateway {
  server service-1:8000;
  server service-2:8001;
}

server {
  location / {
    proxy_pass http://gateway;
  }
}
Here we create a custom nginx image and its configuration file. Inside the configuration file, we have two servers: service-1 and service-2 with their own port. Don't worry, we will create those services later...
IMPORTANT
In production, we should bind a directory to our custom nginx image for storing the configuration file.
It's important because when the configuration file changes we don't need to build the image over and over again.
But, to simplify this article let's put it on inside the image.
Task 2: Creating custom PHP docker image
Let's move to docker-basic-lb.
cd ../;
Create a directory inside docker-basic-lb called service.
mkdir service; cd service;
Inside the service directory, create a Dockerfile and put the following codes. We will use php:8.1-cli as the base image.
touch Dockerfile;
FROM php:8.1-cli

COPY . /usr/src/app

WORKDIR /usr/src/app

RUN chmod +x ./start.sh

CMD ["sh", "./start.sh"]
Create the start.sh scripts.
#!/bin/bash

set -e;

php -S 0.0.0.0:$PORT ./server.php;
Finally, create a file called server.php to returns a JSON data when user access our service.
<?php

header('Content-Type: application/json');

$message = sprintf(
    'Hello from service %s',
    getenv('SERVICE_ID')
);

echo json_encode(compact('message'));
IMPORTANT
In production, you should use something like php-fpm. But, to simplify this article we just using php built-in web server.
Task 3: Creating custom docker network
To be able to connect our things together, we need a docker network. Docker comes with some built-in networks, but we're going to create another one to isolate our services.
Create a network called docker-basic-lb-network.
docker network create docker-basic-lb-network;
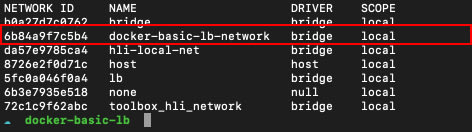
Ensure the network is available.
docker network ls;
Connecting All Things Together
Build All Images
Move to docker-basic-lb/proxy and build the proxy image.
docker build -t proxy:0.1.0 .;
Now move to docker-basic-lb/service and build the service image.
docker build -t service:0.1.0 .;
Ensure the images are available.
docker image ls;
Running The container
We need to run the service container first because our proxy is depends to the services in order to running correctly.
docker run --name service-1 -e SERVICE_ID=1 -e PORT=8000 --network docker-basic-lb-network -d service:0.1.0;
docker run --name service-2 -e SERVICE_ID=2 -e PORT=8001 --network docker-basic-lb-network -d service:0.1.0;
Here we run two php service with the name of each service is service-1 and service-2.
Now let's run the proxy container.
docker run --name proxy-1 -p 80:80 --network docker-basic-lb-network -d proxy:0.1.0;
Testing
Open Postman or install it first when you don't have. Hit http://localhost and you should see something like these...

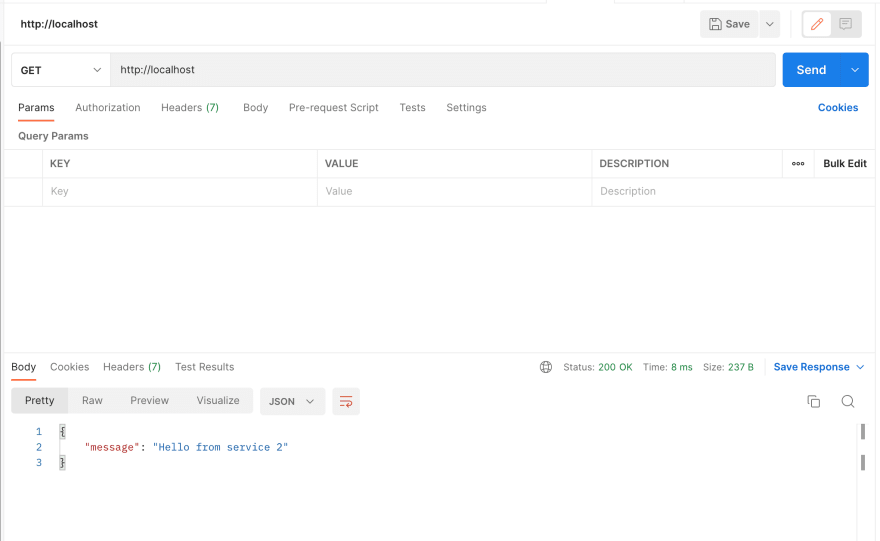
Congrats! Now we have created a load balancer for our services.
I hope it help and you can enjoy this article. See ya!
This content originally appeared on DEV Community 👩💻👨💻 and was authored by M. Akbar Nugroho
M. Akbar Nugroho | Sciencx (2022-10-05T11:21:42+00:00) Basic Load Balancing With Docker, NGINX & PHP. Retrieved from https://www.scien.cx/2022/10/05/basic-load-balancing-with-docker-nginx-php/
Please log in to upload a file.
There are no updates yet.
Click the Upload button above to add an update.