
This content originally appeared on DEV Community 👩💻👨💻 and was authored by Abby Nduta
This tutorial enables the reader to build a simple app using Xata, Cloudinary, and Knockout.js.
Xata is a serverless data platform that provides a database that is very easy to use. Using it is "like using a spreadsheet".
Cloudinary is a cloud storage platform for your app's media.
Knockout.js is a Javascript library that will help you create interactive and dynamic UIs (User Interfaces)
A little more on Knockout.js
Knockout.js, or KO, uses the MVVM — Model, View, View-Model.
- The Model refers to where you store your data. Since we have Xata as our database, we will not have a model, per se.
- The View is a representation of your UI.
- The View-Model is your UI, in this case, our HTML file.
The insurance app can show cashback eligibility if you spend money at a hospital and have coverage older than 90 days.
Our app will store user information in a Xata database and use Cloudinary to store and retrieve the user’s profile picture.
Prerequisites
- It would be best if you had basic HTML and Javascript knowledge.
- It would be best if you had the following installed for your project to run:
- Node.js 16.13 or later.
- If you used nvm to install node, ensure that you instruct nvm to use Node.js 16.13 or later.
- Run the following command to check available Node versions:
nvm ls
- To use a specific version, for example, version 18.12.0, run the following command:
nvm use 18.12.0
- Also, note that we built this project on Linux Ubuntu 22.04. If you are using other operating systems, these instructions might differ.
Project Set Up
- Create a Xata account.
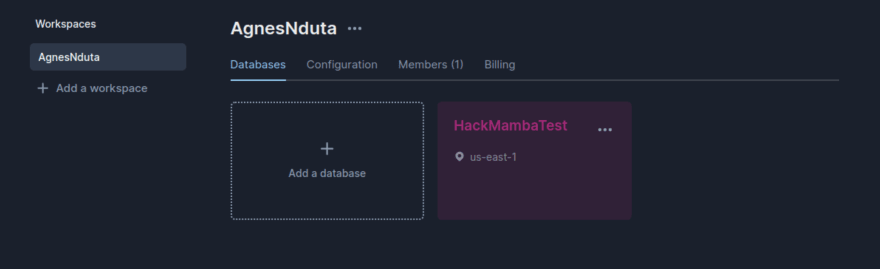
- On the Xata Web Interface, create a workspace.
- Create a database.
- Create a table.
- Add data (optional)
- You can run a Xata command to add dummy data to your database.
xata random-data
- Install the Xata CLI globally (requires Node.js 16.13 or later).
npm i --location=global @xata.io/cli
- Create a Xata client to query your database. To do this, run the following command:
xata auth login
- This presents you with two choices - create a new API key or paste an existing one. This way, Xata will know who you are.

- Go with option one.
- You'll be redirected to the browser to create an API key.

- Enter a name and click the 'Create API key'.
- Next, initiate the project with some files:
xata init --db=[databaseUrl]
- Replace [databaseUrl] with your database’s configuration, which you can access via your workspace’s configuration on the Xata UI.
- Follow the prompts.

- Choose the 'Install the Javascript SDK only, with no code generation’ option.

- Choose a fallback branch, for example, a development branch.

- Select 'create .gitignore and .env files'.
- Create a root directory. After you choose a location, run the mkdir command on Linux.
mkdir HackMamba
- You can name your folder anything you want.
- Change the directory into the folder.
cd HackMamba
- Create an index.js file.
touch index.js
- At this point, you cannot read the API key you generated. Xata does this deliberately for security reasons. You need to set up your Node.js runtime to read your API key. To do this, install dotenv.
npm i dotenv
- Add the following code to your index.js file. It helps you to access your API key from your .env file.
- The XATA_API_KEY will be read from your .env file.
require('dotenv').config()
const apiKey = process.env.XATA_API_KEY;
- Next, query the database - use the Xata web interface to generate queries (use Javascript and Fetch).
Folder Structure
At this point, your folder structure looks like this:
    Hackmamba (root folder)/
    ├── .env
    ├── index.js
    ├── .gitignore
    ├── node_modules/
    ├── .xatarc
    ├── package-lock.json
    ├── README.md
    └── package.json
Querying the Xata Database
- You can now try to access the database.
- On the Xata UI, access your database and click on ‘get code snippet’.
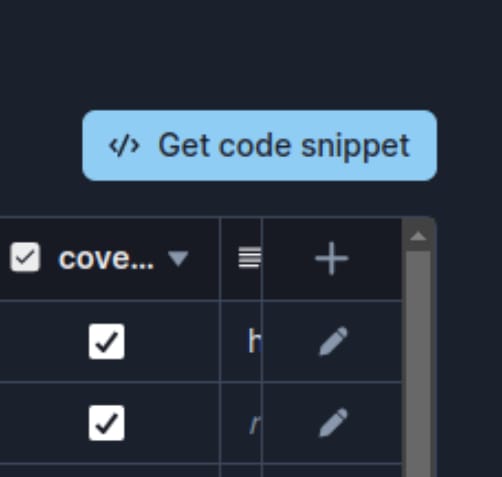
Xata will generate some code
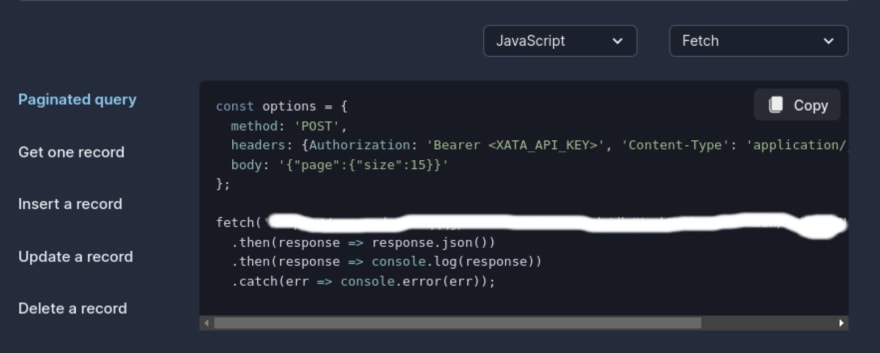
Copy the code and paste it to the index.js file.
The paginated query code generated, for example, is:
const options = {
    method: 'POST',
    headers: {
                Authorization: `Bearer ${apiKey}`,
                'Content-Type': 'application/json'
    },
                body: '{"page":{"size":15}}'
};

fetch('<workspace API base URL>:main/tables/Users/query', options)
  .then(response => response.json())
  .then(response => console.log(response))
  .catch(err => console.error(err));
- Replace the string inside fetch with your workspace API base URL. Go to your workspace’s configuration to get it.
- The rest of the string (after the colon) is made up of:
<branch>/tables/<tableName/query>
- By now, you should be able to get some data from your Xata database.
- Run the following command on your terminal:
node index.js
Retrieving User Data from the Database
- To access user data from the database, use the 'GET' method.
- You also don't need a body in our request.
- Specify a user id in the request URL.
- The request code in the index.js file now looks like this:
const options = {
  method: 'GET',
  headers: {
              Authorization: `Bearer ${apiKey}`,
              'Content-Type': 'application/json'
  }
};

fetch('<workspace API base URL>:main/tables/Users/data/<id>', options)
    .then(response => response.json())
    .then(response => console.log(response))
    .catch(err => console.error(err));
- The response data that you get is in JSON format. You can convert it to a string via the JSON.stringify() method.
- The request code in the index.js file now looks like this:
const options = {
  method: 'GET',
  headers: {
              Authorization: `Bearer ${apiKey}`,
              'Content-Type': 'application/json'
  }
};

fetch('<workspace API base URL>:main/tables/Users/data/<id>', options)
    .then(response => response.json())
    .then(data => console.log(JSON.stringify(data)))
    .catch(err => console.error(err));
Storing your JSON Response in a JSON file
- You need to work with the data you get from our response.
- Running
node index.jswill show the following user data on the console:
  {
    "cover_status":true,
    "first_name":"Ricky",
    "id":"rec_cdf02f39dsj678levd8g",
    "last_name":"Port",
    "period_covered":"120",
    "xata":{"version":4}
  }
- Store the data in a JSON file for easier accessibility.
- To do this, use the built-in fs module (file system) in full.
- Import it into your index.js file using the following command:
const fs = require("fs");
- Update the response code in the index.js file as follows:
fetch('<workspace API base URL>:main/tables/Users/data/<id>', options)
.then((response) => {
  return response.json();
})
.then((json) => {
  fs.writeFile('./users.json', JSON.stringify(json), (err) => {
    if (err) {
      throw new Error('Something went wrong.')
    }
    console.log(json);
  })
});
- The fs module created a JSON file named "users.json" that contains your user data.
-
At this point, your folder structure looks like this:
    Hackmamba (root folder)/
    ├── .env
    ├── index.js
    ├── .gitignore
    ├── node_modules/
    ├── .xatarc
    ├── package-lock.json
    ├── README.md
    ├── users.json
    └── package.json
A Few Things to Note
1. Working With Json Files
Trying to retrieve the data from the JSON file results in CORS (Cross-Origin Resource Sharing) errors. CORS restricts the access of resources if the client and server do not share an origin.
There are several ways I came across to bypass CORS, including a reverse proxy called CORS Anywhere.
Other options included enabling CORS and sending the Access-Control-Allow-Origin header as part of the request.
We skipped multiple JS concepts to save time.
2. Displaying Data
Figuring out how to display the response data proved to be quite the challenge.
This is because browser elements: HTML elements, and others like the ‘document’ object are not accessible in a server environment.
On the other hand, Node.js elements — statements like ‘require’ are not accessible on DOM.
3: Authentication on Xata
As we mentioned, we needed to use dotenv for our API Key to be read by Xata. dotenv, being a node module, again will not work with DOM elements.
The Way Forward
There are better ways to display data.
For now, we are going to bind JSON data to HTML. We’ll take our response data and hard-code it into a JSON object.
We can store it in a variable and use knockout.js to display the data.
Displaying user data
You need to bind JSON to HTML so the user can see the data.
To do this, use a Javascript library called knockout.js
- Create an index.html file.
- Import the knockout script in your index.html's header section.
<script src = "https://ajax.aspnetcdn.com/ajax/knockout/knockout-3.1.0.js" type = "text/javascript"></script>
- Add some HTML elements like paragraphs, inputs, and buttons.
- As you can see, you have a new attribute, ‘data-bind’ native to knockout.js.
<body>
    <p>First name: <input data-bind="value: firstName"></p>
    <p>Last name: <input data-bind="value: lastName"></p>
    <button data-bind="click: seeUser">Check status</button>
</body>
- The JSON object (which you got from your database response) will be your view model (what you want to appear on the browser).
- Next, you'll create a view based on the view model.
- To create a view, use a KO concept called ‘declarative binding’.
- Use the ‘data-bind’ attribute.
This is really what will help you bind JSON to HTML.
Add a script to the index.html file. You’ll use the script to run knockout.js logic that will work with your input and button data.
<script>
       function OurViewModel() {
          this.firstName = ko.observable("first_name");
          this.lastName = ko.observable("last_name");
          this.seeUser = function userData(){
               var json =
                   {
                       "cover_status":true,
                       "first_name":"Ricky",
                       "id":"rec_cdf02f39dsj678levd8g",
                       "last_name":"Port",
                       "period_covered":"120",
                       "xata":{"version":4}
               }
               if (`${json.period_covered}` >= parseInt(90))  {
                   alert(`${json.first_name}, you are covered! and are eligible for cashback!`);
               }
               else{
                   alert(`Sorry, ${json.first_name}, you are not covered`)
               }

           }
       }
       // Activates knockout.js
       ko.applyBindings(new OurViewModel());
    </script>
Your script comprises a Javascript Constructor function called 'OurViewModel'.
It uses the ‘this’ keyword to access the object attributes from the input HTML tag (remember, we used data-bind to ‘bind’ JSON to HTML).
‘observable’ is also a KO concept. It helps with updating the UI automatically without having to refresh it.
The last part of "OurViewModel" function, ‘this.seeUser’ is another function.
This second function, ‘userData’ contains the JSON object and the code you want to display on the UI.
It is bound to ‘this’ as it becomes an attribute too. This is because we bound JSON to the button HTML tag.
When a user clicks the button, the function ‘userData()’ is called.
Finally, activate knockout.js so that all the attributes that are native to it, like ‘data-bind’, can run.
Uploading the User’s Profile Picture to Cloudinary
- The first thing that you need to do is save an image to your root folder (on your local machine).
- Our image is named ‘water.jpg’
- Next, you must store the image in Cloudinary to be accessible “outside” your computer.
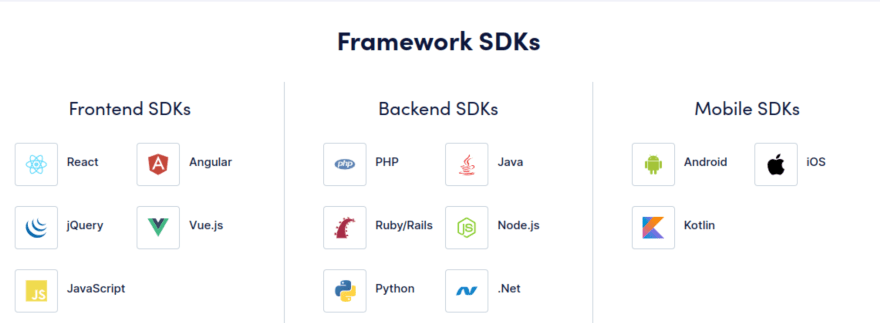
- Access Cloudinary's documentation.
Under Framework SDKs, choose 'Backend SDKs' and 'Node.js.'
Create a Cloudinary account.

Install Cloudinary on your machine.
npm install cloudinary
- Import it into your code in the index.js file.
let cloudinary = require('cloudinary').v2;
- Next, configure Cloudinary. To do this, log in to your Cloudinary account and navigate to your Cloudinary dashboard.
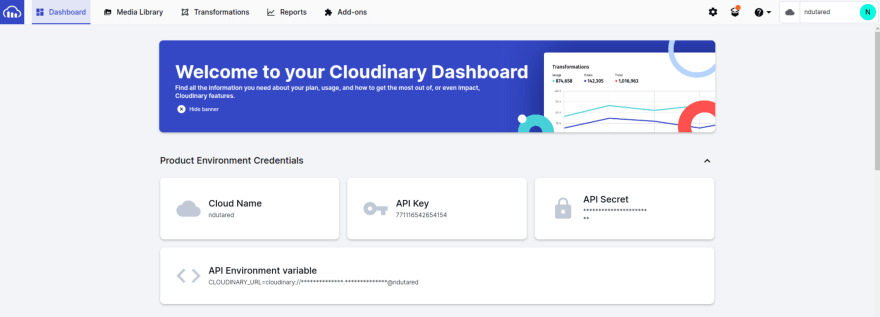
- Copy your cloud_name, api_key, and api_secret, and store them in your .env file.
- Add Cloudinary configuration code to index.js.
    cloudinary.config({
      cloud_name: process.env.cloud_name,
      api_key: process.env.api_key,
      api_secret: process.env.api_secret
    });
- Upload your image from your root folder to Cloudinary. Use the required parameter,
resource_type.
  cloudinary.uploader.upload("water.jpg",
    {resource_type: "image" })
  .then(result=>console.log(result.url));
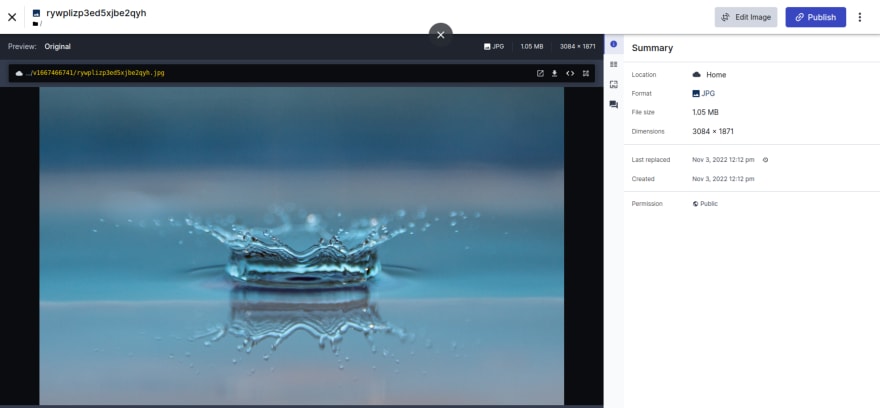
- Confirm that the image has been uploaded successfully from your Cloudinary Media Library.
- Next, add the following code to the index.js file to extract your JSON data and store it in a JSON file called images.json.
  cloudinary.uploader.upload("water.jpg",
  {resource_type: "image" })
.then((result) => {
  fs.writeFile('./images.json', JSON.stringify(result), (err) => {
    if (err) {
      throw new Error('Something went wrong.')
    }
    console.log(result.url);

  })
});
In the next section, we will retrieve the image URL we generated from Cloudinary (result.url) URL and send it in our request.
Send the Image URL to Xata
- Now that we have the image on Cloudinary, we can store its URL in our Xata database.
- To do this, we will use the update method called ‘PATCH’ and include our profile_pic URL.
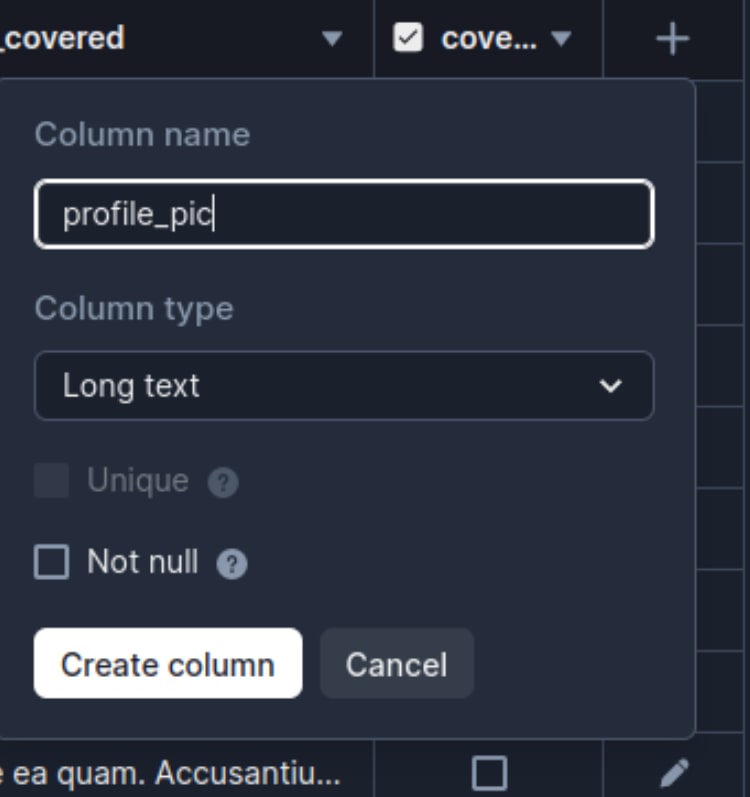
- Next, access your Xata database from the Web Interface.
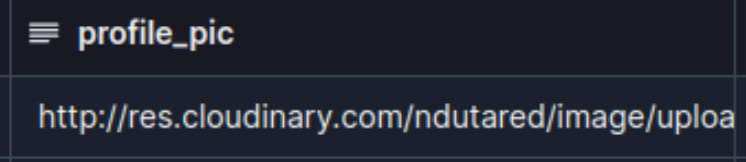
- Create a new column, and name it 'profile_pic.'
- Click generate ‘code snippet’ to get the ‘update a record’ route.
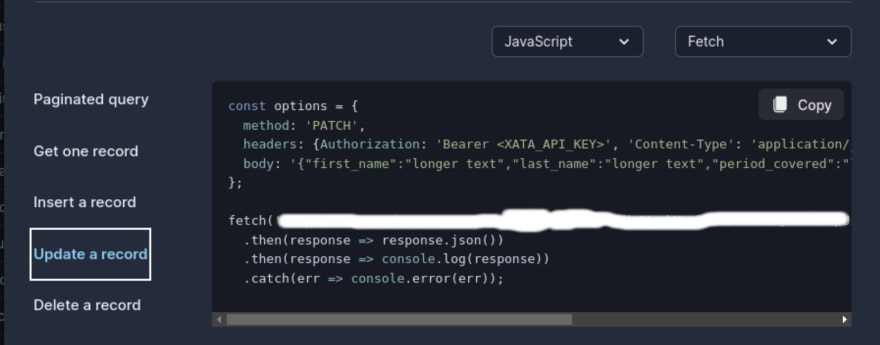
- Your code on the index.js file now looks like this:
const options = {
  method: 'PATCH',
  headers: {
              Authorization: `Bearer ${apiKey}`,
              'Content-Type': 'application/json'
  },
  body: '{
            "first_name":"Ricky",
            "last_name":"Port",
            "period_covered":"120",
            "cover_status":true,
            "profile_pic":"http://res.cloudinary.com/ndutared/image/upload/v1667460232/nr3uwls3q6ew8co39thn.jpg"}'
};

fetch('<workspace API base URL>:main/tables/Users/data/<id>', options)
  .then(response => response.json())
  .then(response => console.log(response))
  .catch(err => console.error(err));
- As you can see, you need to send the user’s details in the body of your request.
- Go to your Xata database to confirm that the user’s profile pic URL has been added.
Voila! We have some base code that we can build on as we learn to work with Xata and Cloudinary.
Here is the app on Netlify
You can find all the code on my Github.
Edge Cases
By all means, this is a fundamental code that could grow in so many ways. Some edge cases:
- User authentication and authorization.
- A great UI.
- A user dashboard where they can log in and see their profile picture, expenditure, cover information, and cashback.
- Predictive algorithms can calculate the actual cashback based on factors like the number of hospital visits and overall lifestyle.
- We are transforming the image before uploading it to Cloudinary.
- We are checking whether the image exists on Cloudinary before uploading it again. We can then choose to overwrite it or not.
- We are checking whether the image exists on Xata before uploading it again. We can then choose to overwrite it or not.
Summary
You now know how to send and retrieve data with the Xata database. You can also store images on Cloudinary, which you can later use to show your user's profile picture.
Lastly, you can create a UI for your app where the user can interact with your app using Knockout.js.
Sources
These sources were very helpful in helping me put this piece and code together:
- How to solve the document is not defined error
- How to bind JSON data to HTML
- Knockout.js tutorial
- Knockout.js documentation
This content originally appeared on DEV Community 👩💻👨💻 and was authored by Abby Nduta
Abby Nduta | Sciencx (2022-11-23T14:58:07+00:00) Build a Simple App with Xata, Cloudinary, and Knockoutjs. Retrieved from https://www.scien.cx/2022/11/23/build-a-simple-app-with-xata-cloudinary-and-knockoutjs/
Please log in to upload a file.
There are no updates yet.
Click the Upload button above to add an update.